Showing posts with label cupcakes. Show all posts

Tuesday, 23 October 2012

DAY TWENTY THREE: Halloween graveyard

I got creative in the kitchen this weekend with a few Halloween treats before I run out if time before the day itself!  I had a lot of fun 'Pinteresting' for ideas...I came across lots of ghosts made from bananas, pumpkins, amazingly decorated cakes, teeth made from apples...but as far as I could tell not many gravestones!!

So this is my spin on things... a cupcake-cookie complete with gruesome 'blood' for special effect!!  Since my Vegan Mofo theme is oats, both my cupcake and cookie cross are oat based recipes, but the same principle could be followed with your own favourite cookie and cupcake recipes.  I will be making these again for halloween itself and i'm tempted to opt for a gingerbread cross and a vanilla cranberry sponge cupcake....Mmmmm.


I have recently bought a new flashlight for my night photography set up, and thought i'd have a play with it. I have a long way to go before I get good night shots that actually look natural but luckily in this instance a contrasty look made for a much better effect!

I have provided the ‘mini muffin’ base below (it’s a variation of this recipe). The cookies will be with you tomorrow in a separate post since the original plan for these wasn't as a gravestone cross!

To assemble the gravestones, turn the mini muffins upside down and poke a slot in the ‘top’ they should be soft and cut easily. Melt a little jam so its nice and runny and drizzle on the top before gently inserting the bottom of the cross into the muffin…tilt at an angle for extra scary effect!! Mwaa haa haaaa....


Recipe: Halloween graveyard

Makes 6

Ingredients- mini muffin cups

1 cup regular oats
¼ cup buckwheat (or other GF flour of choice)
1 tsp baking powder
2 tbs ground chia or flax
1 tsp cinnamon
2 tsp vanilla extract
1 apple grated
2 tbs ground chia or flax
1 tsp cinnamon
2-3 tbs agave or maple syrup
Approx. 1/3  cup preferred milk alternative
½ cup dried cranberries or cherries

Sugar free raspberry jam to decorate

Method

Mix the dry ingredients and then add the wet, mixing everything together well. Add the dried fruit in the final strokes.

Pack the mixture firmly into silicone mini muffins trays (silicone for easy removal and microwave compatibility). Microwave on full power for approx. 90 seconds until the top feels firm or bake for approx. 10 mins at 180C.

Come back tomorrow for the crosses recipe- or use your own  favourite ‘cookie cutter’ recipe!


What Vegan MOFO means to me.


For further guidance on making gluten free choices please see this post.

For tips and info on recipe measurement conversions, ingredients, substitutions and the methods behind how I do things.... check out my 'baking tips' tab at the top of the page.

Wednesday, 25 July 2012

Ginger and mango muffins


I’ve been on a bit of a savoury kick recently. I’m not sure why that it…but upon looking through my photo file of various recipes yet to be posted, I noticed a lot of savoury descriptions lurking. Hmmmm, I might have to do something about that to re-address the balance!

I think it’s got a lot to do with the fact that I’ve been so busy at weekends recently and have struggled to find time to dedicate to a major afternoon baking session and therefore my lunches and dinners have been the focus of my posts. Also the sunshine finally appears to have come out here in England and so baking endeavours are simply not quite so as appealing…more ice cream and no-bakes on the menu?                                                                                        


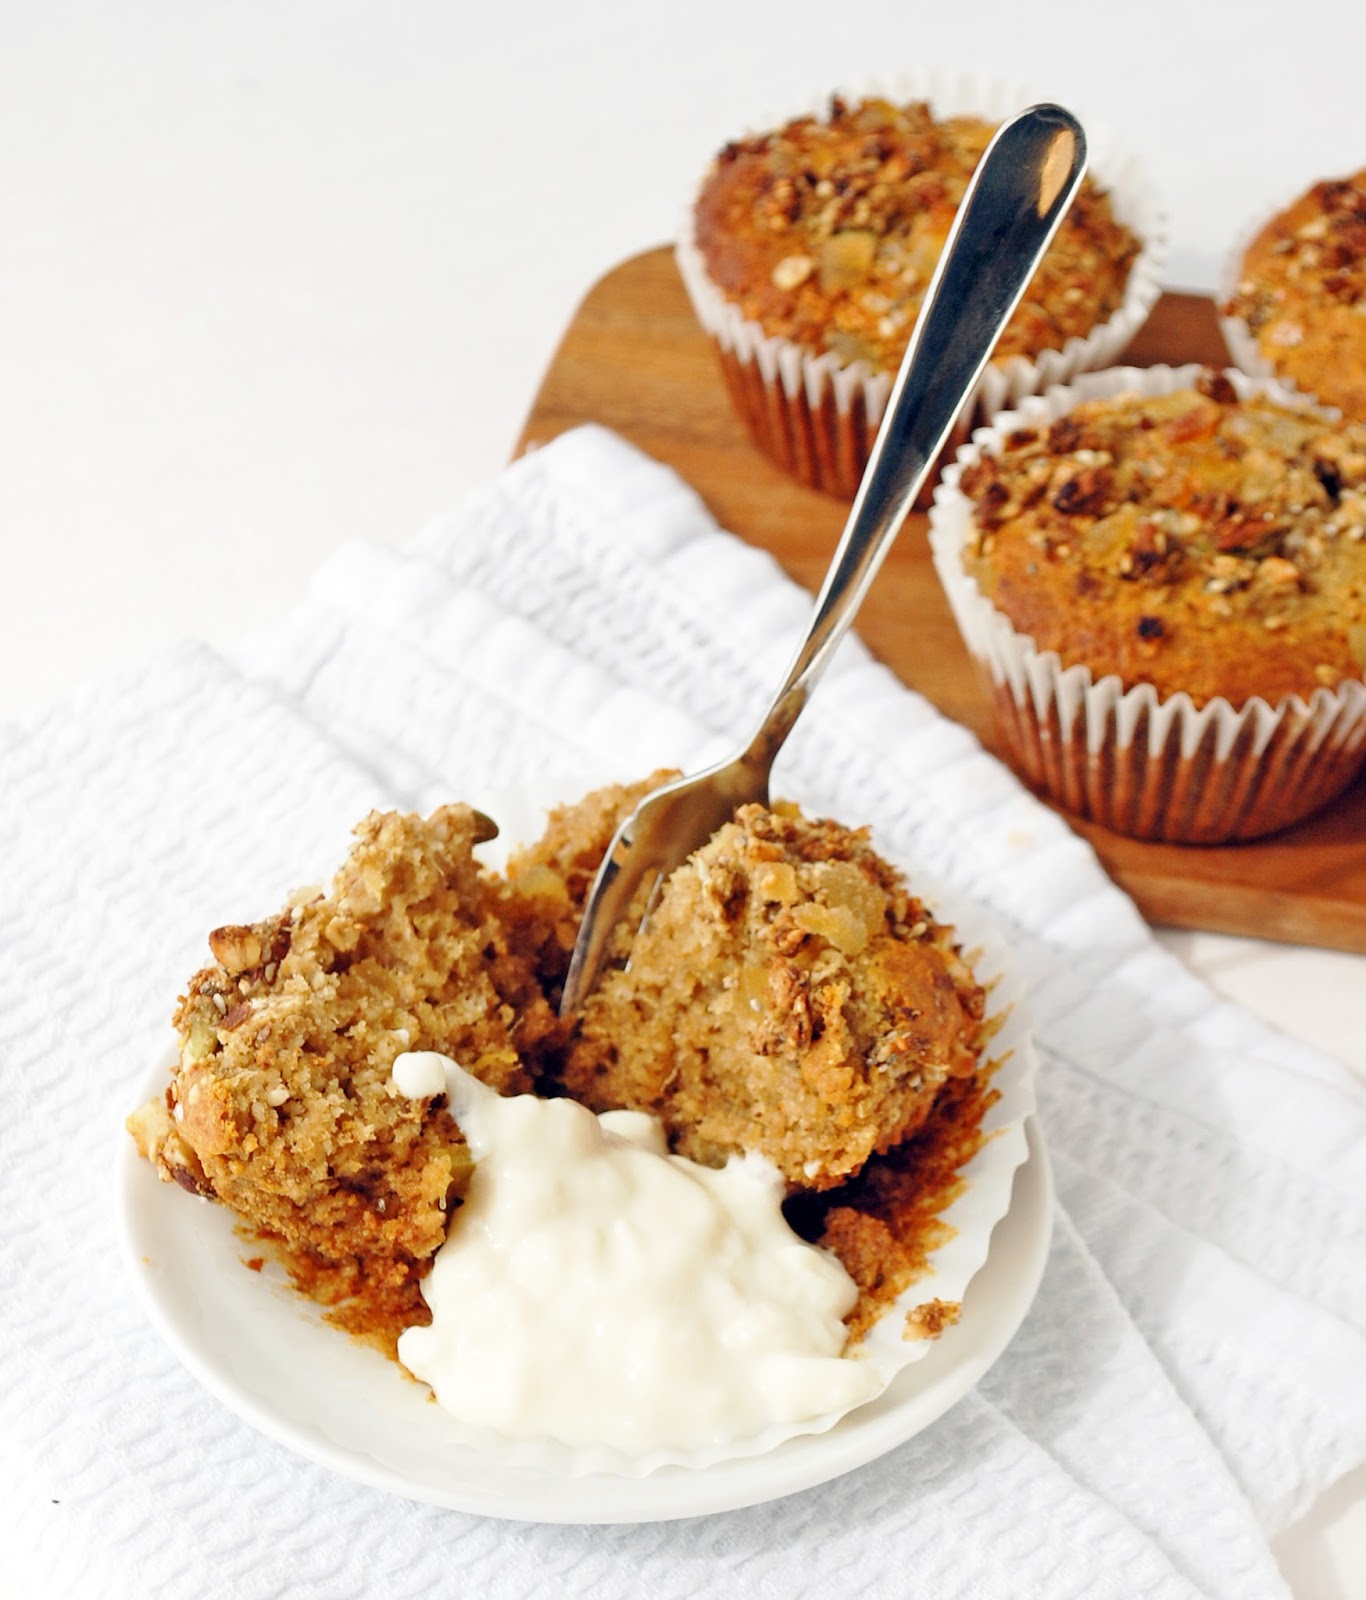
One recipe I did manage to find time for last weekend was these ginger and mango muffins. They were actually inspired  off the back of a batch of gingerbread granola I’d made the morning before and saved a few of the uncooked  crumbles for the top. I made the mistake of eating the granola before I’d had a chance to photograph it…ooops! I will post that recipe another time soon, but you could use any homemade granola (uncooked so it doesn’t burn on the top) or simply some nuts or seeds and extra crystallised ginger for a warming kick!

I have included crystallised ginger in this recipe. Crystallised ginger is not healthy since it is coated in refined sugar, but for the small amount this recipe required and for the extra special chewiness and intense gingery taste it offers I was happy to use it. However if you would prefer to omit this, feel free to add extra ground or fresh ginger in its place.

I made these in muffin pans and the recipe made 5, but if you used slightly smaller cupcake pans you’d easily get 6. Perfect for my mid morning snacks this week!


Recipe: Ginger and mango muffins

5-6 muffins

Ingredients

1 cup GF flour mix* (I used ½ buckwheat, ¼ tapioca, ¼ ground almonds)
¼ cup agave syrup and a pinch of stevia
pinch salt
1 ½ tsp baking powder
½ tsp baking soda
1 tsp ground chia
1/3 cup soy milk (or orange juice or other ‘milk’)
2 tbs coconut oil- melted
¼ cup mango puree
¼ cup chopped mango chunks
2 tbs crystallised ginger- finely chopped (optional or use grated  fresh) (reserve some for topping)
2 tsp ground ginger
Handful of uncooked gingerbread granola for topping (or oats and seeds)

Method

Mix all dry ingredients together in a medium bowl and then add wet ingredients. Mix together well.

Spoon the batter into 6 muffins pans (you may only get 4-5 muffins worth if the pans are large).

Add the reserved ginger and granola sprinkles to the top of each muffin.

Bake at 180C for approx. 20 mins until cooked through when tested with a toothpick. You may need to lightly cover the muffins with foil after 10 minutes if they are looking almost done, to prevent the tops burning.


* for further guidance on making gluten free choices please see this post.

For tips and info on recipe measurement conversions, ingredients, substitutions and the methods behind how I do things.... check out my 'baking tips' tab at the top of the page.

Saturday, 24 March 2012

Easter Bunny’s

My Easter Bunny’s were supposed to look cute….but instead they look more like scary robo-bunny’s with crazy gnashy teeth…Oops!  Oh well, I think they still look kinda goofy cute in their own little way.

I’m getting in my Easter themed recipes in good time, organisation-love it! I have a couple more up my sleeve in coming days so keep your eyes peeled. Easter is typically a time for chocolate I know….don’t worry I have that sussed too!

It’s the principle that is the main thing here, little Easter themed cupcakes that are simple to dress up however you like with your favourite cupcake and frosting combo, or feel free to use  recipes below. I bet yours will look better than mine!  These cupcakes are made using spelt flour, but you could use a GF cupcake recipe instead. In this recipe I trialed both spelt and GF to good effect, but I cant testify this for a larger batch of cupcakes.

So back to the robo-bunny’s.

It’s all pretty simply really. Bake your cupcake in the usual way and then using a very sharp knife (to get as clean edges as possible) cut an oval out of the top of the cupcake- I say oval instead of circle so that the ears are a little longer than they are wide. Fill the ‘hole’ with frosting of your choice (mine was lemony although now I wish I’d added a drop of food colouring too), you could go crazy and go for the chocolate frosting. Once filled, press the ears in and add a couple of dried blueberries or currants for the eyes…and, er maybe avoid coconut flakes for the teeth unless you can do a better job than me!

Simple…and cute (ish)

My cupcakes were basic vanilla cupcakes with a lemony frosting. The frosting will be firmer if it is fresh from the fridge, mine was a slightly runnier than I would have liked but I think that was due to the cupcakes still being ever so slightly warm- note to self: allow cupcakes to cool fully.

I’d love to see your Easter themed successes (or disasters!) whether they be bunny’s or not, feel free to link in the comments below.


Recipe: Lemon frosting

Makes approx. ¾ cup

Ingredients:

½ cup silken tofu
1/3 cup cashew butter
5 tbs agave syrup (or part stevia)
Zest of one lemon plus ½ tsp lemon extract
(note: if you use stevia to sweeten you could use a little real lemon juice to help flavour as this will replace the liquid that the agave would have provided and still not make it too runny)

Method:

Blend everything together well and chill before use.


Recipe: vanilla cupcake

Makes approx. 12 cupcakes.

Based on this recipe

Ingredients 

200g white spelt flour
75g potato starch
1tsp flax seed mixed with 1tbs hot water
3tsp baking powder 
1tbs bicarbonate of soda
50g agave
70g granulated sugar
¼ tsp stevia
100ml melted coconut butter
50ml apple puree
50ml soy yoghurt
150ml orange juice
150ml soy milk
2tsp vanilla extract

Method

Blend all liquids in food processor and melt coconut oil separately then mix in. Mix all dry ingredients together in a bowl then pour into the wet ingredients and beat well to get a smooth mixture. Pour into cupcake cased and bake at 180C  for 10-15 mins. I found these needed turning round every 5 minutes to ensure an even rise.


For tips and info on recipe measurement conversions, ingredients, substitutions and the methods behind how I do things.... check out my 'baking tips' tab at the top of the page.

Friday, 3 February 2012

Valentines choc-orange cupcakes

I love all the blood orange ideas that are making their way into a few recipes at the moment, the perfectly healthy and natural way of bringing a little bit of pink into your life… what a coincidence that Valentines Day is just around the corner!

So, I wanted to create a little bit of pink and chocolatey indulgence of my own. I couldn’t track down any fresh blood oranges in my part of the world so I had to make do with some fresh blood orange juice instead. All the liquid in this recipe comes from the juice, and being such a vibrant pink colour I had hoped the batter would also be a gorgeous pink shade….hmmm not so much! So at this point I have to admit that I had to supplement this with about 5 drops of red food dye.  The batter was a real rich fuchsia colour at this point, although once cooked the colour was much more subtle.

The cupcake sponge is lovely and light, based on this original recipe but substituting the liquids. I love the combination of chocolate and orange in any form. To emphasise the pink theme without having to resort to playful sugary toppings etc, I sprinkled the tops of the cupcakes and the serving plate with pomegranate seeds. Beautiful…and so much better for you than sugar!

This recipe also showcases my newest healthy chocolate frosting!

Can you guess what it contains…

…yep, more beans!

I love this recipe as it simply another step on from my black bean fudge. You can make both the fudge and the frosting in a matter of minutes without having to wash anything up in between. My perfect kind of recipe! The key is to really blend it well.

If you’re a little bit beaned out, you could use this frosting as an alternative, its also quick and simple to make!


Recipe: Valentines choc-orange cupcakes

Frosting ingredients:

200g prepared fudge mixture
80g soy milk (or any non-dairy milk)
2 tsp agave (or more to taste)

This makes enough to frost approx. 12 cupcakes.

Method:
Simple add all the ingredients to a food processor and blend until really smooth. Adjust the ‘milk’ to achieve the desired consistency.


Cupcakes ingredients:

200g white spelt flour (or GF flour mix)
75g potato starch
1tsp flax seed mixed with 1tbs hot water
3tsp baking powder 
1tbs bicarbonate of soda
50g agave syrup
70g rapadura
¼ tsp stevia
100ml melted coconut oil
50ml soy yoghurt
300ml blood orange juice (the pinker the better)
2tsp vanilla extract
5 drops natural red food colour

Method

Blend all liquids in food processor and melt coconut oil separately then mix in. Mix all dry ingredients together in a bowl then pour into the wet ingredients and beat well to get a smooth mixture. Pour into lined cupcake pans. Bake for 15-20 minutes at 180C. Turn half way through to ensure an even rise. A toothpick will come away clean when cooked.


For tips and info on recipe measurement conversions, ingredients, substitutions and the methods behind how I do things.... check out my 'baking tips' tab at the top of the page.

Saturday, 7 January 2012

Carrot cake

Well I know I said my my sticky toffee pudding was a final indulgence after the overload of Christmas naughtiness…well, maybe that was a tiny fib, but I do have an excuse for this cake… and it’s a good one!

For Christmas as a bit of a novelty gift, I made my very own ‘Including Cake vouchers’ to give each of my family so that they could trade them in for a tray of sweet treats of their choosing.


My sister is going back to university this weekend after her holiday’s back at home and so decided to trade her voucher in so she had a little treat to take back with her. So you see, this cake is not for me at all!

She opted for a good old classic carrot cake…super healthy style!

I’ve made a few variations of carrot cake before, but as yet they have not appeared on my blog. The recipe I use makes for quite a dense sponge best suited to mini loaf pans (as I have used here) or muffin/cupcake tins.  When I previously made it using a regular sized loaf tin I felt it was a little gummy in the centre, don’t get me wrong it still tasted really good but would be best suited to a smaller pan so the centre maintains a cakier crumb. I've also used spelt flour here but I would imagine that my typical 30/30/30 combo of ground almonds, buckwheat flour and tapioca starch would work well as a GF sub (note- this hasnlt ben tested in this recipe)

I haven’t frosted these loaves as they really don’t need it, but you may want to add some frosting if you are opting for cupcakes.  I haven’t included a frosting recipe here as I have yet to create a ‘white’ frosting that I really love. My previous investigations lead me down the route of blending firm tofu, coconut butter, orange zest and agave syrup- but although this does create a viable healthy frosting, I simply felt it needed a little more work…feel free to experiment!

I promise I do have some soups coming up very soon! Soups are great for all seasons, all times or day and for wherever you happen to be. They are the perfect healthy winter comfort food and what could be better than that?  (ok, well maybe a little bit of cake for dessert!)

I also have some granola style bar investigations underway. I want to create the perfect healthy snack bars for all situations… a slow release energy bar, an quick release energy hit, a high protein snack. This has been inspired in part by one of my colleagues who asked my to create him a healthy sugar free energy bar. Not one to turn down a challenge…investigations are well underway…I’ll keep you posted!


Recipe: carrot cake

Ingredients

1/3 cup apple sauce (or soy yoghurt)
1/3 cup crushed pineapple
2 tsp vanilla
½ cup agave and a pinch stevia
¼ cup soy milk
¼ cup orange juice
½ cup coconut oil
2 cups spelt flour
1tsp salt
2tsp baking powder
1tsp baking soda
2tsp cinnamon
1tsp mixed spice
2 cups grated carrot
½ cup chopped nuts
½ cup chopped dates or raisins (optional)

Method
Preheat oven to 180C. Blend together wet the ingredients in a food processor then mix in melted coconut oil. Mix dry ingredients together in a large bowl (except nut/dates/carrots) then add wet mixture and stir until thick. Fold in grated carrot, chopped nuts and dates last. Pour mixture into 3 mini loaf tins or  12 cupcake /muffins pans. Bake for approx. 20-30 minutes depending on pan sizes used. Check to see when a toothpick comes away clean.


For tips and info on recipe measurement conversions, ingredients, substitutions and the methods behind how I do things.... check out my 'baking tips' tab at the top of the page.

you may also like

Related Posts Plugin for WordPress, Blogger...