Showing posts with label light meal. Show all posts

Saturday, 29 June 2013

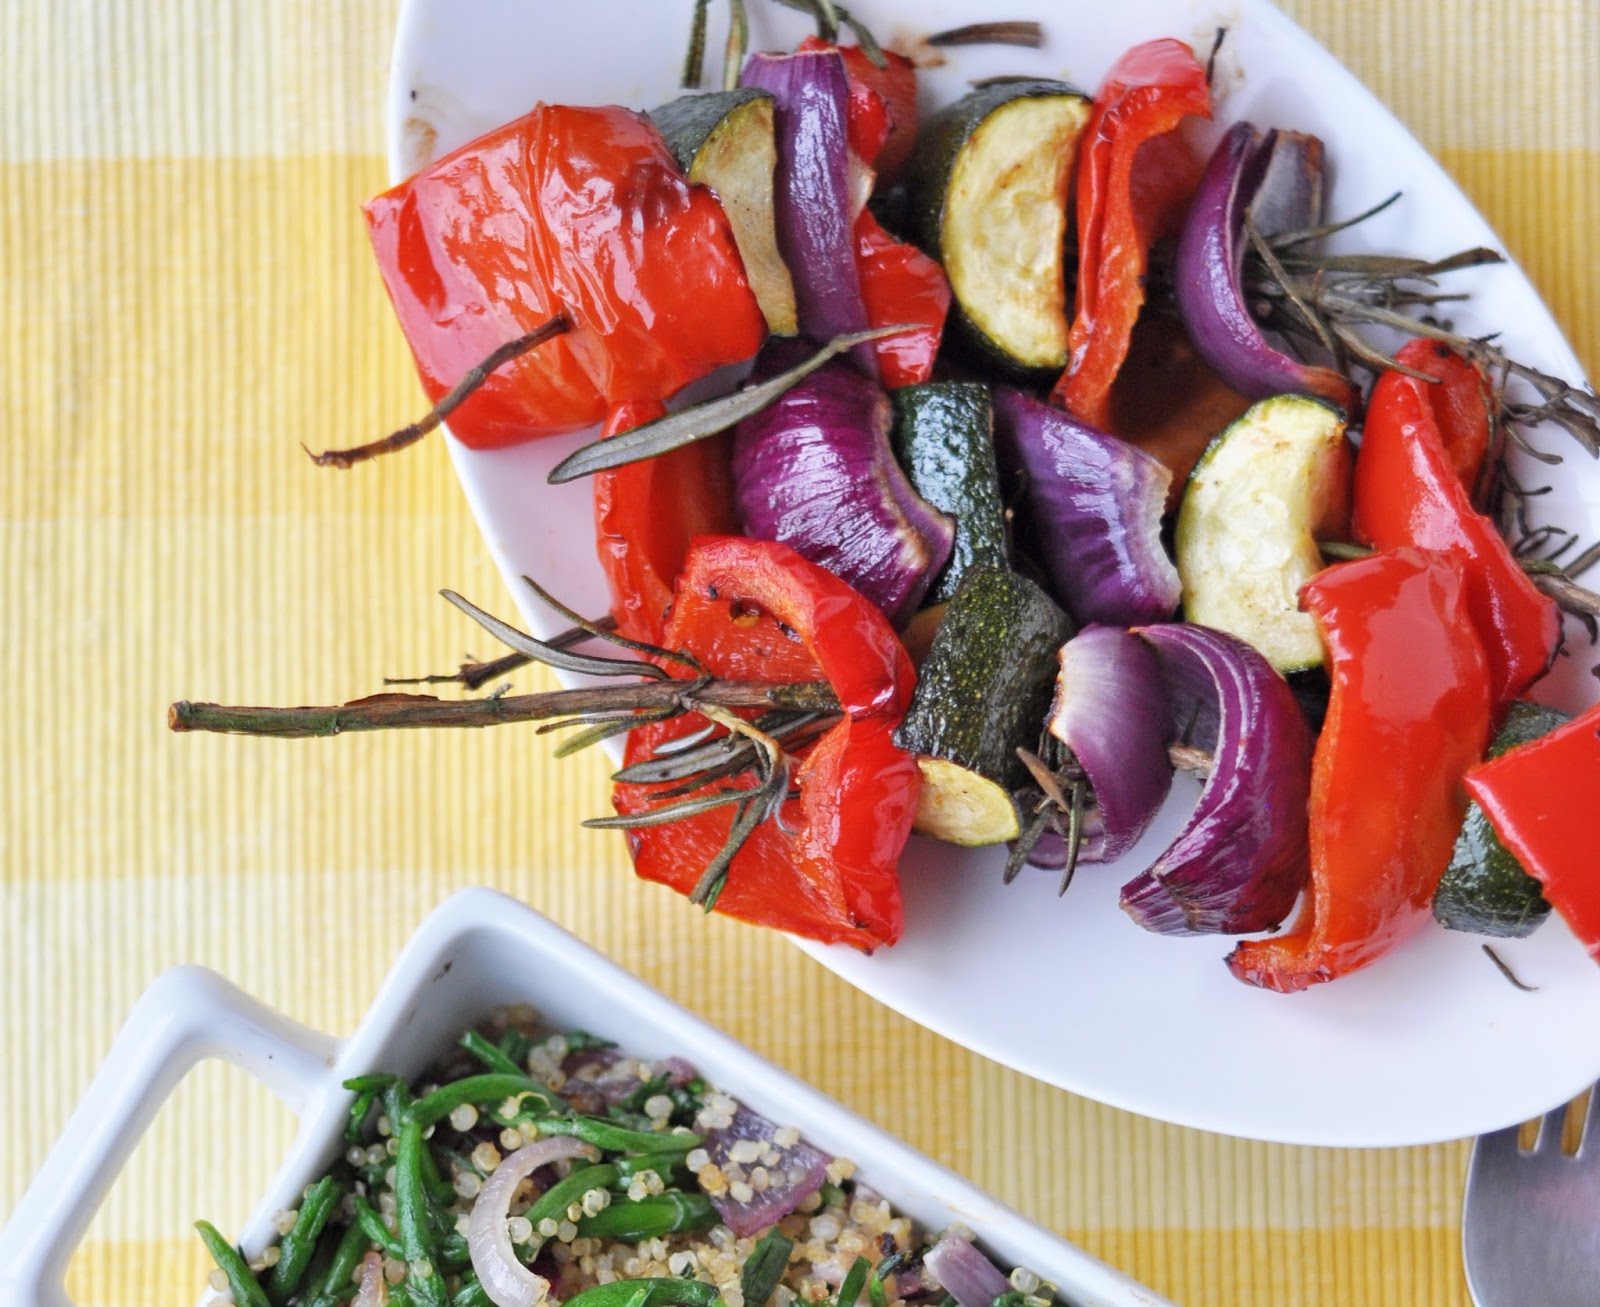
Roasted rosemary veggie skewers


I loved this concept so much and I wanted to share it with you. It's not so much of an amazing recipe- more just the quirky skewer thing going on ;-)


Perfect for BBQ's or summer dining al-fresco, the flavours are fresh and enticing and it will make your dinner companions smile.

There are two simple requirements for this dish:
1- some veggies that can be skewered
2- robust fresh rosemary 'stalks' to act as the skewers

I have a rosemary plant in the garden so had easy access to cut some skewers, some of the skewers I cut were not quite robust enough but they still do the trick and infuse the veggies with flavour. I used my fingers slide the veggie chunks onto my plate just before I ate them and many of the rosemary leaves came away too- yum!

The light oil baste over the veggies was kept simple here so the flavour of the herbs could do their thing, but you could add some more spice if you liked with chipotle sauce or chilli flakes. I served the skewers as a side dish along with the samphire quinoa dish and flatbread wedges.

Bon apetite!


Recipe: Roasted rosemary veggie skewers

Serves 2 as a side

Ingredients:

2 cup worth mixed veg- (I used 1 red onion, 1 red pepper and 1 courgette)
2 tsp oilve oil (or preferred oil)
1 tsp mixed herbs and spices of choice (i.e chili or cajun)
4 robust rosemary stalks to act as skewers

Method:

Prepare the vegetables to be skewered and toss in the oil and spices.

Carefully thread the veg pieces on the rosemary stalks, going along the direction of the leaves so that they largely remain intact).

Toast the skewers under a medium grill for 5-10 minutes until golden along the edges.


For further guidance on making gluten free choices please see this post.

For tips and info on recipe measurement conversions, ingredients, substitutions and the methods behind how I do things.... check out my 'baking tips' tab at the top of the page.

Saturday, 22 June 2013

Smashed avocado oatcakes with orange, onion and cumin

Late last Thursday morning I had kind of missed breakfast but it wasn't yet lunchtime. Upon opening the fridge I was greeted with a bowlful of oranges, a salad tray of red onions and a forlorn looking avocado in need of using up...


I'm not typically a huge fan of avocado on its own as the primary ingredient in my meal but there's always room to change and after seeing a number of delicious looking 'smashed avocado' recipes around the blogosphere and most recently here on Kathy's blog with it's bright colours, temptation struck and I decided to give it a go myself!

This wasn't going to be a long prep or cook time as 10 minutes was all I had... and I was hungry! So I literally sliced up and onion pretty thinly dusted it in cumin and panfried it for five minutes whilst prepping the remainder… The result?  One super simple and super tasty breakfast. I may well be an avocado convert!! P.s I admit my oat cakes were not homemade... I like these Nairns ones for a quick cracker fix.  You could use other crackers or toast for the base if you preferred.

The cumin paired so well with both the flavours of the onion and the refreshing zing of the orange slices, I'd encourage you to use it but of course feel free to swap in any spices if you prefer or you donlt have cumin to hand. I use both ground cumin and cumin seeds so they could be toasted off with the onion. 

I ate an oatcake followed by orange wedge, followed by oat cake.... the orange was amazingly refreshing and also great palate cleanser between mouthfuls of avocado.


Recipe: Smashed avocado oatcakes with orange, onion and cumin

Serves 1

Ingredients:

1 avocado
1 small red onion
A splash of olive oil
1/4 teaspoon ground cumin and 1/2 teaspoon cumin seeds
1 orange- peeled and segmented
Salt and pepper to taste
Oat cakes (or other 'base') to serve
Method:

Slice the onion very finely and lightly pan fry with a little oilve oil and the cumin until soft, approx. five minutes.

Meanwhile prepare the avocado and orange by lightly mashing the avocado so that it is still quite chunky and use one  of the orange segments squeezed over it. And a little salt and pepper to taste.

Using oat crackers (or rice crackers or toast if you prefer) spoon dollops of the avocado mix onto the crackers and top with the panfried onion slices. Decorate the plate with the orange wedges.


For further guidance on making gluten free choices please see this post.

For tips and info on recipe measurement conversions, ingredients, substitutions and the methods behind how I do things.... check out my 'baking tips' tab at the top of the page.

Thursday, 23 May 2013

Quinoa stuffed peppers with cream topping

Stuffed peppers...such a quick an easy meal! Team with salad for a summer twist.


I packed my peppers with quinoa for a great texture and protein boost, but you could use rice, cous-cous, or how about cauliflower rice for a superlight veggie bite?  Add some chopped veggies, or corn to the mix along with spices of chice and you are away.

I decided to jazz things up a little further by adding the coconut flour ‘cream cheese’ topping with a savoury vibe to it for a change since I’m so used to turning it in to a sweet version. I used harrissa paste that I happened to have in the fridge which I felt added to the general Morrocan/Mediterranean feel, buit you can use any preferred spices.  I was intrigued to see how it would work out this way and also how it would handle being under the grill.

It was good! The top browned nicely whilst the ‘cheese’ topping stayed moist and creamy below, almost creating a thick creamy garnish for the peppers and salad. The flavours were good to, nice and strong which is the way I wanted it on this occasion.

For more lighter summer meals have a little look here


Recipe: Quinoa stuffed peppers with cream topping

Serves 1

Ingredients:

1 large red pepper- halved
1 cup cooked quinoa mixed with spices of choice plus extra veg if desired e.g corn/tomatoes)
Topping: 1/3 cup thick basic coconut cream mixed with 1 tsp soy sauce and ½ tsp harrissa paste (or similar)
Salad leaves to serve

Method:

Oven bake the pepper halves  for 10-15 minutes at 180C until softening. Meanwhile prepare the quinoa and coconut cream topping.

Pack the cooked quinoa into the pepper halves and top with the coconut cream paste spread evenly.

Place under a medium grill for up to 10 minutes until the topping is golden.

Serve with a salad.


For further guidance on making gluten free choices please see this post.
 
For tips and info on recipe measurement conversions, ingredients, substitutions and the methods behind how I do things.... check out my 'baking tips' tab at the top of the page.

Thursday, 4 April 2013

Sweet potato salad with soy balsamic


I mentioned before I love lentils, right?


Good, because here are some more. Dark green speckled lentils to be precise. My favourite kind of lentil as they hold their shape so well and look pretty on the plate. My favourite dish to date using these lentils is my ‘spag bolas the green lentil is just the right shape and texture to offer a great meat substitute.

For this dish I also had some sweet potato needing a home so another hot salad combo was born. The dressing it really simple but works so well drizzled over the potato, it is sweet and tart at the same time. I piled my hot lentil and potato mix over a bed of uncooked watercress but you could sub any greens here and cook them if you prefer it that way.

Check out this maple glazed sprout salad and this roasted cauliflower salad for another two of my favourite 'hot salads'.


Recipe: Sweet potato salad with soy balsamic

Serves 2

Ingredients

2 cups cubed sweet potato
1-2 tsp oil (I used melted coconut oil)
½ heaped cup dark green/puy lentils
2 large handfuls watercress (or sub spinach)
1 onion thinly sliced
2 tsp toasted sesame seeds- optional

Dressing:
1 tbs sesame oil
2 tbs balsamic vinegar
1 tbs soy sauce
1 clove crushed garlic
1 tsp agave
½ tsp chilli flakes- optional

Method
 
Mix the cubed potato with the oil and season with a little salt and pepper. Lay in an even layer on a lined baking sheet and roast for approx 15 minutes until golden and cooked through. Add the sliced onion approx 5 minutes before the end of the roasting time.

Meanwhile boil the green lentils for 15 minutes or as according to instruction (if using canned pre-cooked lentils heat for 5 minutes).

Mix the dressing ingredients and set aside. Lightly toast sesame seeds if using.

To serve place a handful of watercress in the bottom of each bowl/plate, pile potato and onion mixture of top and drizzle with dressing and sesame seeds.


For further guidance on making gluten free choices please see this post.

For tips and info on recipe measurement conversions, ingredients, substitutions and the methods behind how I do things.... check out my 'baking tips' tab at the top of the page.

Tuesday, 5 February 2013

'5 minute' miso stew

Today I am off on a little holiday... to a cottage in the Derbyshire Dales with friends, and it's due to be very chilly and potentially snowy so I've packed all my thermals and waterproofs just in case!  Food was of course on my mind over the last few days- prepping lots of snacks and quick meals to take along with me.....so quick soups and granola bars it is then! Such that this post seemed quite appropriately timed.

A few days ago I needed a really quick fix lunch. I had no soup to hand (other than in the freezer) and I didn’t fancy a cold platter of salad or hummus and veg sticks. Hmmm?

What hot dish could I conjure up in a mere five minutes, that was full of veggies and wouldn’t weigh me down?


Then I remembered that I’d bought some instant miso soup sachets to try. I know what you’re thinking...instant miso soup? That’s not particularly healthy- you should make it yourself!  To a large extent I would agree with you, however I had not tried miso soup before (I know that might sound crazy) and so I wanted to get a feel for the flavours before attempting it on my own, plus this pack was organic and the ingredients list was not particularly bad, it was very similar to a vegetable stock really. I felt this would be a great base for some more substantial additions.

To that was the ‘soup base’ sorted, now to make a 5 minutes lunch!  So I grated up some veg to enable a quick cook and then added some brown rice noodles and some soy beans.  It was ready in 5 minutes flat....or there abouts...but who’s counting?

You can find more of my soup and stew recipes here.

P.S It's Chinese New Year this Friday and although this may be a Japanese inspired dish, it's still noodley and therefore I think it fits the bill. You could infuse Chinese spices will a sweet and sour style broth if you really wanted to play the part. :-)

P.P.S If I'm not able to respond to comments etc over the next few days it will be because I have no internet access. I will be back on Sunday... in the mean time I have a couple more posts lined up for you! :)

Recipe: '5 minute' miso stew

Serves 1

Ingredients:

1 sachet miso soup mix
1 cup boiling water
1 tsp sesame oil
1 small onion or shallot thinly sliced
1 small carrot grated
½ cup cabbage thinly sliced (use Chinese cabbage if possible, or a white cabbage)
Handful of frozen soy beans
¼- ½ cup brown rice vermicelli (very thin) noodles
Sesame seeds to garnish

Method:

Add the onion, carrot and cabbage to a frying pan with the oil (you could use any veg that could be chopped finely). Fry for 5 minutes, using extra water to steam fry as necessary.

Meanwhile boil the kettle and add the miso soup mix to the cup of boiling water- stir to combine and set aside. Add the rice noodles to another cup of boiling water and add the frozen soy beans to another cup of boiling water. Let stand for a few minutes whilst the vegetables cook.

Drain the soy beans and noodles. And add to a serving bowl. Pour the miso soup into the bowl and then add the vegetables. Finish with a sprinkle of sesame if desired.


For further guidance on making gluten free choices please see this post.

For tips and info on recipe measurement conversions, ingredients, substitutions and the methods behind how I do things.... check out my 'baking tips' tab at the top of the page.

Tuesday, 4 December 2012

Pear and black bean salad

Looking back at the last few posts i'm detecting a slight lack of cake and sweetness!

Ok I will stop with the salads soon…I promise…maybe! I am really enjoying salad experiments ( I also have another I want to share but maybe I will need to reign that back for now) and just want to share the best flavour combos and pretty platters with you.


There will definitely be much more cake and Christmas goodies over the next couple of weeks so maybe this little episode of savoury dishes is a subconscious statement to address the balance!

So back to the salad...

In previous years I was never big into salads, I was also never big into combining fruit with savoury dishes (I always struggled to get my head around apple sauce with pork and cranberry saice with turkey when I was a child)…but all that has since changed.

Apples and pears make great salad partners for this time of year, plus salads are a great way to use up some leftovers,  I happened to have a small amount of black beans needing using after making some brownie slices. Red cabbage is also one of my favourite ingredients simply because it so colourful and so quick and easy to add to a salad or stir fry for a great texture. I also find red cabbage stays fresh in the fridge for ages so I end up using it for so many meals.

Simple fresh and colourful lunch or side dish, so pretty and guaranteed to put a smile of your face and a swing in your step (hopefully!) Plus if you like, since you've been so virtuous, you can follow up with a cookie or two...


Recipe: Pear and black bean salad

Ingredients

serves 1

½ cup red cabbage- sliced thinly
1 pear cubed
½ cup cooked sweet corn
½ cup cooked black beans
Scant ¼ cup red onion- sliced thinly

Dressing: 1 tsp olive oil, 1 tbs lemon juice, ½ tsp wholegrain mustard.

Salt, pepper, chilli flakes and chia seeds (optional) to serve

Method

Prepare all veggies and toss together in the dressing.  Add a little salt and pepper to taste plus a few chia seeds to serve for an extra boost if desired.


For further guidance on making gluten free choices please see this post.

or tips and info on recipe measurement conversions, ingredients, substitutions and the methods behind how I do things.... check out my 'baking tips' tab at the top of the page.

Saturday, 1 December 2012

Tortilla wraps - gluten free

These wraps are like savoury pancakes…but thick and robust enough to take a filling and they are gluten free to boot!


Fill them with whatever you fancy, here I have gone for a simple vegan yoghurt and bean salad, but how about this ‘untuna’ filling or my favourite lentil and peanut dipYou could also fill them with a veggie chilli as long as it is not too liquidy (I am the master of making  mess with finger food...just warning ya!)

The chia seed is the star of the show in terms of binding the ingredients together and ensuring that these wraps do not fall apart. You could probably use ground flax as a substitution but my personal experience with chia and flax is that ground chia has a better ‘gumming’ action and I usually opt for it given the choice.

I left these wraps pretty plain but they would be the great base for some Italian, Mexican or Indian spices depending on your filling flavours.


Recipe: Gluten free tortilla wraps

Serves 2 (approx 6 wraps)

Ingredients

½ cup chickpea flour
½ cup buckwheat flour
3tbs starch (I used arrowroot)
½ tsp baking powder
¼ tsp salt
¼ tsp garlic powder
Other seasonings as desired to taste (I kept my tortillas ‘plain’)
3tbs ground chia seed mixed with ¼ cup warm water
1 tbs coconut oil
1 cup warm water

Method

Mix dry ingredients together and then add wet ingredients and mix well to form a batter of ‘yoghurt’ consistency.

Lightly oil a frying pan and once hot add a dollop of batter spread thinly (quickly!) and fry the tortillas as you would a pancake. Cook them for 2-3 mins on one side then flip and finish with a minute on reverse.

Serve immediately, or if making in advance simply warm through in the oven or microwave before serving. These are best eaten within 24 hours. I have not tried freezing them but I imagine that would work, making sure they are separated with parchment.


For further guidance on making gluten free choices please see this post.

For tips and info on recipe measurement conversions, ingredients, substitutions and the methods behind how I do things.... check out my 'baking tips' tab at the top of the page.

Saturday, 24 November 2012

Maple glazed brussel sprout salad

I do love brussel sprouts…that is if I get the recipe right, they have a tendency to be a little bitter if not treated sensitively! I think that must be why most people have a ‘love-hate’ relationship with poor old brussels.

I bought a big bag from the supermarket a week or so ago and I've been making various salad and stir fry combos ever since. Some experiments have been tastier than others, but yesterday’s lunch was so good I just had to share it with you.


This ‘warm salad’ or stir fry (whatever you’d prefer to call it) was in large part inspired by Heidi’s recipe over at 101 Cookbooks, I loved the idea of using a little maple sauce as a glaze along with apple for sweetness. I added crushed walnuts instead of pine nuts plus a little ‘fake’ bacon to give a big flavour hit and turn this side dish into a full on meal.

I don’t typically use fake meats as I simply don’t miss having meat in my dishes and so therefore have no desire to sub processed alternatives. However in this instance I had a pack of meat free bacon in the freezer that I’d originally bought to use in a meal for a friend, so I figured today would be a good opportunity to add a little- I used approximately 1 large rasher.  This dish still has so much flavour without, so feel to go without bacon…it will still taste good, or you could follow the principle in Heidi’s recipe and use cubed tofu.

This is a fairly light dish which was perfect for lunch, but you could team it with some quinoa for a more substantial meal.


Recipe: Maple glazed brussel sprout salad

Serves 1 as a main or 2 as a side

Ingredients

1 ½ cups shredded brussel sprouts
1 shallot- sliced thinly (I had none so omitted this but I would have liked to have added one)
1-2 rashers ‘bacon’  sliced (optional)
1 tbs olive oil or coconut oil
1 smallish apple- cubed
2 garlic cloves- minced
Pinch of salt
2 tsp maple syrup
Handful of crushed walnuts

Method

Heat the oil in a frying pan and then add the sprouts, shallot, bacon, apple, garlic and salt. Cook for 4-5 minutes stirring occasionally.

Add the maple syrup and walnut pieces and continue to cook for 2-3 minutes until well glazed and beginning to brown in places.

Serve immediately.


For further guidance on making gluten free choices please see this post.

For tips and info on recipe measurement conversions, ingredients, substitutions and the methods behind how I do things.... check out my 'baking tips' tab at the top of the page.

Thursday, 1 November 2012

Apple chutney salad

It seems strange now to not be writing ‘DAY ____’ before each post! Vegan Mofo is now all over…oats are gone forever? No, never!  I have just realised that I didn't put together a monthly round-up for October! My head has been all over the place...forgive me!


Halloween has been and gone and we are already in November with the cold winds and crispy leaves. This is a busy month for me, so many friends and family with birthdays in the lead up to Christmas… I have two 30th birthday’s to attend this weekend alone!

It’s also a month of some contemplation, planning ahead and looking forward to the New Year that will be with us before we know it…a few changes may be on the horizon.

After yesterday’s Halloween lunch (I ate so much pizza) today wanted to be a lighter day!  I ate my usual apple-oats for breakfast but going lighter on the oats and adding lots more fruit for the topping.

A salad lunch seemed a good option and the sweet apple chutney flavours were a lovely seasonal twist. You could of course use homemade chutney which would be even more delicious, but for speed and because I was having a ‘what do I have in the fridge’ moment I opted for a ready-made version. I appreciate that chutney does have a high sugar content, but for the quantities in this dish and the amount of healthy veggies we have, it was a compromise I was happy to make.  I love the caramelised onions and red cabbage in this salad- my favourite way to eat these veggies.

I am really enjoying salads and would like to experiment with some more seasonal versions…what is your favourite winter salad combination?


Recipe: Apple chutney salad

Serves 2

Ingredients

3-4 handfuls of mixed leaves (I used peashoots, spinach, rocket)
2 leeks chopped into rings
1 cup loosely packed red cabbage
½ cup green beans (I used frozen soy beans)
1/3 cup chunky apple sauce
2 tbs fruit chutney (mine was a mix of apple pear and plum)
2 tbs pumpkin seeds

Method

Heat a little olive oil in a frying pan and sauté the leek and red cabbage for 5 minutes.

Add the soy beans and pumpkin seeds and continue to cook for another 5 mins.

Add all remaining ingredients and cook for a final 1-2 minutes to heat through.

Serve on the bed of salad leaves.


For further guidance on making gluten free choices please see this post.
For tips and info on recipe measurement conversions, ingredients, substitutions and the methods behind how I do things.... check out my 'baking tips' tab at the top of the page.

Saturday, 16 June 2012

‘Get well soon’ Soup


I’m an invalid.

I’m rubbish at being a poorly person as I’m just no good at sitting still and doing nothing. But sometimes your body simply has other ideas.

I appear to have a trapped nerve behind my shoulder which has sent awful aches, pains and numbness all down my left arm. Try as I might to simply ‘carry on as usual’ it just isn’t happening and so for the last three days I’ve pretty much been stuck in bed and catching up with bits and pieces on my laptop as much as I feel able!

Yesterday evening I did manage to make it in to the kitchen to concoct some soup with the help of my trusty Thermomix. I made a big batch so that I could have the left overs today…good job really as I feel worse today (typing parts of this blog post one handed!) and so don’t think I could have managed anything much today. I struggled enough just to take these few photos- I wasn't going to give in!

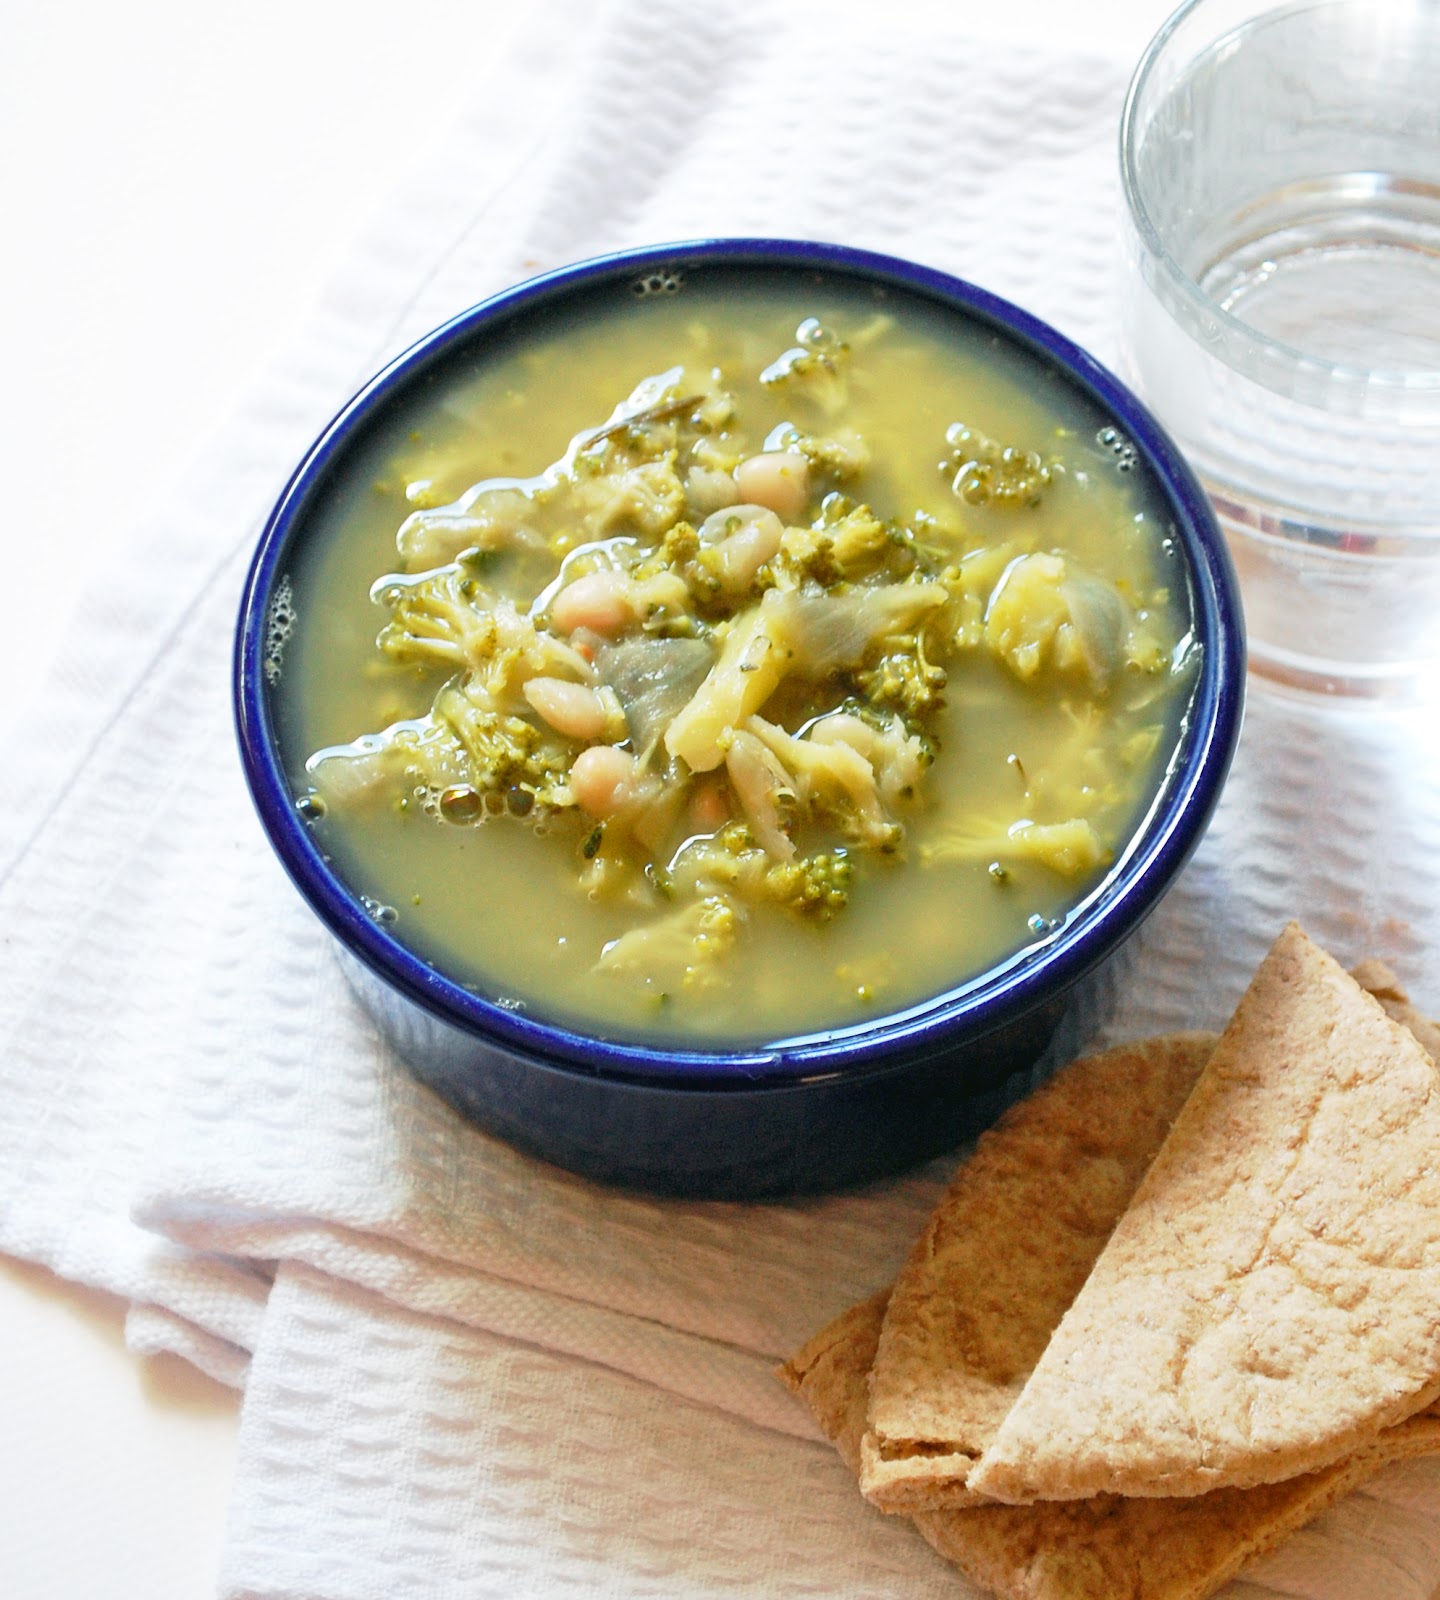
My dinner companion yesterday proclaimed that this soup tastes like ‘chicken soup without the chicken’ and since chicken soup is supposed to be the heal-all wonder…well the ‘get well’ title seemed entirely appropriate…whether you think it tastes like chicken soup is another matter.  I think I just tastes like 'simple goodness'- delicate, wholesome and nourishing, and with some added pasta or quinoa (I served it with quinoa yesterday) you have yourself a good meal, Invalid or not!

I had so many plans in the kitchen this weekend, not least because I have a little stall at an event next weekend (more on all that soon) that I needed to get preparations underway for. Fingers crossed I am back in the saddle very soon. In the meantime, with only my laptop for company, I have been organising my recipes into more easily searchable categories, hopefully I’ll get that up later once the next dose of painkillers kick in!

 
Recipe: broccoli and cannellini soup

Serves 4

Ingredients

1tbs olive oil
1 onion finely chopped
4 cloves garlic crushed
1 tsp dried mixed herbs
Few leaves fresh rosemary
400g (approx. two small heads) broccoli- chopped into fairly small pieces
100g (approx.½) courgette- grated (optional)
400g can butter beans/cannelli beans
800ml hot vegetable stock
100g quinoa or small cooked pasta shapes- optional
Salt and pepper to taste


Method

Heat oil in a large sauce pan and gently fry the onions and chopped garlic for around 5 minutes until soft.

Add the herbs and broccoli and cook for 5 minutes, stirring frequently. Add all remaining ingredients (other than quinoa/pasta if using) and simmer for a further 10 minutes or until broccoli is cooked.

The quinoa/pasta can be cooked separately and spooned over to serve, or added to the pan during cooking time as appropriate.


For tips and info on recipe measurement conversions, ingredients, substitutions and the methods behind how I do things.... check out my 'baking tips' tab at the top of the page.

you may also like

Related Posts Plugin for WordPress, Blogger...