Showing posts with label daring bakers. Show all posts

Friday, 27 July 2012

Cracking crackers…two ways


Continuing the savoury kick with this month’s Daring Bakers challenge….

“Our July 2012 Daring Bakers’ Host was Dana McFarland and she challenged us to make homemade crackers! Dana showed us some techniques for making crackers and encouraged us to use our creativity to make each cracker our own by using ingredients we love”.

As I type this post, I site with my laptop rested on my knee pausing every other sentence to watch the very beginning of the opening ceremony of the London Olympics 2012….this post could take some time!  This is Britain at is best, full of its quirks, its love of routines, it classics and it’s food.  If I’d thought ahead I may have gone for my take on a more ‘classic British cracker’ like a water biscuit or a cream cracker but these are very neutral plain crackers and I love to get the taste buds going with the cracker itself not reliant on toppings.

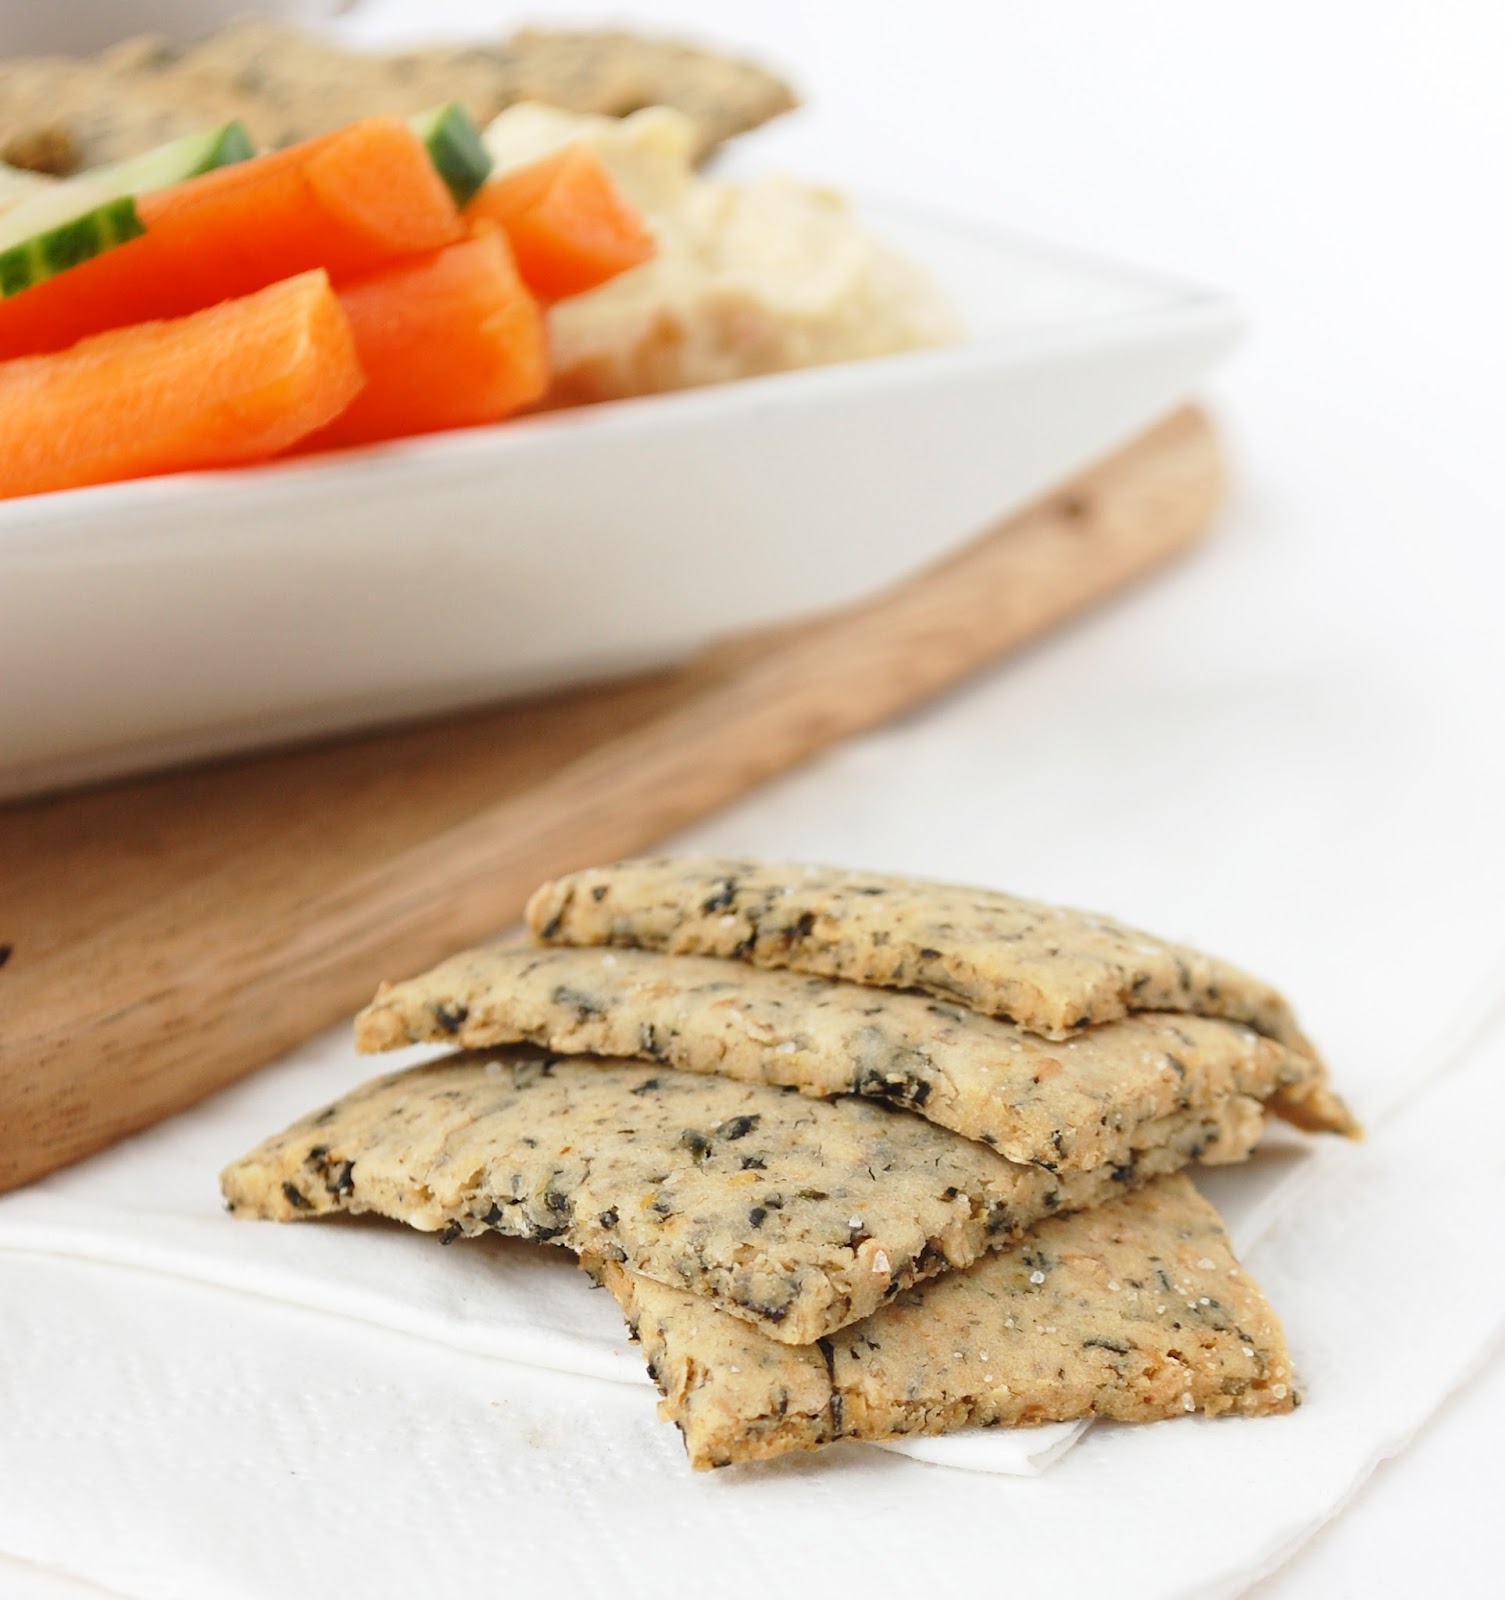
So back to the challenge… I do love snackety foods and dips of all kinds, so what better accompaniment but crackers! Particularly crackers that are full of tasty good-for-you things…..wholesome, gluten free, vegan…what more?!

The challenge required us to make two different types of crackers with two different presentation methods which was interesting in itself. Now since I don’t have any form of pasta/cracker roller machine, I went for a ‘roll thinly and score’ option and the ‘roll into a log and slice into rounds’ option.

I had a lot of fun with flavourings to make sure these were big on taste without using butter and cheese as many of the cracker options seems to entail. You can vary the flavours as you like to achieve you own taste preference, these crackers have such a simple ingredients list you can really go to town with experimentation. The chickpea crackers in particular were a pure shot in the dark, instead of using chickpea flour I opted for chickpeas themselves and to my delicious surprise  they give a lovely chewiness to the cracker that itself has a crisp exterior. The nori crackers are loosely based on these crackers so I was more certain of their success from the outset, although the addition of brown rice was a new twist. The nori crackers were inspired in part by this recipe since I had some leftover sheets of seaweed that caught my eye as I opened the cupboard for inspiration.

These crackers retain their crispness for a couple of days but you may want to crisp them up in the oven beyond that.

Right, that’s me done…now to sit back and watch the amazing creativity and ‘organized chaos’ (words just uttered by the commentator) that all goes on behind the scenes to create a truly memorable opening sequence to the Olympic Games.


Recipe: Nori crackers

Makes approx. 12-16 crackers

Ingredients

½ cup brown rice flour
½ cup cooked brown rice
¼ cup roasted nori seaweed
½ tsp salt
2 tbs sesame seeds
Up to 3tbs water
1 tbs sesame oil

Method

Blend all ingredients together in a food processor, adding the water last a little at a time to reach a slightly sticky dough consistency. The dough should be sticky enough to bind but easy to roll out thinly.

Roll as thinly as possible (approx. 2mm thick), cut into squares and bake in a preheated oven at 180C for approx. 20 minutes until lightly golden.

Allow to cool fully before serving.


Recipe: chickpea sesame crackers

Makes approx. 8 crackers

Ingredients

¾ cup chickpeas
3tbs tapioca starch (or other starch)*
3 tbs gluten free flour (I used buckwheat)*
½ tsp baking powder
¼ tsp salt
¼ cup sesame seeds
1 tbs fresh coriander (or ½ tsp dried)
Pinch chilli flakes (or other spice as optional)
1 tsp sesame oil
1 tsp chia and 2 tbs water

Method

Blend all ingredients together in a food processor to get a fairly smooth and even crumb mixture. Form into a ‘log’ with your hands and cut into rounds with a sharp knife. If it is too soft to cut chill for up to 30 minutes.

Bake in a preheated oven at 180C for approx. 25 minutes until lightly golden.

Allow to cool fully before serving.


* for further guidance on making gluten free choices please see this post.

For tips and info on recipe measurement conversions, ingredients, substitutions and the methods behind how I do things.... check out my 'baking tips' tab at the top of the page.

Wednesday, 27 June 2012

Battenberg…with a difference


So this month’s Daring Bakers challenge is….Battenberg cake.

Mandy of What The Fruitcake?! came to our rescue last minute to present us with the Battenberg Cake challenge! She highlighted Mary Berry’s techniques and recipes to allow us to create this unique little cake with ease.

Battenburg- the classic chequered sponge cake, sandwiched together with jam and all wrapped up in a marzipan jacket!


Marzipan is a tricky one, the traditional version is full of powdered sugar and although it's generally vegan I still have difficulty in endorsing such a sugary treat here on my blog! I have been trying to suss out a sugar free marzipan for quite some time now, with some degree of success here in my Christmas Stollen and my the toppings for the super-cute Christmas puds. But when it comes to a rollable marzipan I have not yet had a breakthrough!

However this challenge allowed us to push the boundaries beyond a traditional Battenberg as long as we held true to the chequered sponge concept with a sweet covering whether it be marzipan, fondant or chocolate. So, one idea came to my mind straight away….

….the ‘world’s healthiest chocolate fudge’!

I had tried rolling the fudge dough previously to make these hearts and it worked really well, so I figured it could also work really well as the Battenberg covering.  That then just left the sponge and the flavours to choose. I opted for a plain vanilla sponge alongside a raspberry sponge (although it has taken on more of a brown tinge in the photos), that allowed me to use sugar-free raspberry jam as the sole sweetener in the raspberry sponge.  I opted to try my ‘easiest ever gluten free sponge’ recipe as the basis for this cake as i really wanted to go gluten free for this recipe.

In hindsight I wish I’d gone for a different sponge recipe, as whilst that simple sponge works well as a small super-simple mug cake, it just didn’t really do it for me as larger oven baked sponge. There was nothing drastically wrong with it, I just felt it could have been a lot more delicate with a lighter crumb. I also wish now that I’d rolled the fudge wrap a little thinner before wrapping the sponge slices.

The overall concept was a great success and the chocolate fudge coating worked a treat (particularly if I’d rolled it more finely), however after eating a slice with the sponge, I got the feeling that the sponge was not doing the cake justice. So what did I decide to do?  Peel the fudge off and reform it into fudge balls of course. Mmmm…much better!

Try this frosting…go on give it a go! It is so easy to form and model that you can cut it into rounds, bars, roll it out as an icing layer or even turn it into a soft piped healthy frosting as I did here with these cupcakes.

I will give the Battenberg another go with an alternative sponge recipe at some point soon. This fudge frosting is so versatile that I want to give it a proper chance to do my Battenberg proud!

This link takes you to the original Daring Bakers Challenge notes with  plenty of alternate recipes for battenberg to try.


Recipe: Battenberg

Makes 1 approx. 7” long cake

Ingredients: chocolate fudge frosting

½  can black beans- rinsed and drained
1 mashed banana
½ cup cocoa powder (or raw cacoa powder)
1/3 cup dates
¼ cup cranberries
2 tsp vanilla extract
½  tsp cinnamon
½ tsp stevia
½ cup ground oats
2 tbs ground flax
2 tbs chia seeds

Method

Combine all ingredients in a food processor and blend until a smooth pliable dough is formed. The dough should be fairly tacky but not sticky and should easy to handle.

Roll out the dough on a sheet of parchment or similar for easily handling. Roll to achieve desired thickness and then, using thr parchment to assist, carefully drape across the jam coated sponge to create the finish Battenberg.

Ingredients: simple vanilla sponge

½ cup buckwheat flour (or other GF grain)
3 tbs ground almonds
½ tsp vanilla
1 tsp baking powder
½ cup plain soy yoghurt (or regular)
2 tbs agave (for vanilla version)
2 tbs sugar free raspberry jam (for raspberry version)

Method

Mix dry ingredients in a medium bowl and then add wet ingredients (other than agave and jam) and mix together well.  

Divide the mixture between two bowls and then add the agave and jam to a bowl each.  Note: to achieve a deeper red/pink colour you may need to add a few drops of food colouring.

You will now have two different coloured/flavoured mixtures. Spoon each into a 7” square  baking tin divided down the centre with parchment paper and foil to prevent the batters mixing (foil helps make a more ridged central partition).

Bake in  pre-heated oven  at 180C for approx. 15 mins until very lightly golden.

Assembling the Battenerg

Cut the slices of sponge into neat squares and arrange in a larger square with each flavour on the diagonal. Paint each edge with slightly runny sugar-free raspberry jam and then firmly wrap the chocolate fudge frosting around the entire cake, ensuring an overlap to seal.


For tips and info on recipe measurement conversions, ingredients, substitutions and the methods behind how I do things.... check out my 'baking tips' tab at the top of the page.

Sunday, 27 May 2012

Cinnamon challah

Hello, hello…. A second post on a Sunday? Ah, but it’s the Daring Bakers reveal date and this month’s challenge was Challah bread. A new experience for me!

May’s Daring Bakers’ Challenge was pretty twisted – Ruth from The Crafts of Mommyhood challenged us to make challah! Using recipes from all over, and tips from “A Taste of Challah,” by Tamar Ansh, she encouraged us to bake beautifully braided breads.

Right, let me tell you one thing. Nothing went smoothly for me in this challenge. First settling on which recipe to use caused me much deliberation (ok, well that’s not exactly unusual). I had the usual task of veganizing the recipe, which it itself was not too tricky as suggestions had been given and I found quite a lot of additional inspiration from other recipes already out there (I looked at too many to name specific resources!)

Then came the debate as to how to actually make the challah. I have a Thermomix and in the Thermomix cookbook there is a specific Challah bread recipe. So, was I to go with the more traditional kneading/rising  methods and times suggested in the Daring Bakers Challenge and elsewhere  online, or was I to go with the Thermomix method (a swifter process).

So I went with the Thermomix method. In hindsight that was probably a mistake as I had no gauge against others results and it required more guess work in translating my ingredients to their (simple) method and that therefore meant more room for things going awry!

My first stumble: I killed the yeast (oops!) I added it to milk that I warmed just a little too much. Move onto second trial where I didn’t add the yeast to the liquid prior mixing.
My second stumble: On to my second attempt and it all went smoothly until the point at which I had to braid. I prepared a 4-strand braid and then realised I had no clue how to create a braid with 4 strands …ha ha! The stands got a bit stretched and mauled whilst I figured it out…I got there in the end*
My third stumble: Without having the option of using egg wash for the surface, I went for a soy milk with brown rice syrup combo. This was ok I principle I think, but I’m not sure whether it contributed to the over-browing of the top.
My fourth stumble: The cookbook I used stated bake for 20 minutes at 220C. I checked after 15 and it was very much done! I took it out at this point and it was saved…but had I left it longer….
My fifth (and final) stumble: I had added a ‘sweet cinnamon butter’ centre to the inside of each strand. I had high hopes for a lovely swirly effect when I cut into the loaf. Hmmm…not so much..it was barely noticeable.

Anyway, it was a good learning experience…and for the all the things that ‘challenged’ me there were plenty of good bits too…

The good bits: Using the banana as a binder (instead of an egg) worked really well and assisted with the light sweetness. The addition of cinnamon and coconut sugar was delicious. I learnt how to braid with 4 strands…and you know what…

Most importantly, the bread tasted YUMMY! Yes, I said it tasted yummy…perfect when lightly toasted with a mug of tea. Let me tell you I sure needed that mug of tea!

Please feel free to have a go yourself…here is a link to the original Daring Bakers Challenge, which may assist with the process and also give other ideas for ingredients and tips above and beyond my own.


Recipe: Cinnamon challah

Ingredients

400g mix of white and wholegrain spelt flour
½ tsp salt
1 sachet instant yeast
200g warm soy milk (or water)
1 banana
30g coconut oil
20g coconut sugar
2 tsp vanilla extract
2 tsp cinnamon
To glaze- approx. 3tbs soy milk plus ½ tsp brown rice syrup, extra coconut sugar for sprinkling
Filling- (optional) 3tbs melted coconut butter, 1tbs cinnamon 2 tbs agagve syrup

Method

Add all ingredients to the Thermomix and mix for 20 seconds/speed 3.

Knead for 2 mins of the dough setting. Remove the dough and place ina  large oiled bowl, cover and leave to rise for approx. 1 hour.

On a flour surface, remove the dough and punch it down. Divide into 4 equal portions and roll each piece into a long sausage shape approx. 40cm long. For a filled bread- i.e cinnamon as I have done or an alternative sweet or savoury filling, flatten the strands and add a line of filling before pinching together to seal into a thick round strand.

Press the 4 ends together and loosely plait the length of the strands before pressing the ends together to complete the braid. Form into a circle if you wish

Allow the challah to rise for approx. 30 mins and pre-heat the oven to 220C (based on my experience I would now suggest 200C I would also suggest a longer rising time of 1 hour). Brush the bread generously with the soy milk/syrup glaze and bake for 15-20 minutes  or until the glaze is golden (keep a close eye to prevent burning).

*for a 4-strand braid, think of the 4 strands in two pairs. Cross the inner strands first (one from each pair) and then cross both of the outer stands individually (each pair), repeat the procedure with the inner strands (which will now be the other strand of each pair) then repeat with the pairs…..does that make sense. Basically you are just crossing the inners and then both outers in repetition. If you’re still confused…Google it like it did! 

 Flattened strand recieving its filling


barely there cinnamon butter swirls!

For tips and info on recipe measurement conversions, ingredients, substitutions and the methods behind how I do things.... check out my 'baking tips' tab at the top of the page.

Friday, 27 April 2012

Armenian nutmeg cake

Is it that time of the month again already?!

Time for the Daring Bakers Challenge reveal…  this month Armenian Nutmeg Cake! There was also an option of creating Armenian Nazook, which looked deliciously intriguing but sadly I did not find the time to attempt a vegan version of this recipe also.

You can find the original recipe outline and instructions here.

The Daring Bakers’ April 2012 challenge, hosted by Jason at Daily Candor, were two Armenian standards: nazook and nutmeg cake. Nazook is a layered yeasted dough pastry with a sweet filling, and nutmeg cake is a fragrant, nutty coffee-style cake.

There were a few things I changed in order to veganize and healthanize this recipe: I used soy milk to replace regular milk, I reduced the quantity of sugar and added some polenta so that the base layer maintained some crunch, I use coconut butter and reduce the quantity by adding soy yoghurt to substitute in part. Lastly I used wholemeal spelt flour as my usual flour of choice when baking.

The cake turned out quite well, it was light and airy although not very deep, I think if I made this again I would use a 7” or 8” pan. It ws delicately spiced and not over sweet which I really liked. However, I made a bit of a silly mistake by not fitting the base of the pan tin correctly so that some of the mixture leaked through. Silly me! This meant my crust was a little messy and it was also a bit crumbly.  I was keen to have another go at getting the crust sussed! In my second attempt I added a little ground chia to help the mixture stick together. This time I also decided to go down the route of mini muffins with a little base mixture pressed into each muffin mould with the end of a rolling pin.  This time the mixture was not crumbly at all but it was not very crisp either- I wasn’t sure if it should be?  I have therefore come to the conclusion that in order to get a crisper denser crust you would need to include nearer the full quantities or sugar and butter. I’d be interested to get thoughts on how the base turned out for you?

Either way I really enjoyed the taste of this cake, a lovely change from the norm as I usually opt for fruity flavours. Even though the name of the cake is ‘nutmeg’ you can use any warming spices you wish such as cinnamon and cardammon depending on you preferences. I used a combo of cinnamon and nutmeg (I just had to get cinnamon on there somewhere!) Similarly you could decorate the top with any nuts you wish (or go crazy with some chocolate shavings!...shhhh you didn’t hear that from me!)


Recipe: Armenian nutmeg cake

Makes  a  9” cake

Ingredients

1 cup soy milk
Just under 1 tsp baking soda
2 cups spelt flour- mix of whole and white
2 tsp baking powder
½ tsp cinnamon
1 tsp nutmeg
1/2 cup rapadura plus a pinch of stevia
¼ cup polenta (to add crispness)
1/3 cup coconut butter/oil
1/3 cup soy yoghurt (or apple puree)
1 tbs ground chia or flax and 2 tbs hot water
½ cup flakes almonds and desiccated coconut

Method

Mix the soy milk and baking soda and set aside.
                                                                                      
Mix the flour, baking powder, spices, rapadura and polenta in a food processor. Add the coconut butter and yoghurt/apple and mix to form crumbs.

Press half the mixture into a cake pan (or in the bottom of cupcake moulds) to form a base.

Add the chia egg and milk mix to the remaining dough in the food processor and mix to form a lumpy batter. Pour the batter over the base mixture in the pan. Sprinkle nuts over the top.

Bake at 180C for approx. 30-40 mins until lightly golden and a skewer comes away clean.


For tips and info on recipe measurement conversions, ingredients, substitutions and the methods behind how I do things.... check out my 'baking tips' tab at the top of the page.

Tuesday, 27 March 2012

Dutch crunch rolls (aka tigerbread)

It’s that time of the month again…the Daring Bakers Challenge.  This month it was tiger bread, or Dutch Crunch as it’s also known…though I has never come across that name before (I like learning random new things!)

Sara and Erica of Baking JDs were our March 2012 Daring Baker hostesses! Sara & Erica challenged us to make Dutch Crunch bread, a delicious sandwich bread with a unique, crunchy topping. Sara and Erica also challenged us to create a one of a kind sandwich with our bread!

In the UK we say  ’tiger bread’…well most of us do, other than this one little girl who had other ideas! 


(I would have to agree that giraffe bread is indeed much more appropriate!)
 
I decided I would try a couple of options for my bread rolls, My favourite spelt flour rolls made in my Thermomix plus a gluten free version.  Considering I’ve never attempting gluten free bread before…was a DB challenge really the right time to start? Well the result was definitely edible but very dense and not very ‘bread like’. I will have some further attempts and post a winning recipe at a later date. So for now, below you have the spelt option, but of course you could use any soft topped roll/loaf recipe you like and simply add the tiger bread paste prior to baking. 

The tiger bread topping it certainly something I’ll be experimenting further with, I was even wondering whether these flatbreads would accommodate a topping even though they are grilled and not baked…curious now! I also wondering whether the topping could be sweetened and used in a semi-sweet tea bread form.

The second half of the challenge was to make a sandwich from the bread. My filing consists of spinach leaves and a ‘dip’ which I often also use for my sandwiches  (though these days it’s rare that I have an actual sandwich so this was quite a novelty).  I love a creamy spread but don’t want to resort to fakes vegan cheezes or butters if I can help it..  This is a lentil and peanut dip, the recipe for this specific dip is not yet up on the blog, but for a similar filling option check out this dip. I love how versatile dips can be…sandwich fillings, pasta sauces…er ok, well that are probably tons more ways to use them too!

Back to the tiger bread topping. I loved the fact that this was such a simple recipe and easy method, and it is naturally gluten free made with ingredients I typically have in my baking boxes anyway.  I did a little research and read a few comments from others in the forum and decided to opt for a sesame paste with a little molasses and marmite for extra colour and kick. It made the bread super tasty!


My lentil and root vegetable dip (or sandwich filling). 


Recipe: Easy rolls (made in the Thermomix, kneading times etc may need adaptation without)

280g cold water.
1 tsp sugar
2 tsp dried yeast
1 tps salt
520g wholemeal or white spelt flour

Method:

Add the water, sugar and yeast to the TM and heat sp2 for 90 seconds. Add the salt and spelt flour and knead for 4 minutes on the dough setting.

Leave in the TM bowl for the dough the rise for approx. 1 hour. (Allow the dough to roughly double in size).

Remove from the bowl and shape into rolls. Place on a parchment lined baking tray and leave to rise for another hour. Before baking at 200C for 10-15 minutes until golden (keep a close eye to check for colour).


Recipe: Dutch Crunch topping

(note- begin preparing the bread topping 20 mins before the end of the final bread rising period)

6 tbs rice flour (white or brown non-glutinous)
65ml warm water
1 ½ tsp sesame oil
½ tsp molasses
½ tsp marmite
1 ½ tsp dried yeast

Method:

Add all the ingredient s to a small bowl and mix well together to form a smooth paste. Allow to stand for 15 minutes,

Paste onto the top of the bread rolls/loaf…thickly spread for large cracks and thinly spread for small subtle cracks.

Bake the rolls immediately.

(note- some suggest leaving the bread with the topping to sit for 10 mintues prior to baking but others say there is no need for this. I didn’t wait)


 These are the gluten free attempts. the topping didn't crackle as well and the rolls 
themselves are very dense.

For tips and info on recipe measurement conversions, ingredients, substitutions and the methods behind how I do things.... check out my 'baking tips' tab at the top of the page.

Monday, 27 February 2012

Gingerbread loaf

My second Daring Bakers Challenge reveal has arrived. 

This months challenge...Quickbread. 

The Daring Bakers’ February 2012 host was – Lis! Lis stepped in last minute and challenged us to create a quick bread we could call our own. She supplied us with a base recipe and shared some recipes she loves from various websites and encouraged us to build upon them and create new flavour profiles.

You can see the challenge details here.

It was a very versatile challenge in which we had to come up with a recipe for a loaf, muffin or popover (i’d never even heard of that word before!) that didn't use yeast but instead used baking powder/soda as the raising agent. I fancied making a loaf, and as much as I love a good old banana bread (and was very tempted), that is something i’ve made many times before and my veganised banana plantain loaf was even one of the first recipes on my blog.

So, I had another think and a riffle through my folder of scribbles, notes, cutout, printouts of various recipes from all over.  I came across a gingerbread loaf that I had already written a few notes against with ideas for veganising.  I went a little further than this to bump up the healthy factor and used grated pureed carrot to sub most of the oil. The result was amazing, not at all dry but also not at all gummy as i’d sometimes found previously when just using agave nectar as the sweetener. It wasn’t too sweet and was a cross between a cake and a delicate bread with its fine texture.

I baked the ‘mixture in three mini loaf tins so I could vary the toppings. The other reason for this was to reduce the risk of any issue with the loaf browning on the top before being cooked in the middle. Judging by the texture of the loaf I think this may not have been an issue anyway, but I would still suggest using mini loaf tins or alternatively a shallower cake pan if you have them.  

For the tops I kept one loaf plain, decorated the second with chunks of crystalized ginger prior to baking (ok I accept that does have a little refined sugar), and covered the third in a thin sticky layer of chopped up crystalized ginger and agave syrup once baked but whilst the top was still warm.....all three options were delicious!

I served the loaf warm with a dollop of soy youghurt.


Recipe: Gingerbread Loaf

Makes 3 mini loaves (or 1 large)

Ingredients-

1 ½ cups wholemeal spelt flour
1 tsp baking soda
¼ tsp baking powder
1 tbs ground ginger
1 tsp cinnamon
Pinch salt
1 tbs ground flax/chia and 2 tbs hot water
2 tbs molasses
½ cup agave syrup and ¼ tsp stevia
1 tbs freshly grated ginger
1 tsp oil (I used rapeseed)
2 carrots grated/pureed
1 cup soy milk
Chopped crystallized ginger for top- optional

Method

Mix together the wet ingredients. Mix together the dry ingredients in a separate bowl and then add to the wet. Mix through lightly and then pour batter in to three mini greased/lined loaf tins (approx. 15cm length).

Sprinkle finely chopped crystallised ginger over the top of the loaf if desired.

Bake at 180C for approx. 30 mins. Check with a skewer to see when done.

Note: I used 3 mini loaf tins to eliminate any potential issue of undercooking/gumminess in the centre. In the past when I have used larger loaf tins the centre has not cooked before the top begins to brown.  This cake crumb was very light and so may not present any problem with a larger pan.


For tips and info on recipe measurement conversions, ingredients, substitutions and the methods behind how I do things.... check out my 'baking tips' tab at the top of the page.

Friday, 27 January 2012

Scones- back to basics with a difference!

I like a challenge, the chance to do something a little different, the chance to explore a common theme with a little of my own imagination thrown in. I also enjoy seeing how others respond to an idea…

…for example if you were asked to make scones (aka American biscuits)  what would you come up with?

Sweet, savoury, a circle of wedges, round scones cut with a cutter, fruity scones, chocolate scones, scones served with jam and cream for afternoon tea, scones served as a side with a casserole or broth…the list goes on!

I have recently joined the Daring Bakers and this was my first monthly challenge….scones! The challenges are set on the 1st of every month with a publishing date of the 27th of every month. It’s been very interesting to check out the results of the other bakers and to see just how different the outcomes can be.

For me the basic scone recipe presents simply the principle, one which I can then tweak to create a healthy vegan adaptation.  I opted for sweet scones as would be traditionally served with jam and cream (or in my case sugar free jam and a dollop of soy yoghurt). This is the type of scone with which I am most familiar; I remember days gone by cuddling up on the sofa with a warm wedge of light and fluffy baked scone slathered in jam and squirty cream!

I haven’t had too much experience with baking healthy vegan scones (or any scones for that matter), other than the first batch I ever made- my Halloween pumpkin scones which were a resounding success! This gave me a little confidence boost and I was keen to get cracking!

Traditional scones, whether sweet or savoury, consist primarily of plain flour, butter and milk. I adapted the basic recipe to incorporate spelt flour, almond milk and coconut oil and I’m pleased with the overall result…a good base for many flavour combinations.  I had three attempts at this challenge, tweaking as I went and reducing the liquid slightly and adding a little baking soda along with the baking powder, and adding a little dried fruit.  The original Daring Bakers January recipe challenge can be found here.

So, question time...Do you call them ‘biscuits’ or ‘scones’? Do you prefer sweet or savoury? What’s your favourite flavour combination?


Recipe: Scones with walnut and cranberry

Makes approx. 6 wedges or circles (I made one batch of each)

Ingredients

1 cup mix of white and wholemeal spelt flours
2 tsp baking powder
½ tsp baking soda
Tiny pinch of salt
2 tables coconut oil (not melted)
Slightly over 1/3 cup almond milk (or other non-dairy milk of choice) plus extra for glaze
2 tsp agave syrup
¼ cup mix of chopped cranberries and dates (optional)

Method

Mix/sift dry ingredients well to maximise air in the mixture. 

Rub through the coconut oil with fingers to achieve a breadcrumb like consistency, then mix through the dried fruit if using. 

Mix agave into the milk and add liquid to the dry ingredients. Use hands to create a soft dough ball that should be slightly sticky but manageable.

On a floured surface, knead dough into a circle approx. 2cm thick and either cut into 6 wedges or circles using a cutter. Brush a little ‘milk’ over the tops to glaze.

Lay close together on a lightly greased baking sheet and bake at 210C for 8-10 minutes until tops are golden. You may need to rotate halfway through to ensure an even rise.


Blog-checking lines: Audax Artifex was our January 2012 Daring Bakers’ host.. Aud worked tirelessly to master light and fluffy scones (a/k/a biscuits) to help us create delicious and perfect batches in our own kitchens!


For tips and info on recipe measurement conversions, ingredients, substitutions and the methods behind how I do things.... check out my 'baking tips' tab at the top of the page.

you may also like

Related Posts Plugin for WordPress, Blogger...