Showing posts with label wholefood lent challenge. Show all posts

Saturday, 20 April 2013

It’s all about...dates, dates, dates!

I use dates a lot!! 

Particularly this last month or so, as I cut out syrups of all kinds during lent in a bid to use only whole food sweeteners, and to be honest I have enjoyed keeping this up! That’s not to say I won’t use agave, brown rice syrup or maple syrup ever again, I have simply enjoyed the challenge of not relying on these foods.


Dates have therefore become by go-to versatile sweetener above and beyond bananas or other dried fruits on the basis they are so neutral in taste and still pack a lot of sweetness in to a small bite.

I have written a few posts about various homemade date products before, but I figured it made sense to do a bit of a round up here with all the basic recipes in one place for easy reference, plus this old date paste post was in need of a little refresher (and much better photos!)

I’d love to hear how you use dates and other dried fruits in your baking?

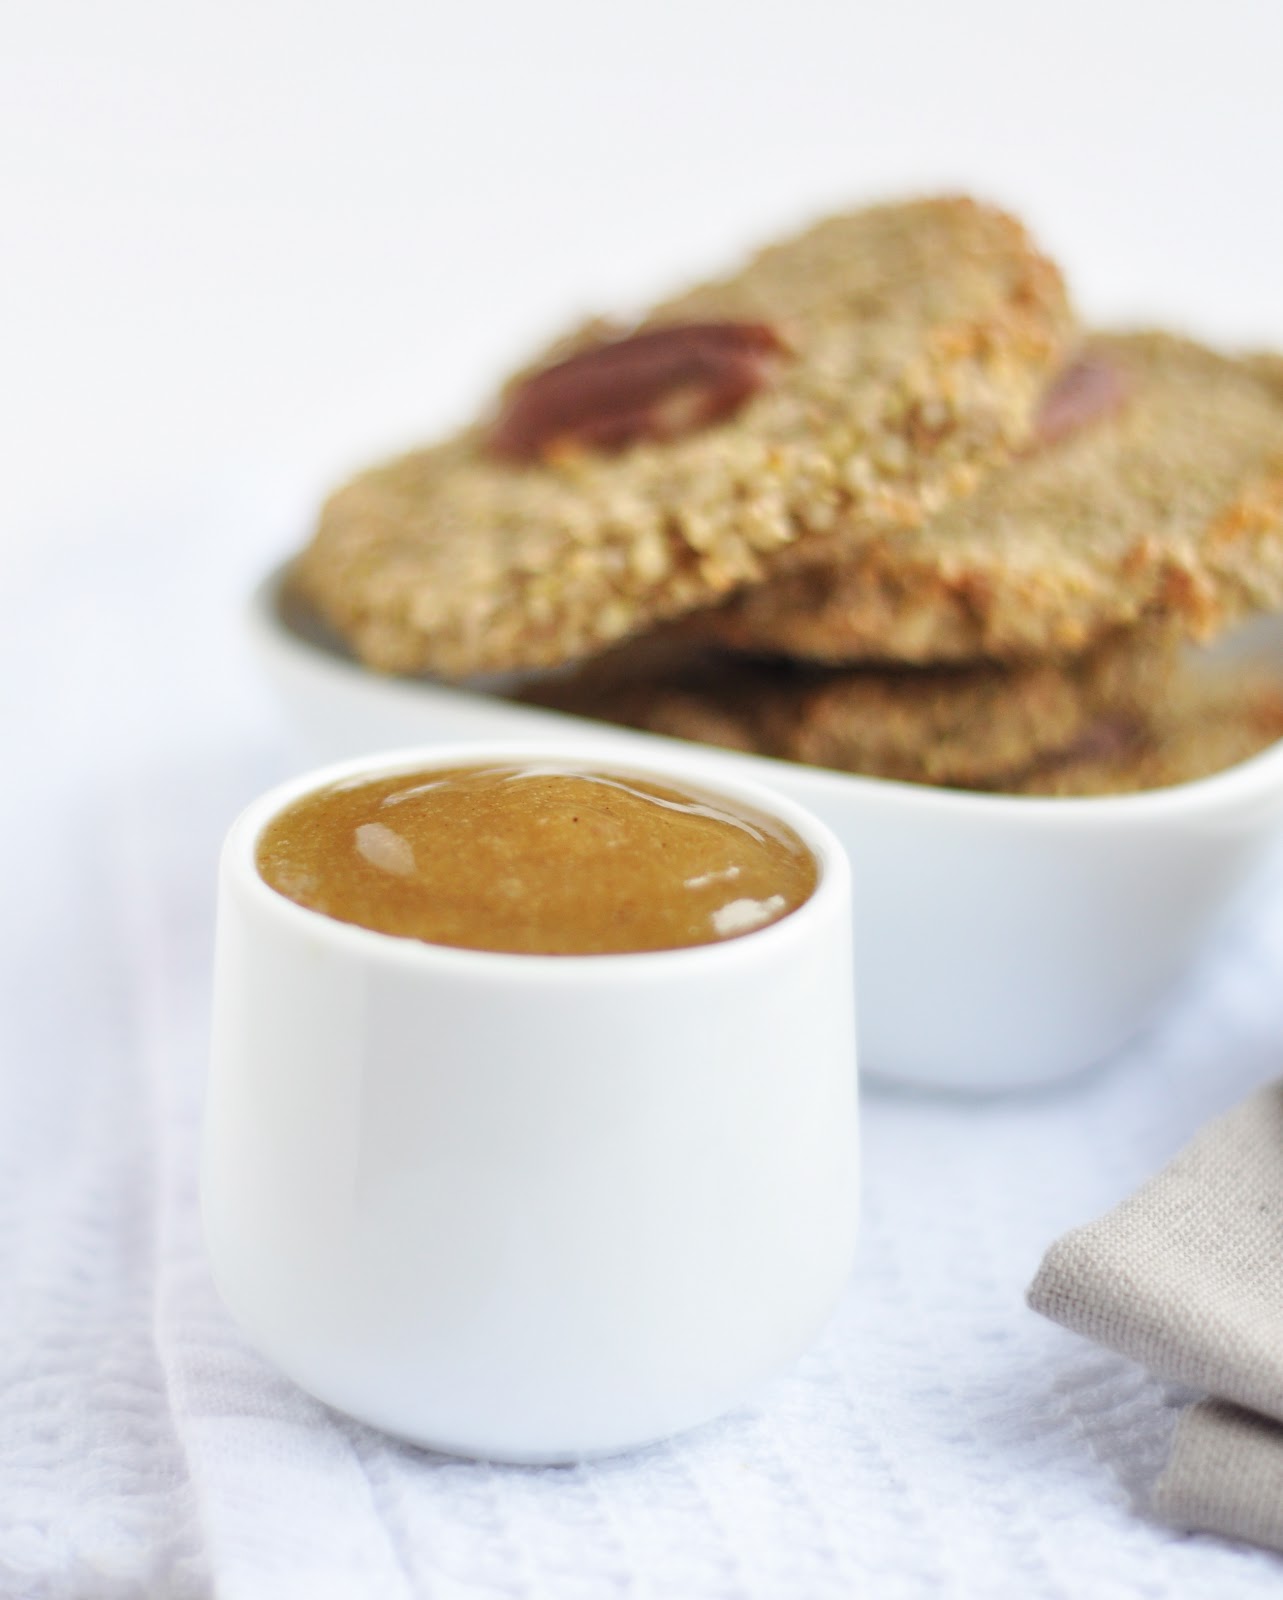
Date paste

Recipe: Date paste

Ingredients 

1 packed cup of dates (I used 1 heaped cup to compensate for the fact the dates were whole and not packed in- so you want to visually aim for a fairly packed cup)
½ cup hot water
1 tsp vanilla extract- optional

Method

Place the dates in a small/medium bowl. Pour the required amount of boiling water over the dates and leave to soften for approx. 30 minutes. Once softened pour the contents of the bowl, along with a little vanilla extract, in to a blender (I used my thermomix) and blend until smooth.

Spoon the paste into a jar and store in the fridge if not using straight away.  This keeps for at approx 1 month in a sealed container.


date syrup


Recipe: Date syrup 


Ingredients 

1 packed cup of dates (I used 1 heaped cup to compensate for the fact the dates were whole and not packed in- so you want to visually aim for a fairly packed cup)
1.5 cups hot water- for a smoother easily spoon-able syrup
1 tsp vanilla extract- optional
1/4 tsp pure liquid stevia (to gove back sweetness diluted by the water)

Method

Place the dates in a small/medium bowl. Pour the required amount of boiling water over the dates and leave to soften for approx. 30 minutes. Once softened pour the contents of the bowl, along with a little vanilla extract, in to a blender (I used my thermomix) and blend until smooth.

Pour the syrup into a jar and store in the fridge if not using straight away.  This keeps for at least two weeks in sealed container.


date sugar


Recipe: Date sugar

Makes 1 cup

Ingredients

3 cups fresh dates (I used deglet noor- so as big and sticky as medjool)
1-2 tsp starch (I used arrowroot but others will also work)

Method

Halve the dates and lay them in a single layer on a lined baking sheet.

Place in the oven on the lowest temperature (mine was approx 50C) and ‘bake’ for about 3 hours, turn the oven off and allow to cool whilst still in the oven. I left mine in their overnight. They should end up much harder and dryer.

Placed in a high powered food processor (I used a Thermomix) and blitz on high for 30 seconds. Add 1 tsp of starch and blitz for another 30 seconds.

At this stage I lots of small clumpy grains that were still a little sticky. Lay this mixture out on the baking sheet once again in an even layer and bake at a low temp for another hour until the mixture is very hard to the touch.

Once fully cool, re blend the mixture in the processor adding a touch more starch if necessary (the starch helps to prevent clumping).  You could also add other flavours such as vanilla or cinnamon here if desired.

Once the date sugar is as fine as you can get it and there is no moisture present. Pour into an airtight storage container for future use. You will find that the date sugar hardens together over time which is normal. Use a fork to loosen for use.

Notes: you may find that if you are able to ensure the dates are rock hard from the first bake the resulting sugar will be fine enough from the first blend without the need for re-baking. You can also use a dehydrator to achieve the same affect. Follow the manufacturer’s instructions.
 

I also use ground dates as the basis for these breakfast sprinkles.


Here is a little list of a few of my date sweetened recipes:

Bakes Apple Oatmeal

Chewy Buckwheat Clusters

Spiced Apple Pancakes with Date and Walnut

Toffee Granola Bars

Quinoa Breakfast Cakes

Dark Chocolate Pudding

Sticky Toffee Pudding


For further guidance on making gluten free choices please see this post.

For tips and info on recipe measurement conversions, ingredients, substitutions and the methods behind how I do things.... check out my 'baking tips' tab at the top of the page.

Friday, 29 March 2013

Whole Foods Lent Challenge....Done! (plus Easter roundup)

This weekend it is Easter....and today is Good Friday meaning that it is the last day of lent.

My congratulations to all those who challenged themselves for the last 6-weeks regardless of whether you teamed up with me to take the 'Whole Foods Challenge' or whether you opted for a personal challenge of your own...if you've made it this far I applaud you!


You may remember that as part of the challenge I decided that I was going to go sugar free in all my baking endeavours...well I can tell you now that it has been a resounding success. I admit that I was a little nervous to begin with and I worried that there would be a lot of savoury recipe being posted on my blog... ha ha! But with the miracle food that is dates, I was not at a loss at all.

In fact I see no reason to change my ways. I am more than happy to continue with this mindset. That said, I am not going to restrict myself in that if I come up with a recipe that is clearer more suited to using a little agave or maple syrup then I am happy to use it, it's just been great to move away from relying on these sweeteners day to day.

I have also now updated the Lent Challenge 2013 menu tab. As well as going sugar free I also decided to give myself the further challenge of '6-weeks to 6-pack'...that did not go so well... see the link to check it out (or scroll towards the bottom for the outcome highlights). I have more ideas up my sleeve for all that.... I will not be beaten!

So for today I simply have a roundup.... the summary of my 'sweet' sugar free experiments are listed below with my three favourites picked out, followed by a visual roundup of Easter themed recipes.

I will have one final Easter post going up tomorrow...its a speedy single serve recipe perfect for a last minute celebration!

I am also going away on holiday to trek the Welsh mountains for all of next week and I don't know how plugged in to the internet i'll be whilst away. Hopefully i'll be able to keep an eye on things but I apologise now if there is a delay in reply to emails or comments. I have a few posts scheduled to keep you going in the meantime.

A sweet summary of my sugar free challenge!

(they look so good I can barely believe it myself!)


Healthy Cadbury's Cream eggs (favourite)

Buckwheat Balls

Quinoa powder breakfast Cakes

Green smoothie peppermint cheesecake (favourite)

Choc berry buckwheat bake

Chewy choc quinoa cookies (favourite)

Whipped buckwheat porridge

Chocolate almond crackles

Gingerbread ice cream

Chewy buckwheat clusters

CADA...zing!

Baked apple oatmeal with date sugar

Date sugar


 An offering of Easter recipes...


This obviously had to go in!
Healthy Cadbury's Cream eggs

Hot choc cream cups

Classic Easter biscuits

I know you see these truffles everywhere....but they are so good!


angel delight
raw carrot cake balls

carrot cake pancakes


carrot burgers...these are a reader favourite

chia banana pudding

healthy banana frosting

quinoa balls


...and just for giggles...!

Easter bunnies....ok they look a bit ridiculous I admit!


Thursday, 7 March 2013

Chocolate almond crackles

I recently posted this little gem of a recipe over here at the Real Food Source.... I have quite a collection of recipes over there now, some of which are a variation on my own posts.  This recipe is one such recipe, and instead of going for toasted coconut flakes and chia seeds I opted for an 'almondy' concoction! I think chocolate and almond pair so beautifully.


If these don't make for the perfect beautiful and healthy Mothers Day alternative to a box of chocolates then I don't know what does! Can you beleive this recipe still holds true to my sugar free Whole Food Lent Challenge.

These little treats only take 5 minutes to create and look almost too cute to eat. Plus true to my nature this recipe provides plenty of scope for changing things up exactly as you wish, and if you'd like to add a little agave or other syrup then you can my all means. I was simply going for the truly sugar free option and in my opinion the intense darkness of the chocolate is perfectly complemented by the sweet aftertaste of the dried fruits.

I have used raw cacao liquor but a semi sweet dark chocolate or in fact any melty dark chocolate would work here. Just make sure its not too sweet since the darkness really does add to the indulgent nature of the recipe. The almond extract is also a perfect companion- my favourite flavour combination so far. I also find the almond tastes amazing in these ultimate dark chocolate truffles for the same reason.

Use crinkle edged mini petit four cases if you can find them, simply because they give such a pretty finish to the moulded chocolate. You will see in some of the photos below that there are also some longer misshapen circles with 'white stuff' on top. I ran out of fruity filling but still had melted chocolate mix left, so I placed a date in a few cases and enrobed it with the mixture and then sprinkled ground almonds on top. Even simpler but just as good! Yay for dates :-)

You can find more simple no-bake treats perfect for Mother's Day here.

Or for a crazy indulgent special breakfast (or dessert) for two... you have to try these hot chocolate cream cups. They first made their debut for Valentines Day but I cant help by parade them again here- just too good to miss!


Recipe: Chocolate almond crackles

Makes 8 mini cups

Ingredients

1/3 cup chopped or flaked almonds
3 tbs fine oats or almond flour (other flours should also work)
¼ cup dried fruit paste (I used prunes and cherries)
--------
¼ cup cacao liquor (or low sugar dark chocolate)
1 tbs coconut oil
Pinch stevia
½ tsp almond extract


Method

Blend dried fruits to form a thick sticky paste. Add the almonds and oats/flour and pulse lightly to mix through.

Spoon small teaspoon sized dollops of the mixture into small petit-four cases (or in ice cube trays).
To prepare the chocolate drizzle, place all ingredients in a small bowl and microwave on medium power for approx 90 seconds or until full melted. Stir through and lightly drizzle across the top of each mound, the mixture will pool in the bottom of each case. Add a few extra nuts if desired.

Chill to set until serving. 


For further guidance on making gluten free choices please see this post.

For tips and info on recipe measurement conversions, ingredients, substitutions and the methods behind how I do things.... check out my 'baking tips' tab at the top of the page.

Saturday, 2 March 2013

Gingerbread ice cream


I had a friend over to visit last Sunday and in true Sunday style we had a full on roast dinner complete with this nut roast, I actually used predominatly sunflower seeds this time which worked very well.

For dessert I wanted something quick easy and not too heavy after such a big main course. My hot pear and gingerbread crumble was the perfect fit- particularly since I had some of my buckwheat granola left over to use on top! I made a large batch of saucy topping and had quite a lot remaining afterwards so...what to do?

...Gingerbread ice cream! 


this gingerbread sauce was turned into ice cream!

I’ve not made many frozen desserts in the past, partly because I don’t have an ice cream maker, but every now and again curiosity gets the better of me. This is one such time.  This ice cream also perfectly fits the theme of my sugar free Whole Foods Challenge

If anyone does try this out with an ice cream maker please let me know how you get on and how creamy the ice cream is?  Without an ice cream maker this little concoction has some ice crystals and is more like a sorbet, but in actual fact I think this texture suits the dessert really well as it is a very refreshing after dinner experience and would make the perfect accompaniment to a an apple pie or pear crumble (it could replace the sauce on top of the hot pear curmble).

The strength of the ginger dominates the banana which is what I was looking for, of course the banana undertones are there in the background but I felt this flavour combo struck a great refreshing but mellow balance. I used soy yogurt in my recipe, and have not tried other substitutions, but you may find that full fat coconut milk gives a creamy texture. 

I toped my icecream with a simple dark chocolate drizzle made from melted cacao liquor, melted coconut oil and a little liquid sweetener. It freezes upopn contact with the ice cream for a lovely 'crack' as your spoon dives in. You could also dust with lemon zest, nuts or crystalised ginger if you desired.


Recipe: Gingerbread ice cream

Makes one small tub

Ingredients:

2 bananas (approx 200g peeled weight)
equal weight in vegan yoghurt (or coconut milk)
1/4 tsp pure stevia
1 tbs ground ginger
1 tbs fresh ginger (use more or less to taste)
1/2 tsp ground cinnamon

Method:

Blend all ingredients together until very smooth. Pour into a freezer container and freeze stirring twice during the following 2 hours as it freezes.


For further guidance on making gluten free choices please see this post.

For tips and info on recipe measurement conversions, ingredients, substitutions and the methods behind how I do things.... check out my 'baking tips' tab at the top of the page.

Thursday, 28 February 2013

Chewy buckwheat clusters

You should all know by now that i'm a little obssesed with oats...and that doesn't look set to change anytime soon! BUT there is a new kid on the block...in the form of buckwheat. I had a top up delivery of foodie delights from my wholesaler last week which included 10 kilos of raw buckwheat groats!


Up until now I've genrally milled the buckwheat to make flour, since that is the GF flour of choice for the majority of my recipes. However, recently a few recipies using the whole groats recently caught my eye, in addition to a few energy bar experiments that I wil be rervealing more about shortly! This buckwheat granola by Angela over at Oh She Glows particulalrly grabbed my attention and so I wanted to try out my own spin on it!

Anyway, back to the recipe itself. This is a buckwheat granola and I simply swapped buckwheat for the usual oats and in keeping with my sugar free WholFood Challenge I have used date syrup to sweeten and bind, it works perfectly and gives lovely crispy chewy nuggets of buckwheat delight!

Here I made a date syrup with roughly a 4:1 ratio of dates to water made by soaking the dates in hot water and then blending until smooth (you can make a jars worth and store in the fridge) Once again, we have a very versatile recipe as a great base for ‘mix ins’. Just be sure that the balance of dry ingredients to wet stays roughly the same to ensure the mixture clumps together well as it is baked.

I actually made a similar recipe using a few different ingredients including coconut sugar for a more itense caramelly flavour. You can find the recipe here at Real Food Source  (along with many other recipes I have created for them).


Recipe: Buckwheat granola clusters 


Makes 1 ½ cups

Ingredients:

1 cup buckwheat groats (soaked and well drained*- they don't need to be totally dry)
¼ cup date syrup and a pinch of stevia to taste
¼ cup coconut flakes or other nuts/seeds (optional)
2 tbs peanut butter (or other nut butter) this should be drippy
1 tsp cinnamon
pinch of sea salt (omit if using salted butter)


Method:

Mix the date syrup with the nut butter of choice, cinnamon and salt. Add the buckwheat groats and coconut flakes, nuts or seeds and mix through lightly until well coated.

Lay in clumps in a even layer on a lined baking sheet and bake on a low temperature- approx 140C for approx 30-40 mins until just golden. The granola will still be soft and sticky but will crisp up as it cools.

*Soak the buckwheat for a few hours or overnight, drain and rinse at least twice as buckwheat residue is very slimy. I prepared a big batch and kept the remainder in the fridge for a few days. to use for other things,


For further guidance on making gluten free choices please see this post.

For tips and info on recipe measurement conversions, ingredients, substitutions and the methods behind how I do things.... check out my 'baking tips' tab at the top of the page.

Wednesday, 27 February 2013

Week Two of 'six-weeks to six-pack'

I have updated my 'Lent Challenge' page....click the tab at the top and scroll down to check out my progress report for week two...it's been a tough week in a few ways!

Bring on week three....come on you can do this!


Amongst other things this week included!


See you for WEEK THREE this time next week! :-)

Tuesday, 19 February 2013

Baked apple oatmeal with date sugar

My first date sugar recipe!

For those of you who missed it, I had a little reflection on sweeteners and set myself a lent challenge, date sugar is probably one of the healthiest options out there and so I figured it made sense to make my own. So....lets go date crazy!


I decided to keep it pretty simple for my first attempt. A baked oatmeal recipe that I felt pretty sure would work in principle, since I’ve created so many baked oatmeal dishes before. The date sugar was sprinkled over the top to create a caramelised glaze, whilst extra dates were used throughout to provide additional sweetness. You could use other forms of granulated sugar such as coconut sugar or rapadura (sucanat) but I loved the rich caramelised flavour the dates gave plus its arguably the healthiest option.

In the same theme at the carrot cake baked oatmeal and banana bread oatmeal, I thought I’d incorporate some veggies....you can omit the courgette if you like, thought I dont think you can taste it at all? Just make sure you use a really flavoursome and tart apple so that the oatmeal is not at all bland.


Recipe: Baked apple oatmeal with date sugar 

Serves 2

Ingredients

1 apple cubed- use a tart flavoured apple such as a granny smith or a cooking apple
¼ cup courgette- grated (omit of preferred and use a larger apple)
1 tbs chia/flax seed
1 cup soy milk (or other vegan milk)
1 tsp cinnamon
½ cup oats
2 tbs chopped pecans or walnuts
1/4 cup chopped dates
2 tbs date sugar

Method

Reserve the chopped nuts and 1 tbs date sugar and mix all remaining ingredients together until well coated  and spoon into a greased oven dish approx 20x10cm. Press down and smooth the top before adding the nuts and pressing lightly into the mixture. Sprinkle with the reserved date sugar.

Bake at 180C for approx. 20 mins until the topping is golden. Serve immediately.  This also tastes good cold the next day!


For further guidance on making gluten free choices please see this post.

For tips and info on recipe measurement conversions, ingredients, substitutions and the methods behind how I do things.... check out my 'baking tips' tab at the top of the page.

you may also like

Related Posts Plugin for WordPress, Blogger...