Showing posts with label sauce. Show all posts

Saturday, 25 May 2013

Summer fruit slaw with chia berry dressing


My julienne peeler has been getting a bit of action again! But this time it’s not only with the veggies.


After the success of this simple cucumber and pineapple salsa, I was keen to experiment more with mixing the refreshing subtle taste of cucumber with other fruits.

Here I used any fruits I could get my hands on to julienne. For your reference...no, you cannot julienne a banana. Believe me I tried. It would have been the perfect shape so I am very disappointed! (I even tried with a frozen banana as I was that determined but nope it just wasn’t happening!)

The first time I made this slaw I had a large mango in my fruit bowl and that worked a treat, the second time I didn’t have a mango, hence why the photos below are mango-less but I have still added it to the recipe. I also used rhubarb which gave a great tart flavour contrast, though raw rhubarb is a little tough and stringy so you may want to cook it ever so slightly after julienning it- I left it raw, but it’s just an idea for you to try.

Throw in lots of cucumber, you won’t taste it against the sweetness of the fruits and I also added a simple fruity yoghurt and chia dressing to give an extra touch of sweetness.

Breakfast? Dessert? You choose.


Recipe: Summer fruit slaw

Serves 1

Ingredients:

½ cup cucumber noodles
¼ cup rhubarb noodles (cook lightly if desired)
¼ cup mango noodles
----
1tbs sugar free berry jam
2 tbs non-dairy yoghurt
1 tsp chia seed
Extra fruit/berries to decorate as desired.

Method:

Mix the yoghurt with the sugar free jam and chia seeds and set aside to thicken slightly. 

Prepare the fruit and cucumber noodles and place in a swirl in a serving plate/bowl leaving a well in the centre. Spoon the jam mix into the centre of the slaw.

Decorate with berries  to serve as desired. You could also add a sprinkle of cinnamon, vanilla bean powder, cocoa, coconut, nuts.....


For further guidance on making gluten free choices please see this post.

For tips and info on recipe measurement conversions, ingredients, substitutions and the methods behind how I do things.... check out my 'baking tips' tab at the top of the page.

Tuesday, 21 May 2013

'Not as you know it' Nutella

Yes, yes I know there are plenty of 'healthy' 'vegan' nutella recipes already lurking around the blogosphere... and for good reason, who doesn't like a drippy spoonful of thick creamy chocolate?


So far I have avoided the temptation to make my own. Partly because  had concerns as to my self control once made, but also many of the recipes I'd come across had a number of time consuming steps and also many recipes also left a lot to be desired in the healthy department.

I made my first version of the 'Nutella' a week or so ago here for the Real Food Source. It was delcious and the coconut sugar gave a lovely caramelised touch.  I wanted to reinvent it again with a slight twist this time using my ever faithful date paste.

You'll notice there are no roasted hazlenutsa in this recipe, so technically its not Nutella at all...rather a chocolate almond spread. Somehow that description didn't tantalize my tatsebuds in quite the way it should! The chocolate really takes centre stage and the creamy almond paste (make your own or buy it) just brings it all together in a rich and creamy spread.

Plus if you add a little extra water you'll have an amazing chocolate drizzle sauce! Sooooo good.


Recipe: Healthy ‘Nutella’

Makes just under 1 cup

Ingredients:

1/3 cup almond paste*
1/3 cup date paste
3 tbs cocoa powder
1/3 cup boiling water

*almond paste is just blanched almond butter. Make your own or buy it for example here

Method:

Stir the cocoa into the boiling water until smooth. Add all ingredients to a blender and blend until very smooth. This works best with either a smallish sized blender or double the amount (the mixture had a tendency to fling itself to the edges of my large Thermomix and I had to scrape it down a few times)

Store in the fridge. it will thicken up a little. This would also be good mixed with a little hot water and served as a chocolate drizzle sauce. You may want to add a couple of drops of stevia to add sweetness if diluting as a drizzle.


For further guidance on making gluten free choices please see this post.

For tips and info on recipe measurement conversions, ingredients, substitutions and the methods behind how I do things.... check out my 'baking tips' tab at the top of the page.

Saturday, 20 April 2013

It’s all about...dates, dates, dates!

I use dates a lot!! 

Particularly this last month or so, as I cut out syrups of all kinds during lent in a bid to use only whole food sweeteners, and to be honest I have enjoyed keeping this up! That’s not to say I won’t use agave, brown rice syrup or maple syrup ever again, I have simply enjoyed the challenge of not relying on these foods.


Dates have therefore become by go-to versatile sweetener above and beyond bananas or other dried fruits on the basis they are so neutral in taste and still pack a lot of sweetness in to a small bite.

I have written a few posts about various homemade date products before, but I figured it made sense to do a bit of a round up here with all the basic recipes in one place for easy reference, plus this old date paste post was in need of a little refresher (and much better photos!)

I’d love to hear how you use dates and other dried fruits in your baking?

Date paste

Recipe: Date paste

Ingredients 

1 packed cup of dates (I used 1 heaped cup to compensate for the fact the dates were whole and not packed in- so you want to visually aim for a fairly packed cup)
½ cup hot water
1 tsp vanilla extract- optional

Method

Place the dates in a small/medium bowl. Pour the required amount of boiling water over the dates and leave to soften for approx. 30 minutes. Once softened pour the contents of the bowl, along with a little vanilla extract, in to a blender (I used my thermomix) and blend until smooth.

Spoon the paste into a jar and store in the fridge if not using straight away.  This keeps for at approx 1 month in a sealed container.


date syrup


Recipe: Date syrup 


Ingredients 

1 packed cup of dates (I used 1 heaped cup to compensate for the fact the dates were whole and not packed in- so you want to visually aim for a fairly packed cup)
1.5 cups hot water- for a smoother easily spoon-able syrup
1 tsp vanilla extract- optional
1/4 tsp pure liquid stevia (to gove back sweetness diluted by the water)

Method

Place the dates in a small/medium bowl. Pour the required amount of boiling water over the dates and leave to soften for approx. 30 minutes. Once softened pour the contents of the bowl, along with a little vanilla extract, in to a blender (I used my thermomix) and blend until smooth.

Pour the syrup into a jar and store in the fridge if not using straight away.  This keeps for at least two weeks in sealed container.


date sugar


Recipe: Date sugar

Makes 1 cup

Ingredients

3 cups fresh dates (I used deglet noor- so as big and sticky as medjool)
1-2 tsp starch (I used arrowroot but others will also work)

Method

Halve the dates and lay them in a single layer on a lined baking sheet.

Place in the oven on the lowest temperature (mine was approx 50C) and ‘bake’ for about 3 hours, turn the oven off and allow to cool whilst still in the oven. I left mine in their overnight. They should end up much harder and dryer.

Placed in a high powered food processor (I used a Thermomix) and blitz on high for 30 seconds. Add 1 tsp of starch and blitz for another 30 seconds.

At this stage I lots of small clumpy grains that were still a little sticky. Lay this mixture out on the baking sheet once again in an even layer and bake at a low temp for another hour until the mixture is very hard to the touch.

Once fully cool, re blend the mixture in the processor adding a touch more starch if necessary (the starch helps to prevent clumping).  You could also add other flavours such as vanilla or cinnamon here if desired.

Once the date sugar is as fine as you can get it and there is no moisture present. Pour into an airtight storage container for future use. You will find that the date sugar hardens together over time which is normal. Use a fork to loosen for use.

Notes: you may find that if you are able to ensure the dates are rock hard from the first bake the resulting sugar will be fine enough from the first blend without the need for re-baking. You can also use a dehydrator to achieve the same affect. Follow the manufacturer’s instructions.
 

I also use ground dates as the basis for these breakfast sprinkles.


Here is a little list of a few of my date sweetened recipes:

Bakes Apple Oatmeal

Chewy Buckwheat Clusters

Spiced Apple Pancakes with Date and Walnut

Toffee Granola Bars

Quinoa Breakfast Cakes

Dark Chocolate Pudding

Sticky Toffee Pudding


For further guidance on making gluten free choices please see this post.

For tips and info on recipe measurement conversions, ingredients, substitutions and the methods behind how I do things.... check out my 'baking tips' tab at the top of the page.

Saturday, 9 February 2013

Valentines hot chocolate cream cups

I love this recipe!

It worked perfectly, maybe even more perfectly than I had hoped when I dreamed it up in my mind... the gooey banana and thick creamy chocolate sauce make for the perfect Valentines breakfast decadence....or simply any breakfast decadence or dessert. Yes indeed this is another 'breakfast does dessert’ recipe.


Oh, and did I mention that it only take 5 minutes?

I originally tried this recipe without warming the sauce, more in keeping with this original recipe that inspired this creation and has proved immensely popular on the blog. It was ok this way, kind of like a chocolatey custard but a little bit thin and not indulgent enough for my liking (although you could always increase the nut butter/reduce water if necessary). So then in the second testing I fully assembled the cups and then warmed them! Amazing, the banana at the bottom of the cup cooks and goes all gooey and the nut butter and banana in the sauce thicken like a rich creamy mousse. It’s hard to explain....so instead I won’t keep trying to. Instead you should just go and make it!  

You could use a mild nut butter like almond or cashew for a subtle creaminess or go all out with peanut butter for a choco-peanutty-banana hit! Alternatively if you aren't a fan of banana, you could maybe use avocado or increase the nut butter content to achieve the same thickness- note I have not tried it this way!

P.S I loved the pretty white flowers in the photos. I ran round my house trying to find something pink or red that was feminine and Valentines-y, but nothing came to hand...then I remembered i'd bought some flowers last weekend.... not pink, but elegantly romantic- the perfect prop :-)  Now if i just had my very own romantic to present me with the flowers.....hmmmm?


Recipe: Hot chocolate cream cups

Makes 2 cupcake sized cups

Ingredients- cups

1/3 cup oats
1 heaped tbs cocoa powder
2 tsp ground flax
Vanilla extract to taste (approx. ½ tsp each)
1 tbs agave
2-3 tbs vegan yoghurt

Ingredients - Filling:

1 medium banana mashed (slice and reserve ¼ of the banana)
1 tbs nut butter (I used almond)
1 tbs cocoa
2 tbs water
A few mini dark chocolate drops

Method

Mix and mash all the 'cup' ingredients together well to form a thick sticky ball of dough. Divide into two equal pieces and press firmly into two cupcake ‘cups’ (I used silicone cups).

Cook on full powder in the microwave for 1 min or bake at 180C in the oven for approx. 10 minutes until just cooked and not sticky to touch

Meanwhile blend the filing ingredients together in a small blender, reserving a few slices of banana. If you are struggling with blending a small quantity, double the mixture and save some in the fridge for later. This makes a little more than needed for the cups anyway.

To fill the cups, place a couple of slices of banana at the bottom of each cup, fill with sauce and decorate with remaining banana and chocolate chips as desired. Microwave both cups at the same time on 70% power for 30 seconds. IMPORTANT: do not allow the mixture to bubble- watch closely and as you see it begin to want to bubble stop the microwave- you are done! For me, this happened at 30 seconds. (otherwise the mixture will boil over the edge of the cup and the texture will be impaired).

These are the cups served cold (not a huge visual difference but definitely better served hot!)
gooey...melty....gooey....melty...double chocolate....banana....


For further guidance on making gluten free choices please see this post.
For tips and info on recipe measurement conversions, ingredients, substitutions and the methods behind how I do things.... check out my 'baking tips' tab at the top of the page.

Thursday, 24 January 2013

Tahini sauce salad- low fat!

Salads have become much more of a big deal for me in recent months. By salads I’m talking huge bowl salads, soup accompaniment salads and hot salads.... gone are the days when salads were only served in summer!


I love hot food, there is something so satisfying about a plate of hot home cooked food, but I also appreciate the virtues of raw and uncooked foods and try to eat raw veggie sticks and salads when I can. It’s a simple fact that regardless of how healthy a food is, it will lose some of its nutritional value during the heating process. So, for me a hot salad is a great compromise... the benefits of raw veggies whilst satisfying the ‘hot’ meal side of things.  I nearly always eat my spinach raw in what ever dish I make, partly because raw spinach is so much more bulky and visually substantial that wilted cooked spinach. You eat with your eyes, right?


Back to the point of this post....it’s not all about the salad but the dressing! The dressing is a low fat twist on a traditional tahini dressing and I credit Susan over at Fat Free Vegan for her great recipe.


The salad itself is up to you... I threw together a mixture of roasted and raw veggies...  iceberg lettuce with raw grated carrot and cucumber chunks, along with some leftover chickpeas and roasted cauliflower and courgette that I chopped small and sprinkled with a little salt and pepper and allowed to roasted whilst I blended the dressing and prepped the rest of the dish. 

Assemble your salad and then go crazy with the healthy tahini dressing until your hearts content! This could also be used as a dipping sauce- reduce the water by half when you blend together.


Recipe: Low fat tahini dressing

Ingredients:

1/4 cup chickpeas
1/4 cup lemon juice
1/2 cup water
1 tbs tahini
2 tsp soy sauce
1 tbs ground chia
1 tbs nutritional yeast
1-2 garlic cloves- crushed
2 tsp fresh ginger (or 1/2 tsp ground)
black pepper to taste

Method:

Blend all ingredients together until very smooth. Dressing will store in the fridge for up to two weeks.


I served mine over a raw-cooked combo salad!


For further guidance on making gluten free choices please see this post.

For tips and info on recipe measurement conversions, ingredients, substitutions and the methods behind how I do things.... check out my 'baking tips' tab at the top of the page.

Saturday, 19 January 2013

Creamy herb mushroom gravy

As soon as I'd posted the recipe for the lentil and rosemary balls I realised that I'd never posted a gravy recipe on my blog!


A roast without gravy...well that would be a travesty!  

My go to vegan gravy is a mushroom gravy, currently its the only way I truly enjoy mushrooms in a cooked form (although I love them raw). With this version of the gravy I jazzed things up a little and infused it with some extra rosemary (yes I did mention I was a little rosemary obsessed at the moment!) I think the rosemary works so well with the flavours of a roast, I even throw the remains of the piece i'd cut from the garden in with the potatoes.

It tasted great, but the rosemary did give a slight green tinge which made the overall gravy a little off-coloured. It didn't bother me but I just thought i'd mention it so that you can add some browning if you prefer a richer colour. Alternatively chop the rosemary quite finely and add it after the blending process so that the leaves stay more intact without altering the colour so much.

This gravy is also a fabulous accompaniment to my traditional nut roast  and the chestnut roastIf you omit the fresh herbs you may want to increase the garlic and dried herbs a little to give it some oomph.


Recipe: Creamy herb mushroom gravy

Makes approx. 500ml

Ingredients:

1 tsp olive oil
1/2 a medium white onion
2 cloves garlic
1 1/2 cup veg stock
1 1/2 cup chopped white mushrooms
2 tbs nutritional yeast
1 tbs fresh rosemary (or herb of choice)
1 tsp mixed herbs
1/4 tsp salt
1 tbs soy sauce
2 tbs cornflour (or starch or choice)
1 tbs browning (this is optional for a richer colour- I didn't use this)

Method:


In a medium saucepan saute the onion for 5 minutes until softening. Add the garlic and mushrooms and saute for a further 5 minutes.


Add the seasoning and mix through. Add 1/2 cup of the veg stock and blend with a hand blender until smooth. Add the remaining ingredients and blend until smooth.

Bring the mixture to a boil and simmer for 3 minutes until the gravy has thickened before serving.

Note: you could add the rosemary last and blend lightly if you wanted larger rosemary flecks and would prefer to omit the browning whilst still and achieving a more visually appealing gravy colour.


For further guidance on making gluten free choices please see this post.

For tips and info on recipe measurement conversions, ingredients, substitutions and the methods behind how I do things.... check out my 'baking tips' tab at the top of the page.

Thursday, 10 January 2013

Triple gingerbread pancakes

This post and the last have actually been written up in reverse order to how they were created in the kitchen...simply because I got a little too excitable about the gingerbread sauce!


Triple ginger...?
...ginger pancakes, gingerbread granola, gingerbread sauce...you do like ginger right?  

Erm if not, maybe the pancakes below will be more up you street.


For the gingerbread recipe, I used my oatmeal blini recipe to get an oaty kick to start the morning, but you could use spelt or GF flours as per the other recipes linked above or your own tried and tested recipe, just add the ginger and molasses. For the sauce, see this post. My sauce was runnier than I had originally envisaged as I was too impatient to let the ingredients freeze fully and I spent too much time faffing around before taking the photos. For a thicker frosting to sandwich between the pancakes simply freeze for longer either before or after blending.

Gingerbread reminds me of the holidays, cold weather and warm sticky cake fresh from the oven....maybe i'm simply not ready to leave behind the seasonal festivities quite yet.


Recipe: triple gingerbread pancakes

makes 4 (easy to double)

Ingredients:

50g ground oats
1/2 tsp baking soda
70g soy milk
1 tsp ground chia or flax
1 tbs maple syrup
1/2 tsp molasses (optional to taste)
1/2-1 tsp ground ginger

For ginger bread sauce- see this recipe
For gingerbread granola- see this recipe

Method:

Mix all ingredients together in a small bowl ensuring no lumps.

In a lightly oiled frying pan, spoon pancake mixture into rounds and fry on a medium heat for approx. 2 minutes each side until cooked through and golden.

Serve immediately with gingerbread sauce and granola or other toppings as desired.

Note: you could also use a melon baller and make mini pancakes to skewer as per this recipe.


For further guidance on making gluten free choices please see this post.

For tips and info on recipe measurement conversions, ingredients, substitutions and the methods behind how I do things.... check out my 'baking tips' tab at the top of the page.
Tuesday, 8 January 2013

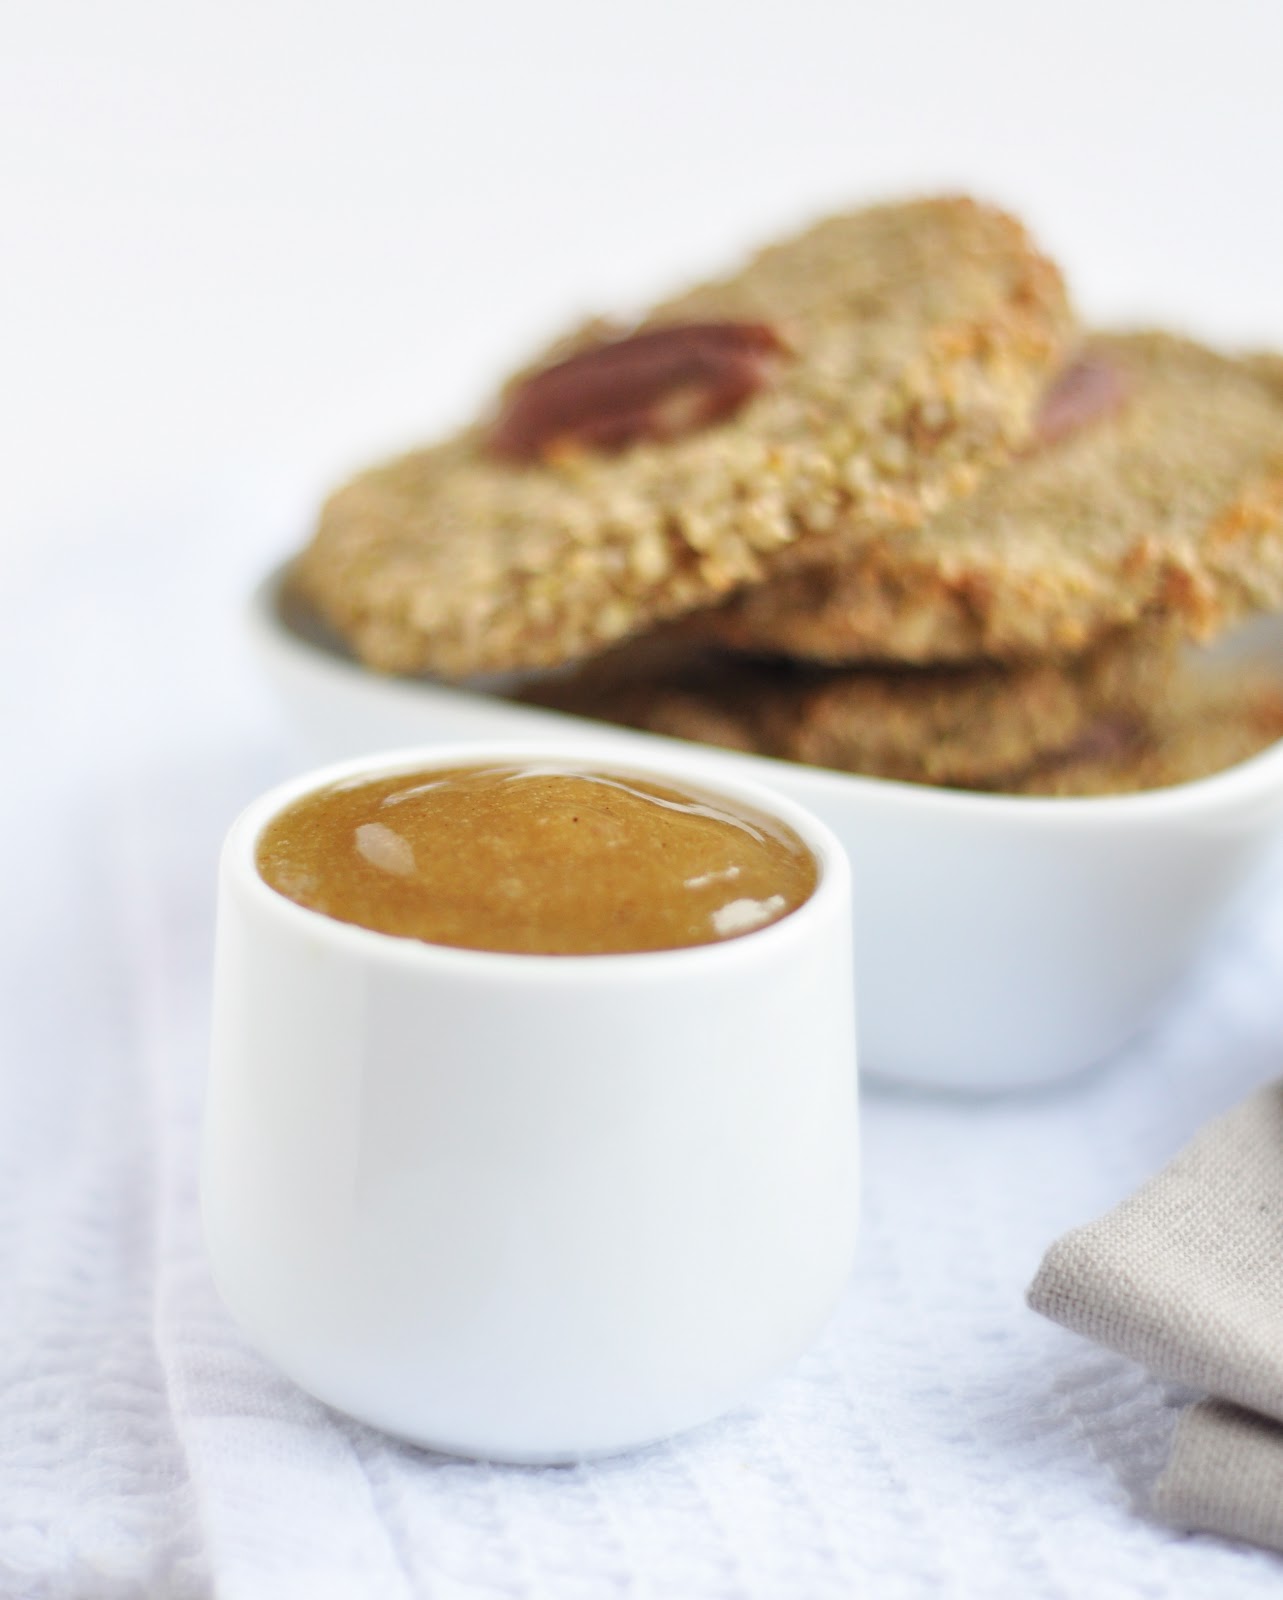
Hot pear with gingerbread sauce

This was the 'accidental breakfast' I declared on my facebook page last Saturday...most worthy of its declaration, it was amazing, maybe even better than the original breakfast it was a spin off from (although that is pretty good too and will feature tomorrow!)  or maybe it was so good as it was unexpected...those moments are always the best!


So, I actually ended up having two breakfasts on Saturday...but it was around 11:30am when I ate this second one so that's pretty much lunch right?

The gingerbread sauce is the star..so good. yet so simple! Just three ingredients and depending on whether you freeze the yoghurt/banana beforehand determines whether you get a thicker frosting or cream consistency. Once blended you could also re-freeze for a short while if necessary. One sauce...two ways!  Yes the sauce does have a taste of banana, more so if your banana is very ripe (mine was quite green and still perfectly sweet enough) but the strength of the ginger does dominate and create a lovely flavour compliment.

You could use it on pretty much anything dessert like (or breakfast like) in nature. Or warm a brownie or muffins and drizzle the sauce over. I whipped up a simple 5 minute breakfast, hot pear chunks, gingerbread granola and gingerbread sauce. Don't skimp on the molasses if you can help it as this creates a lovely sweet caramelised puddle of juice at the bottom of the dish from the hot pear juice.  This really is more like dessert,  I would eat this as dessert any day of the week and still feel like i'm treating myself... i'm already planning more gingerbread sauce creations to get my fix!


Check out these recipes for inspiration to add the gingerbread sauce to. In particular this sticky jamaican ginger cake...mmmmm with at hot gingerbread custard version.


Recipe: Hot pear with gingerbread sauce

Serves 1
1 pear cut into chunks
1/2 tsp molasses
gingerbread granola as per this recipe (or any granola topping)
gingerbread sauce- see recipe below (for a single serving I used approx 1/3 the amount the recipe below makes)

sauce: serves 1-3

1 small frozen banana (approx 80g)
equal quantity of frozen yoghurt chunks
1/2 tsp ground ginger to taste
(for a thicker frosting use frozen ingredients or freeze briefly before serving)


Method:


Chop the pear into fairly small chunks and add alongside a blob of molasses to a small bowl. Cook pear chunks in the microwave for 90 seconds.

Meanwhile blend the sauce ingredients together in a mini blender until well blended. 

Serve the hot pear and molasses mix topped with granola and drizzled with gingerbread sauce.


For further guidance on making gluten free choices please see this post.

For tips and info on recipe measurement conversions, ingredients, substitutions and the methods behind how I do things.... check out my 'baking tips' tab at the top of the page.

Friday, 4 January 2013

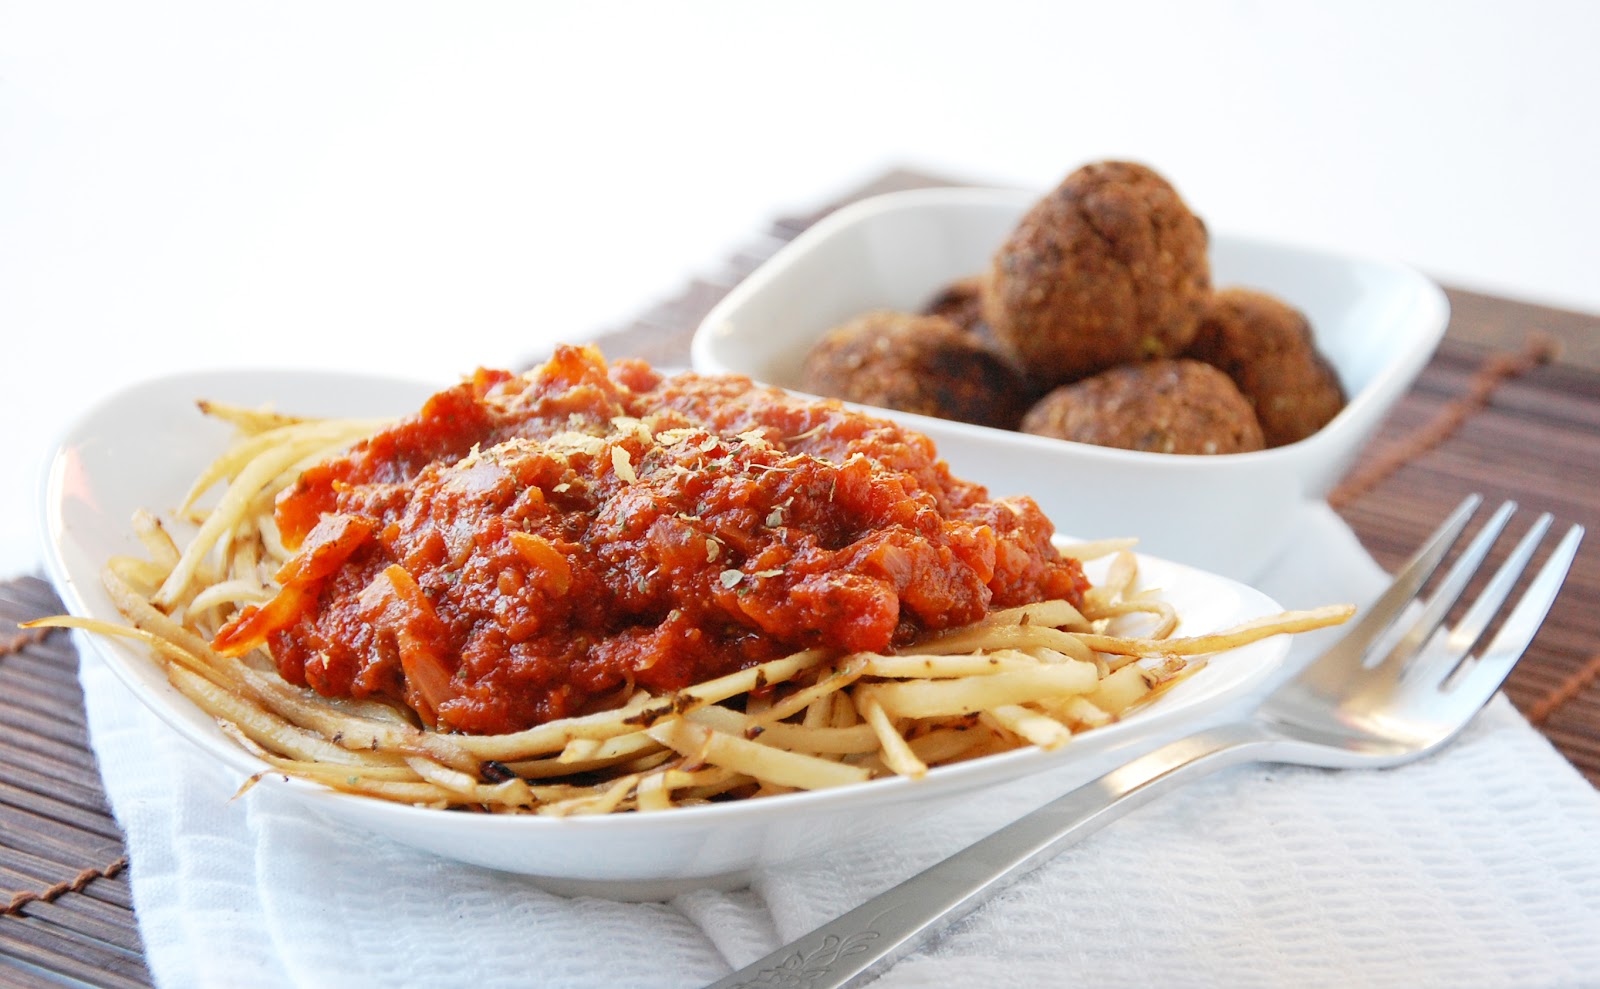
Chia tomato spaghetti sauce


I really wanted this post to feature spaghetti squash! 

I had a spaghetti squash delivered in my veg box and have been a little scared to use it since my first attempt a few months back was less than desirable (i.e a pile of mush)....so with trepidation I had another attempt....ahhhh the same result! When I scrape the cooked squash halves wth a fork just as I saw in many tutorial videos I came across my squash simply did not turn into elegant spaghetti style strands, but instead...more mush.

What am I doing wrong? I can only assume I am overcooking it, or maybe I need to let it cool a little before spaghettifying it?  Any advice appreciated...!

Anyway, I had to resort to a backup spaghetti plan. Sasify noodles! 


salsify (complete with earthy covered skins)
Salsify is another veg I have not used before, also delivered in the veg box. I figured I could julienne the stems (is that the right word for them?!) in a similar way to my noodle stir fry. It worked pretty well so I'm pleased. My salsify stems were quite skinny and getting a bit old and bendy so they were  harder to work with than if they were thicker. You could of course use courgettes or parsnips instead....or even spaghetti squash if you can master it!  Or if you want to go all out, just use regular spaghetti! :-)

The sauce is the star of today's post. I wanted a traditional style Italian tomato sauce flavour but with a thicker consistency since the sauce clings less to vegetable noodles compared to pasta noodles. Enter the chia seeds... achieving a thicker sauce but without altering the flavour
 (with a bonus 'superfood'  infusion). You could of course add other veggies to this sauce and use it top anything you like.  I also added my 'meat' balls to add some carbs to an otherwise low carb meal. 


Recipe: Chia tomato spaghetti sauce


Ingredients:


2 tsp oilve oil

400g (large tin) chopped tomatoes
2 tbs tomato puree
1 tsp mixed dried Italian herbs
2 garlic cloves- crushed
1 small white onion- chopped
handful of fresh herbs- chopped (I used basil but parsley would also work)
2 tsp ground chia seeds (ground ensures a smoother texture)

Method:


Fry the onion and garlic in the oil for approx. 5 minutes until softening. 


Add all ongredients other than chia and frash herbs. Simmer for 10 minutes stirring occasionally. Add the chia and fresh herbs suring the final 2 minutes of cooking.


Serve immediately over the 'spaghetti' of whatever type you choose.


Notes: I stir fried my 'noodles' of salsify in a little coconut oil for approx. 5-7 minutes until they had just softened. My veggie noodle recipe is here and my meat balls recipe is here or for a quinoa version try these. 


For further guidance on making gluten free choices please see this post.

For tips and info on recipe measurement conversions, ingredients, substitutions and the methods behind how I do things.... check out my 'baking tips' tab at the top of the page.

Thursday, 4 October 2012

DAY FOUR: Cheese bake with crispy oat topping


Oats make fabulous, fill-you-up, healthy sweet snacks, but they can also work extremely well in savoury recipes. This is an area in which I need to do some more research and investigation as I am typically more comfortable with ‘sweet’ oat based baking…still so much to learn, all in good  time.

I love the way oats are so hardy and robust, with most recipes simply calling for them to be ‘mixed through’ or ‘mashed in with’. They never cause a scene or disappoint…oats are a dependable friend!

Today I have a savoury recipe. You can use this topping for anything vaguely savoury, though its best serves as a baked topping over a sauce…but  filling and the sauce itself are totally up for grabs. Throw in some spices to compliment, and you’re well away.

If you change up the spices and flavouring you would also have a sweet bread or streusel topping, the key things is to make sure the chickpeas are well mashed and flaky otherwise it’s a dead giveaway as to what the topping contains! The consistency you are looking for is a coarse crumbly flaky one.

It’s Day 4 of MOFO and I feel as though I’m missing out…I’m currently on holiday in Turkey and as I write this post before I leave (Sunday morning scheduled for two days time) I’ve got no real idea how much internet access I’ll get…hopefully all will be fine and I’ll be able to log on and get involved…but it’s always best to be safe, right?


Recipe: Cheese bake with crispy topping

Serves 3

Ingredients

Equivalent 3 cups cooked chopped veg of choice- I used broccoli, cauliflower and peas.

Sauce:
¾ cup soy milk
6tbs nutritional yeast
1 tbs coconut oil
1 ½ tbs cornflour
2 tsp Dijon mustard
¼ tsp garlic powder
½  tsp salt and pepper

Topping:
½ cup mashed chickpeas
½ cup oats
1 tsp dried mixed herbs (I used Italian herb mix)
2 tbs nutritional yeast
2 tbs crushed nuts

Method

Cook the veg until just cooked using steaming or boiling.

Preheat the oven to 180C.

Meanwhile make up the sauce. Melt the coconut oil in a small pan over the hob. Whisk the flour and milk together in a separate bowl ensuring there are no lumps. Add the milk mixture plus all remaining ingredients to the pan and whisk well. Simmer and whisk for approx. 5 mins until thick.

In a medium oven dish place the cooked veg in an even layer and cover with the cheese sauce so that all vegetables are fully coated.

Mix the topping ingredients so that you have a coarse slightly sticky mixture and crumble over the sauce giving an even covering.

Bake at 180C for approx. 20 minutes or until the topping is nicely golden.


What Vegan MOFO means to me.


For further guidance on making gluten free choices please see this post.

For tips and info on recipe measurement conversions, ingredients, substitutions and the methods behind how I do things.... check out my 'baking tips' tab at the top of the page.

you may also like

Related Posts Plugin for WordPress, Blogger...