Showing posts with label 12 days of christmas. Show all posts

Monday, 24 December 2012

Oh Christmas tree oh Christmas tree....

Final pre-Christmas post!!! I got there in the end....

I know by now some of you will be buried under wrapping paper in full flow of Christmas spirit (but hopefully not quite yet Christmas spirits!)


For me it's now 9:40pm on Christmas eve so I'm putting together the finishing touches...final blog post, bread sauce, the first bake of the nut roast (I go for the double bake strategy), wrapping up the gifts (I wont elaborate for now in case of prying eyes)...and finally if I have time, a few games with the family.

So, here you have it, a super simple but super cute christmas buffet recipe...perfect for the times throughout the holidays when you put out a display of 'picky bits' for people to nibble on.

I can't take credit for the 'visual' idea since I saw this version linked through Facebook, the original uses a dairy based guacamole for the 'green' but my version opts for a simple white bean and pea dip layered up on my gluten free flatbread, topped with corn and peppers and white chia seeds for fairy lights...a spontaneous moment of genius ;-) For an even quicker non GF option you could use regular pitta breads as the triangular bases.

On that note, I will be off to get busy in the kitchen. I hope you have a magical day wherever in the world you may be!


Recipe: White bean and pea dip 

Ingredients:

1 cup frozen peas (thawed)
1/2 cup white beans
1 garlic clove- crushed
a squeeze of fresh lemon juice
1 shallot (or 1/4 white onion)
1 tbs fresh herbs (I used parsley)
salt and pepper to taste

Method:

Whizz everything up together until smooth!

Spread onto the flatbread triangles and decorate with corn, pepper pieces and chia seeds (or sesame seeds) and some carrot wedges for the trunks.

Store any remaining dip in the fridge and use within 2 days.

Notes: I only used half the amount of dip to cover the trees, you can use the rest as a dip for veg sticks served hot or cold.  For the flatbreads use half of this recipe to make six trees.


For further guidance on making gluten free choices please see this post.

For tips and info on recipe measurement conversions, ingredients, substitutions and the methods behind how I do things.... check out my 'baking tips' tab at the top of the page.

Saturday, 22 December 2012

Cinnamon rolls...super fast!


I've been wanting to make super speedy cinnamon rolls for ages!  Ever since this recipe when they tasted great but...took...so...long...to...make!

Patience is not my greatest virtue :-)


So a super speedy no-rise cinnamon roll has been on the cards for some time. Obviously it also had to be healthy (as far as possible) and offer a gluten free option (note: I have used oat flour which some will have sensitivities to). Finally I have a little recipe to share with you.

I made a small batch but you could easily double this recipe. I made these rolls in a mini muffin tray. I encourage you to do the same, but in order to get a soft 'crust' make sure the dough is sized to almost touch the sides of the tray before they go in the oven, since they don't rise much and any 'air gap' will give more of a crust...not that this matters (that's what mine were like) I just felt that next time round i'd try this method for a softer option. You could also loosely cover with foil to reduce browning and drying of the tops.

I tried both spelt and oat flour rolls, both tasted good, the spelt had a slightly more 'bready' feel to it' which I guess it to be expected and it rose a little more during baking, although between the two I don't have a clear favourite.

You can make this roll as naughty or as virtuous as you like with your own desired level of sugars and syrup or frosting added. I used this mincemeat filling to amp up the Christmassy theme with some extra extra coconut sugar added....it made for an amazingly moist filling...I would definitely recommend using a really thick moist filling like this!

I still have so many Christmas themed recipes to share...oh well my '12 days of Christmas' may have to continue over the entire Christmas period....too bad ;-)


Keep your eyes peeled for a round-up tomorrow (it will replace Silent Sunday)...there are so many great recipes and funky ideas out there!


Recipe: No-rise cinnamon roll

Makes 6 mini rolls

Ingredients:

1 cup flour*
1/2 tsp baking powder
1/4 tsp baking soda
1 tsp cinnamon
pinch salt
approx. 1/3 cup soy yoghurt (or other plain style yoghurt)
1 tbs coconut oil melted
2 tsp agave
Filling: 3 tbs mincemeat, 1 tsp cinnamon and 1 tbs coconut sugar
Decoration: chopped nuts and maple syrup

*Either use 1 cup wholemeal spelt or use a heaped 3/4 cup oat flour with 3 tbs tapioca starch and 1 tbs ground chia/flax)

Method:

Mix the dry ingredients in a medium bowl and then add the wet ingredients. Mix lightly but well, the mixture should be lightly tacky but you should be able to handle it with floured hands.

Lightly knead the mixture onto a non-stick surface to form a rectangle approx 1cm thick, gauge the width of the rectangle based on the size of mini muffin or cupcake trays so that when rolled up it will fill them nicely. Mix the filling ingredients together, warm if necessary so that it is easy to spread across the surface of the dough right to the edges.

Carefully roll the dough into a little log and slice into approx 6 pieces (depending on the size of the muffin trays). Place a piece in each case and bake in a preheated oven for 10-12 minutes. Cover with foil for part of the baking time to reduce browning.

Drizzle with nuts and syrup to serve.

spelt on the left oat flour on the right


For further guidance on making gluten free choices please see this post.

For tips and info on recipe measurement conversions, ingredients, substitutions and the methods behind how I do things.... check out my 'baking tips' tab at the top of the page.

Christmas spiced butter


I originally got the idea for this recipe from a magazine I happened to be browsing through a few weeks ago, although I now have no idea where I was when I was browsing and I have no idea which magazine...sorry about that! But I can tell you this, it was such a super simple idea that basically consisted of softening some (non-vegan) butter and whipping into it some Christmas spices. 

I took this one level further by using melted coconut oil and folding in Christmas spices along with some blitzed up dried cranberries for a pretty sparkly berry effect. You could add more or less sweetener to taste depending on how sweet and indulgent you want to make it. I actually used about 1/4 coconut butter as I had a tiny bit of homemade stuff needing to be used but all coconut oil will be fine, I wouldn't recommend all coconut butter as the 'meat' content would not give such a smooth overall blend.


This would make the perfect last minute Christmas gift too, all wrapped up in a little canister with some ideas for use on a little label....imagine it melted and drizzled over pancakes, dolloped on top of a single serve sponge watching it melt over the top or even added too some oats and nuts to make a quick baked granola!

It's barely even a recipe, but of course I've added it below. Feel free to swap in your own favourite spices or add different dried fruits. I'd advise that any dried fruit is blitzed up into very small pieces or chopped very finely so that the resulting 'butter' is not too chunky to use.


Recipe: Christmas spiced butter

Ingredients:

1/2 cup coconut oil
1/4 tsp each cinnamon/nutmeg/ginger
pinch allspice
1tbs coconut sugar or rapadura (agave etc may also be fine but I opted for a granulated sweetener to mix through)
1 tbs very finely chopped dried cranberries (or other dried fruit)

Method: 

Melt the coconut oil and mix through all the ingredients. Spoon/pour into a small jar and allow to set. Store at room temperature.

Note: the top photos were taken when the butter had set and these photos were taken when the coconut oil was still liquidy, hence the darker colour.


For further guidance on making gluten free choices please see this post.

For tips and info on recipe measurement conversions, ingredients, substitutions and the methods behind how I do things.... check out my 'baking tips' tab at the top of the page.

Friday, 21 December 2012

Chestnut sponge pudding


Ahhh...apologies for the delay in posting. I really wanted to get a post up each day during my '12 days of Christmas', but the recent events with my stolen laptop have meant that I've struggled to get onto a computer with all the software I need to edit the photos. Alas, I failed in my task...but I still have so many Christmassy recipes I want to fit in so I am determined to complete my challenge but it will simply mean that in the next few days there will probably have to be multiple posts on some days (hence why I'm writing and posting this at 1:30am!)....not that I ever heard anyone complain about too much cake!

Ok, relax and breathe, back to cake....


I was in a huge chestnut mode a week or so ago, as i'd been to the supermarket and stocked up on these ready prepared chestnuts (I feel I should prepare my own from scratch too just so I don't feel like i'm completely cheating this year!) 

So then of course I wanted to set about making lots of things with them, particular since this chestnut roast had gone down so well. I first tried making a batch of chestnut scones using this pumpkin recipe as a guide but changing the flours to make it gluten free. It was not much of a success, the flour combo just wasn't doing anything for the consistency or the rise of the scone, i'm pretty sure that if i'd used spelt it would have been fine, scone making is one aspect of my gluten free baking that I have to get right since this is the second attempt in the last few weeks that has gone in the bin! 

So onto trial number two....a mug cake. This little mug cake actually turned into a gem of a dessert in its own right, simply because it seemed too grown up to be a regular mug cake. I actually gave this one two attempts each with different flours. I tried buckwheat (my go to gluten free flour) for the first attempt but I wasn't totally convinced- the flavour seemed to overpower the chestnuts a little, so then a I had another go using ground oats (make sure they are GF if dealing with sensitives) and this sponge was perfect, light and fluffy but still delicate and moist. 

I'm sure other flours would also work just be careful to opt for a mild flavour. It had a lovely subtle chestnut flavour and paired so well with a creamy vanilla sauce. The sauce was a last moment act of spontaneity since I had some of this yoghurt to use up. To make a healthier cream to the one I used (which contained some sugar) you could opt for this cashew custard which would think would be awesome!


Recipe: Chestnut sponge pudding

serves 1-2

Ingredients:

3tbs ground oats (oat flour)
1tbs rapadura
1/4 tsp each baking power and baking soda
1/4 cup chestnut pure
1/4 tsp cinnamon
approx. 2 tbs soy milk (or other) if needed
1tbs chopped chestnuts mixed through batter (optional)
1tbs chopped nuts on chestnuts reserved for top
1/3 yoghurt/custard/cream to serve

Method:

Mix the dry ingredients together in a small bowl. Add the wet ingredients and mix to form a soft spoonable batter. 

Using a silicone egg poach, a silicone muffin case or a small lightly greased microwaveable domed dish, add the reserved nuts to the bottom of the dish and then spoon the batter on top. Cook in the microwave for 60 seconds until just cooked (if the top is still sticky cook for a further 20-30 seconds). You could oven bake this but the result might not be quite so moist, if you decide to oven bake try 10-15 minutes at 180C (note I haven't tried this method).

To create an indulgent dessert pour vegan vanilla yoghurt, cream or custard into the bottom of a small serving dish and then turn the sponge out into the dish so that the cream surrounds it and the nuts are now on top. Drizzle with maple syrup and dust with cinnamon if desired.

You could double or triple this recipe to make multiple individual cupcake sized servings.


For further guidance on making gluten free choices please see this post.

For tips and info on recipe measurement conversions, ingredients, substitutions and the methods behind how I do things.... check out my 'baking tips' tab at the top of the page.

Tuesday, 18 December 2012

Christmas chestnut roast


The chestnut and cranberry roast was my substitute for the Christmas turkey at my work Christmas party, it was like nut loaf and stuffing balls all wrapped up in one dish!


I baked the roast in a round cake pan and cut wedges, just to visually change things up a bit, but you could bake in a loaf pan or form balls if you preferred. For for extra crispy roasted edges, use the 'double bake' technique detailed here in my regular nut roast.

This is a great seasonal dish and is so simple to throw together... particularly if you cheat a little like I did and buy pre-cooked chestnuts (shhh, I was pushed for time!). I added a few dried cranberries for an extra flavour boost but they are not essential.  I used my regular nut roast as a guide, knowing that the versatile recipe would be likely to lend itself to such variations.


Recipe: Christmas chestnut roast

Ingredients:

1 cup coarsely chopped cooked chestnuts (I briefly pulsed in a food processor)
1/2 cup chopped cashews/pinenuts
approx. 1/4 cup dried cranberries (optional)
2 tbs olive oil
1 large onion- diced
2 crushed garlic cloves
2 carrots- grated
1 medium parsnip- grated
1 cup white beans- mashed
1 cup cooked quinoa (or cooked rice or oats*)
2 heaped tbs tapioca flour
1/4 cup fresh herbs (parsley/thyme/rosemary)
1/2 tsp mixed spice/nutmeg
2 tbs soy sauce
salt and pepper to taste
water (if needed- I never need it)


Pre-heat oven to 180C. Grind nuts and set aside. Sauté vegetables in olive oil for 5 mins until soft. 

Mix all ingredients in large bowl adding sautéed vegetables to it. Mix and mash together well and add a little water only if needed to achieve a sticky (but not wet) consistency. Add more oats (or another carbohydrate of choice) if mixture is too wet. 

Press mixture firmly into a greased 9" cake pan or equivalent loaf tin. Bake for approx. 45 minutes until golden.


(Apologies these last couple of photos are a bit dark and blue, the light was fading at the time of the shoot and when usually I would have quickly tweaked the colour and brightness in Photoshop I am lacking in my tool set until I get a new laptop....managing as best I can for the time being!)

For further guidance on making gluten free choices please see this post.

For tips and info on recipe measurement conversions, ingredients, substitutions and the methods behind how I do things.... check out my 'baking tips' tab at the top of the page.

Saturday, 15 December 2012

Christmas party time! (and the Christmas pudding recipe!)


Yesterday was a crazy day! 

Thankfully it finished on a high with my work Christmas party...my 8th and final Christmas party with the architects practice since as of next Wednesday I will be leaving the gang to find my own way into this big big world...more on all that another time. After the chaos of the day I was looking forward to eating good food and letting my hair down. 


All the team pitched in to cook a huge Christmas roast... I was chief event co-ordinator and so of prime importance to me was to make sure we had plenty of vegetable dishes! Of course there was lots of meat as well for the rest of the team so I let them get on with that part. I cooked up a chestnut and cranberry nut roast for me...but big enough to share (for anyone who cared for a slice), I also made a little batch of vegan bread sauce- no way was I going to miss out on that regardless of the fact I didn't have turkey to accompany it, it was a perfectly fine match for my nut roast! We also made a variation of this brussel sprout salad without and bacon but with extra shallots and sliced chestnuts too...it was so good!


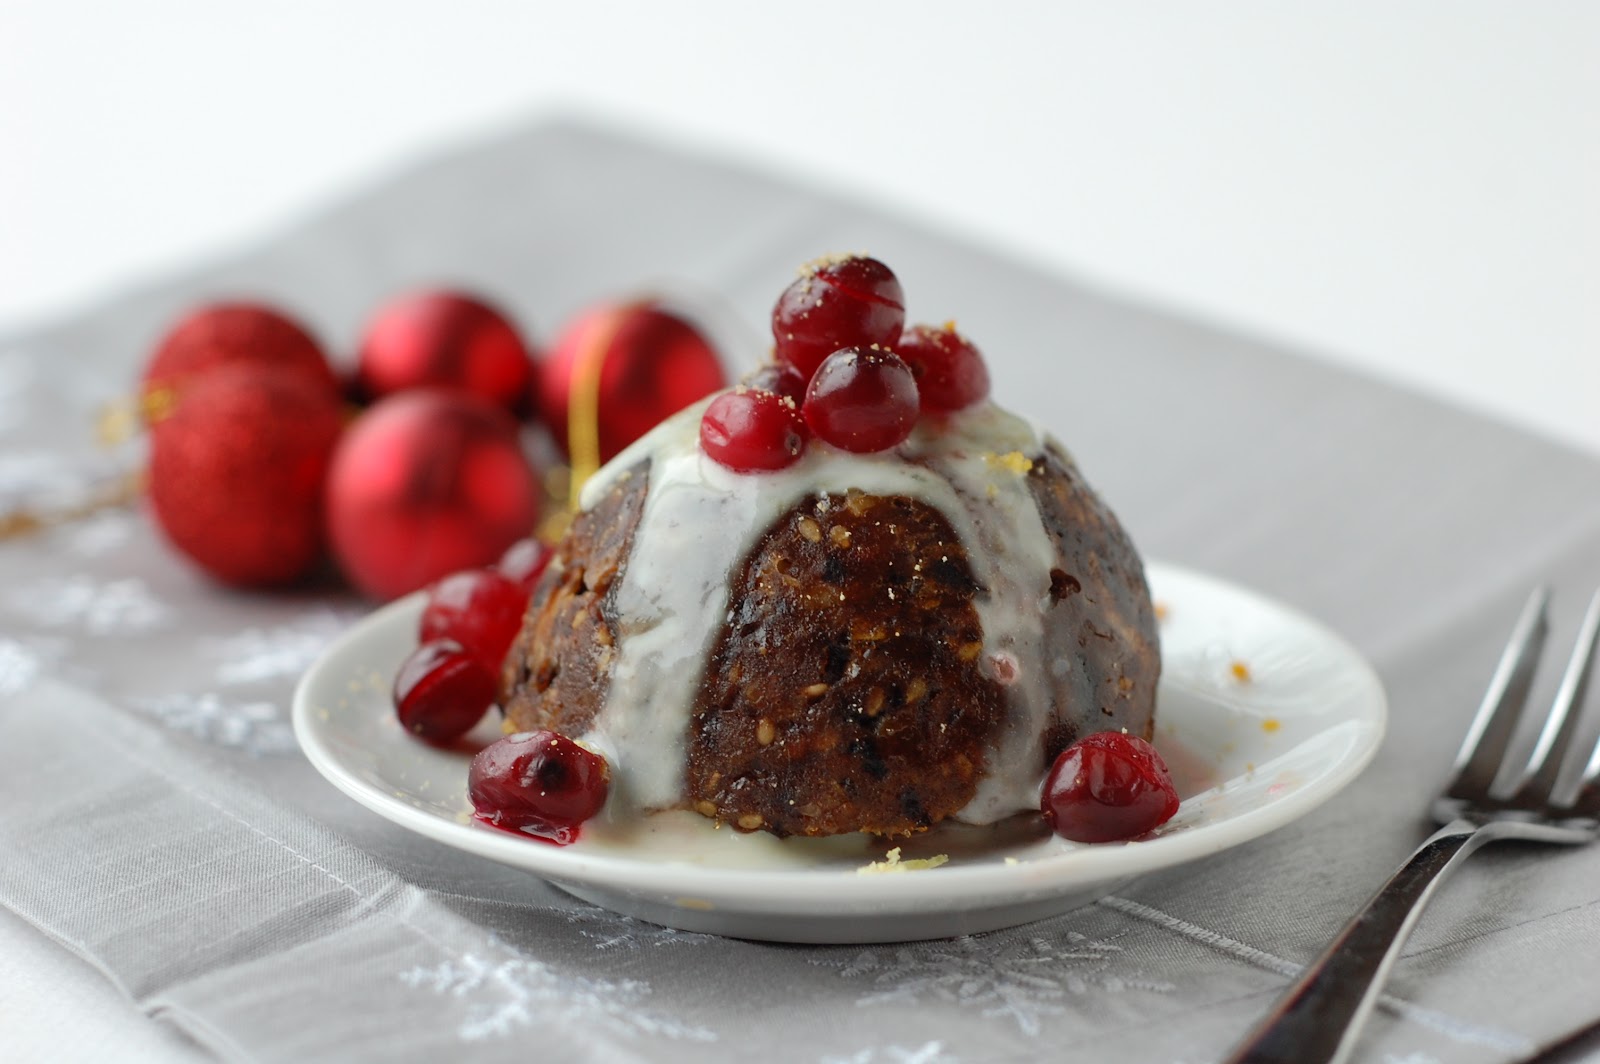
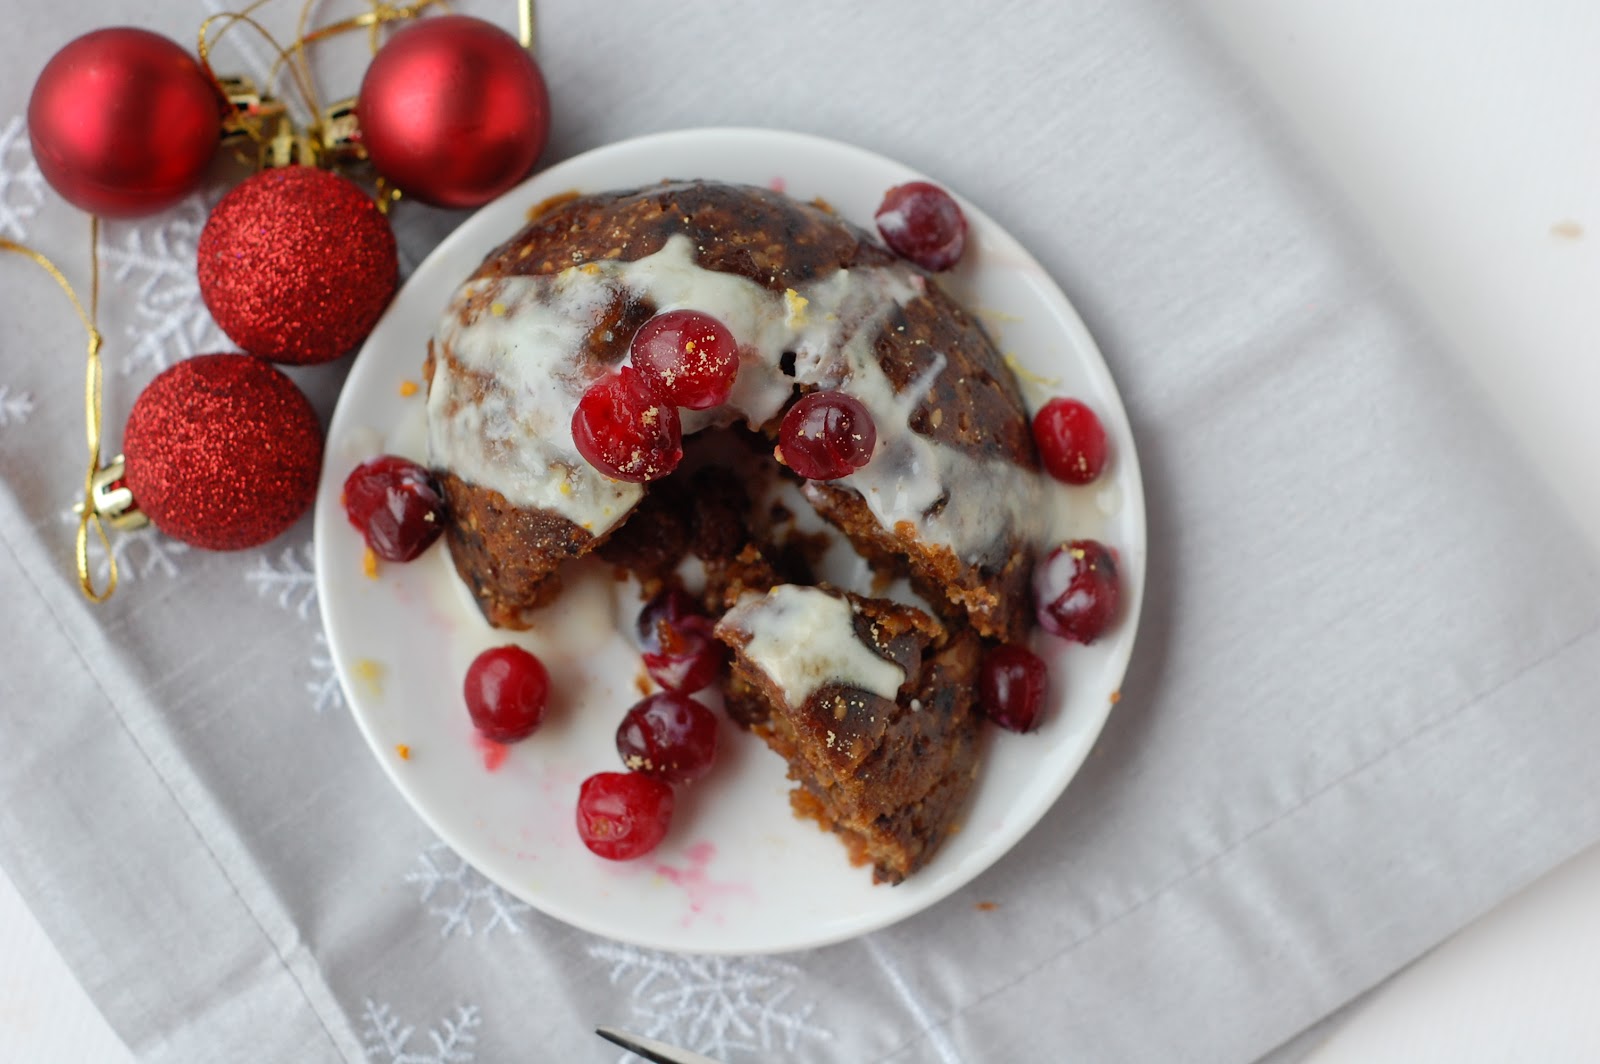
For dessert we had fruit salad, along with some more of these truffles that i'd whipped up earlier in the day. I also had my 'Christmas pud for one' whilst my colleagues served up their puddings and gateaux. I served my pudding with a drizzle of Alpro vegan vanilla pouring yoghurt. I'd not come across it before but found it in the supermarket yesterday and was very excited to try it, whilst I can't say its healthy since it does contain quite a lot of sugar, it was great for a little treat and for a change to regular vegan yoghurt or cream and the lovely vanilla flavour gave a real festive feel.

Instagram Christmas pud!
As promised here you have my Christmas pudding recipe, I found my notes! Most Christmas puddings require preparation way in advance and also need hours of steaming- not this one... here is a pudding in a day!

Recipe: Mini Christmas pudding (quick, easy and gluten free)


(Makes 2 mini puddings or one slightly larger. serve 2-4 altogether)

Ingredients:

50g each of raisins, sultanas and dried apricots
50g oatmeal or GF flour mix of choice (note: rice flour may give a slightly grainy texture though barely noticeable)
1/2 tsp baking powder
3tbs ground almonds
1 tsp each orange and lemon zest and a small squeeze of juice (or 1 tbs sugar-free marmalade)
1 small grated apple
1/2 tsp mixed spice (cinnamon/nutmeg/cloves)
1 tbs brandy (or omit for non alcoholic)
10g rapadura/fruit sugar or other unrefined granulated sugar

Method:

In a food processor pulse the dried apricots to chop very roughly and then add the sultanas and raisins and pulse a few times to achieve a very coarse paste (the raisins should still be mostly whole).

Transfer to a small bowl and mix through the grated apple. Add all remaining ingredients and mix well.

You can either prepare this mix the night before and let to sit overnight to 'mature' or you can use it straight away (I tried both ways and did not notice a significant difference to flavour).

Spoon the mixture into two silicone egg poachers (similar to this method) or one slightly larger domed bowl (silicone or glass). I really recommend silicone since its so much easier to remove once cooked. Make sure you cover the tops very well, I used baking parchment and then foil over folded tightly to the rim.  Steam the puddings with the bowl half submerged in simmering water with the covered top well out of the water. Steam for 90 minutes for 2 mini puddings or slightly longer for a larger pudding (I only tried making two smaller ones).

Allow to cool with the tops still fully covered, and uncover when ready to serve.  If you are serving these at a later time, they can be re-steamed or simply microwaved for 1 minute each to warm through.

P.s this recipe is actually much simpler than it sounds in these steps!!


For further guidance on making gluten free choices please see this post.

For tips and info on recipe measurement conversions, ingredients, substitutions and the methods behind how I do things.... check out my 'baking tips' tab at the top of the page.

Friday, 14 December 2012

Speedy Christmas pudding for one!


I did not think this post was going to happen. Seriously. But i'm a determined girl and I was not going to let 'a situation' stop me in my tracks!

It's been a crazy 24 hours and I do not wish to repeat it!

Yesterday evening I had my car broken into and my laptop and DSRL camera stolen. Along with my notebook which I jot down all my recipe ideas, experiments, website resources, inspirations and anything else that randomly crops up in my head...which it does on regular occasions!

It felt like a lead weight. I was gutted. Today has been a chaotic mix of phone calls, glass repair, laptop borrowing (thanks mum!) BUT there is a silver lining to this story. Two good things happened:

1- they found my bag, minus all the valuables of course, but with my notebooks! It had been raining but my holdall was waterproof. I have to just wait until the police have finished their investigations to get it back. Fingers crossed its ok.

2 - I was forced to use a different camera and a different lense to take these shots. These photos have been taken with my old Nikon camera body and a 50mm prime lense which i'd bought s few months back but had never actualy used. I love it! Even in low light the images rendered well, huge depth of field- maybe too much!  These photos have not been retouched in anyway as I simply have no software on the borrowed laptop to do it, they haven't even been cropped....this is literally straight from camera. I'm pretty happy with the results.

Ok, so I may have got your mouth watering, but you will have to wait for the recipe as it was written in my notebook...doh! ;-) will try and recall it and rewrite it tomorrow- I may have notes lying around the house (I am organised really!). But I will tell you this mini Christmas pud is a 'pud in a day'- super fast, gluten free, and sugar free.  Oh and it is super yummy!

I'm off to my work Christmas party now, in amongst the chaos I've been preparing food all day...more on that tomorrow and I will do my best to bring you this recipe.

Oh and just for a final laugh- all my make up and hair straighteners were in that bag too! The one evening in recent weeks that I actually want to make a effort to look half decent. So I guess this will be the second 'au naturel' look of the day!

Enjoy!

(Edit: you can now find the recipe here!)


For further guidance on making gluten free choices please see this post.

For tips and info on recipe measurement conversions, ingredients, substitutions and the methods behind how I do things.... check out my 'baking tips' tab at the top of the page.

Thursday, 13 December 2012

Holiday spiced fruit granola


Christmas breakfast take-two….that’s if you haven’t already been swayed by my Christmas baked oatmeal! Maybe you’ll just have to have two breakfasts…or even better reserve this for a snack. Mid morning, or mid afternoon, whenever you’re flagging an in need of a spiced fruity kick all packed into a little chewy granola nugget to power you through your day.


I love to eat a handful of granola clusters as a snack, but if you are more the breakfast kind you can spread the raw mixture thinly and bake to make more of a ‘flaked granola’ and serve with your favourite fruit/milk/yoghurt. Layer up that breakfast bowl!

There are two things I really love about this granola: the smooshed up fruit (aka mincemeat) gives the chunks an amazing glazed crisp yet chewy texture it is amazing. Secondly because the fruit pieces in the mincemeat have been smooshed to a more paste, it doesn’t burn it like whole raisins or cranberries etc would do. I also added some extra dried fruit to the mix once cooked but that’s optional.

I know I am a little oat obsessed…we are only 5 days in and already we have two oat recipes! Well I am not apologising, I love my oats and they make the perfect snack for a bit of sweet sustenance. But I’ll do you a deal...no more oats for the next few days, I have a few more ideas in store!


Recipe: Holiday spiced fruit granola

Makes approx 2-3 bowls (or 2 baking sheets worth)

Ingredients:

1 ¼ cup oats
2 tbs chia seeds
1 cup hazel nuts (or any nut mix)
¼ cup flakes almonds
¼ cup mincemeat
1 tsp vanilla extract
½ tsp rum extract to taste- optional
1 tbs orange zest (or ½ tsp extract if no zest)
1 tsp ground cinnamon
½ tsp ground mixed spice
2 tbs coconut oil- melted
2 tbs rapadura (or other unrefined sugar) or more to taste
½ cup cranberries or other dried fruits mixed through once cooked- optional
  
Method:

Melt the coconut oil and mix with the extracts, mincemeat and zest.
Add all dry ingredients  (except whole dried fruit pieces) to a medium bowl and mix well. Add the wet ingredients and mix through to form a sticky mix.
Spoon onto 2 lightly greased baking sheets making sure to achieve a thin even layer with lots of clumpy bits for clusters or a no clumps for a flaked mix.
Bake at 170C for 10-12 minutes until slightly golden, flakes may take a minute or so less. Add the dried cherries/cranberries to the mixture once cooled. Stores in cupboard for a few weeks.


For further guidance on making gluten free choices please see this post.

For tips and info on recipe measurement conversions, ingredients, substitutions and the methods behind how I do things.... check out my 'baking tips' tab at the top of the page.

Wednesday, 12 December 2012

Gingerbread quinoa bake


Homemade mincemeat is definitely my new favourite thing around here. Once you've made a jar (which literally only takes minutes) you can store it in the fridge and then use it in everything. I did the same last Christmas and these were a couple of the resulting recipes from back then.


Cranberries also seem to be a bit of a recurring theme at the moment, maybe it’s because they look like Christmas jewels and I like pretty seasonal photos!


But in actual fact this post is really in celebration of…ginger and quinoa. I almost reached across for the cinnamon when mixing together this batter then my fingers switched track and out came Mr Ginger accompanied by Miss Molasses, another fabulous combo for this time of year. Note I am very cautious with adding too much molasses as I find it easily overpowering to my taste buds, feel free to be more generous if that’s your thing.

The texture of this bake was spot on, really moist but light and cakey. If you are not accustomed to the taste of quinoa flakes you may pick up on a slight bitterness, I think the ginger works really well to compliment the quinoa. But feel free to modify the level of spice and agave to your own taste.

Perfect for breakfast or dessert…or both! The recipe can easily be doubled up for a larger pie dish.


Recipe: Gingerbread quinoa bake

serves 2

Ingredients

½ cup quinoa flakes
1 tbs ground chia/flax
½ tsp baking powder
½ tsp vanilla extract
1 tsp ground ginger
Pinch stevia (1/6th tsp)
3 tbs agave/maple syrup
1 tsp molasses
1/3 cup soy yoghurt to mix (or other yoghurt)
3 tbs apple puree (or more yoghurt)
2-3 tbs mincemeat for base (homemade ideally)
Handful of part-cooked fresh cranberries to decorate top
1 tbs crystalised ginger- chopped for top
Brown rice syrup/agave/maple syrup to drizzle (if desired- I omitted)

Method

Part cook the cranberries by cooking in the microwave (1 minute) or hob for a few minutes until the first few cranberries only just begin to pop their skins.

Meanwhile, mix all wet ingredients together in a small bowl before adding to the dry ingredients (other than base and toppings) Mix well to achieve a thick smooth batter consistency.

Line the bottom of a small pie dish (approx. 15cm diameter) with the mincemeat mixture (or mix this through the batter- see note) spoon the quinoa batter over the top and smooth top with a spoon. Gently press the part cooked cranberries into the top of the batter and sprinkle with the finely chopped ginger pieces.

Bake in a preheated oven at 180 for approx. 15 minutes until golden, check with a toothpick and if the mixture is still uncooked in the centre loosely cover with foil so that the top doesn’t brown and continue to bake for another 5 minutes until cooked through. (I had to cover mine)

Notes:
Instead of using mincemeat as a base, you could mix it through the batter and reduce the yoghurt slightly.  I used a small ceramic fluted pie dish and it was tricky to get the bake out neatly. It would be advisable to use a dish with a removable base and mix the mincemeat through the batter if you wish to remove it. Or do as I did and eat from the dish- I didn't eat it all by myself!


For further guidance on making gluten free choices please see this post.

For tips and info on recipe measurement conversions, ingredients, substitutions and the methods behind how I do things.... check out my 'baking tips' tab at the top of the page.

Tuesday, 11 December 2012

No bake Christmas candy collection


Well I actually call these ‘smoosh bars’…if you’ve been following for a while you’ll have probably already figured that out since they pop up quite a lot (read: I am a little obsessed!)’ Smoosh Bars’ was a name that my family began to call them since when asked what they were I simply said ‘its just lots of healthy ingredients all smooshed together.’  It stuck!


I figured smoosh bars  was maybe an odd title for the post…probably less likely to entice people over, and then they’d be missing out on all the fun…(these bars are a lot of fun). So no- bake Christmas candy collection it is since today I am sharing with you my entire collection so far, but the variations are almost limitless, I’d love for you to share your own favourite flavour combos since I know many of you make this sort of thing yourself too!

Below you’ll find the links to previous smoosh posts, note that most of these bars contain nuts. In more recent weeks I have been running low on my cashew and almond supplies and have had a surplus of sunflower seeds, so to readdress this balance I made all the flavours linked below with sunflower seeds in place of the nuts to see how they worked out. The result was almost identical. If I absolutely had to choose I’d maybe say the nut version slightly won over the seed, but there is very little in it, so here we have the perfect most versatile bar collection perfect for school lunches and nut allergy sufferers… and in actual fact perfect for pretty much everyone!

Take your pick and go play!

Oh and last but not least…do you remember these mini Christmas puds?…they were my favourite thing last year!

I still love these mini puds...the clove in the top infused the flavour and makes them taste so authentic!

Now, here I have two new recipes to excite you:

Recipe: Marzipan almond smoosh

Makes approx. 10 bars

Ingredients:

70g dates
70g raisins
100g almonds (or sunflower seeds) I did use almonds to make it more aurthentic
50g buckwheat flour (or oatmeal)
30g dessicated coconut
30g dried cranberries
1tsp almond extract*

Topping (optional): 50g cashews or blanched almonds, few drops almond extract and 2 tbs agave syrup. Extra flaked almonds to decorate.

Recipe: Chocolate peppermint smoosh

Ingredients:

70g dates
70g raisins
100g sunflower seeds (or mild flavoured nuts)
40g buckwheat flour (or oatmeal)
30g dessicated coconut
20g cocoa powder
1tsp peppermint extract*

Topping (optional): 50g cashews or blanched almonds, few drops peppermint extract and 2 tbs agave syrup. If desired you could decorate with mini choc drops as a nice contrast.


Method (for both):

Blitz the nuts/seeds in a food processor for a few seconds until they are coarse. Add all remaining ingredients and blitz until you have a fine sticky ‘dough’.

Press the dough into a square container or smallish loaf tin lined with parchment (tin should be approx. 10x15cm) and pack down firmly, I use the flat end of a rolling pin to do this.

To make the top layer, blitz cashews or blanched almonds (make sure there is no skin as it will discolour the result) until they begin to get sticky, add a little agave and flavouring to taste and process a little longer.

Press a thin layer of nut mixture over the bottom layer and decorate with flaked almonds if desired.

 Chill for a couple of hours until firm enough to slice neatly.

Note: you could form into balls instead of making slices.

*use oil based and not alcohol based extracts if possible since the alcohol based versions have a slightly bitter taste due to the alcohol not being ‘burnt off’ as the bars are not baked.


 chocolate peppermint bar
almond marzipan bar
roasted peanut and cranberry bar

For further guidance on making gluten free choices please see  this post.

For tips and info on recipe measurement conversions, ingredients, substitutions and the methods behind how I do things.... check out my 'baking tips' tab at the top of the page.

you may also like

Related Posts Plugin for WordPress, Blogger...