Showing posts with label fruit. Show all posts

Saturday, 25 May 2013

Summer fruit slaw with chia berry dressing


My julienne peeler has been getting a bit of action again! But this time it’s not only with the veggies.


After the success of this simple cucumber and pineapple salsa, I was keen to experiment more with mixing the refreshing subtle taste of cucumber with other fruits.

Here I used any fruits I could get my hands on to julienne. For your reference...no, you cannot julienne a banana. Believe me I tried. It would have been the perfect shape so I am very disappointed! (I even tried with a frozen banana as I was that determined but nope it just wasn’t happening!)

The first time I made this slaw I had a large mango in my fruit bowl and that worked a treat, the second time I didn’t have a mango, hence why the photos below are mango-less but I have still added it to the recipe. I also used rhubarb which gave a great tart flavour contrast, though raw rhubarb is a little tough and stringy so you may want to cook it ever so slightly after julienning it- I left it raw, but it’s just an idea for you to try.

Throw in lots of cucumber, you won’t taste it against the sweetness of the fruits and I also added a simple fruity yoghurt and chia dressing to give an extra touch of sweetness.

Breakfast? Dessert? You choose.


Recipe: Summer fruit slaw

Serves 1

Ingredients:

½ cup cucumber noodles
¼ cup rhubarb noodles (cook lightly if desired)
¼ cup mango noodles
----
1tbs sugar free berry jam
2 tbs non-dairy yoghurt
1 tsp chia seed
Extra fruit/berries to decorate as desired.

Method:

Mix the yoghurt with the sugar free jam and chia seeds and set aside to thicken slightly. 

Prepare the fruit and cucumber noodles and place in a swirl in a serving plate/bowl leaving a well in the centre. Spoon the jam mix into the centre of the slaw.

Decorate with berries  to serve as desired. You could also add a sprinkle of cinnamon, vanilla bean powder, cocoa, coconut, nuts.....


For further guidance on making gluten free choices please see this post.

For tips and info on recipe measurement conversions, ingredients, substitutions and the methods behind how I do things.... check out my 'baking tips' tab at the top of the page.

Wednesday, 15 May 2013

Summer fruits chocolate frosted cake

I might sound strange making your own birthday cake. Maybe a little sad even!

But I just had so many ideas that didn’t bother me in the slightest. My friends and family had said they’d have given me a cake but were too nervous to know what to get! Oops sorry- I don’t tend to make things easy for them ;-)


I had so many ideas of my own, that just like last year, I made a birthday cake for myself...I even blew out my own candles (well I had to light them for the photo shoot!)  This year the cake came a day late. If you read this post you’ll understand why!  But hey, it was still part of my birthday weekend so it still counts!

It was the perfect cake to make for a day when I was off to eat lots of Thai food with friends.  I knew
I’d be stuffed full of lunch so this little treat was just right for a super light morning snack, and then also served again as dinner! Yep this beauty is super light and healthy. 

It’s not just a birthday cake....it would be perfect for any summer gathering or BBQ. Vary the fruits as you wish or according to the season.  My super speedy healthy frosting  also made for the perfect companion, and I added some cocoa to it for a chocolatey hit.

Remember to throw on some sprinkles. The world is always a better place with sprinkles!!


This time I've even given you a few step-by-step process shots! Hope it helps....


Summer fruit frosted cake

Makes 1 cake (size depends on size of melon)

Ingredients:

1 medium water melon (mine was approx 20cm round)
½ cup strawberries (or other fruits)
½ cup banana (or other fruits)
Approx 1 cup chocolate frosting*
Approx ½ cup vanilla frosting*
Handful of chocolate sprinkles*

Method:

Prepare the melon by slicing of the top and bottom (I sliced a larger chunk off the top so that I could have a small top layer), slice the skin off the sides to form a fairly neat round ‘cake’

Prepare the frosting. (see linked post and notes below) I prepared both together and then divided them and added cocoa to the larger portion.

Place the watermelon on it's final serving plate, and begin spreading the frosting over the surface with a palette knife or spoon. Dollop some of the vanilla round the edge of the top surface (or all over the top if you are not having a smaller top piece) place the strawberries and banana or other fruit around the edge and then position the top piece. Cover the top piece with the remaining vanilla frosting and decorate with the top with the remaining fruit.

Add sprinkles, such as these, or any types of sprinkles, seeds, nuts, cocoa.... as desired over the surface.

Serve immediately.  It will keep for a couple of days but always nicest eaten on the same day...so make sure you have a crowd (or like a lot watermelon!)


Frosting:
For frosting refer to this post (for more details) adding 2-3 tbs cocoa powder to one cup’s worth of mix. To make a thick frosting for spreading mix 4:1 yoghurt to coconut flour ratio plus vanilla extract and a few drops of stevia and drizzle of maple syrup (or other sweetener), you may need to increase the yoghurt quantity slightly for the chocolate version.

Sprinkles:
For sprinkles, I used a cocoa version of these sprinkles, also referred to here for the choclatey version.  Feel free to use whatever you like to add a touch of sweetness.


chocolate sprinkles!!

For further guidance on making gluten free choices please see this post.

For tips and info on recipe measurement conversions, ingredients, substitutions and the methods behind how I do things.... check out my 'baking tips' tab at the top of the page.

Thursday, 21 February 2013

CADA...zing!

This recipe is not my own discovery. In the world of Thermomix users it’s a well known concoction, with each of the initials corresponding to each of the ingredients. I decided to add some ‘zing’ with orange, cinnamon and cacao nibs and turned it into a creamy breakfast yoghurt bowl!


This is a super simple recipe. Great for breakfast or as a refreshing but filling snack. Like most of my favourite recipes this one is endlessly versatile...change up the nuts and fruits to suit your taste or what you have to hand. The fresh coconut is a must, and this is one of the only recipes I keep fresh coconut to hand for. I also use dates for their versatility and subtle sweetness but other dried fruits could be used.

I think what I actually love most about this recipe is it’s ‘what you see is what you get’ philosohy. All the ingredients are still visible in their original form, blitzed a little and mixed. Keep it nice and chunky for great texture.  


Recipe: CADA...zing!

Serves 2

Ingredients

Approx. ¼ cup chunks of fresh coconut
1 small apple- quartered and cored*
4-5 small dates (I used deglet nor)
¼ cup whole almonds

(optional extras)
1 small orange
½ cup vegan yoghurt
1 tsp orange zest
Cacao nibs
Cinnamon

Method

Prepare the CADA ingredients and add to the Thermomix bowl, or other high power food processor and pulse together until chunky.

To serve, layer up the orange segments into the bottom of a small bowl, top with yoghurt, add the CADA mix and then garnish with zest, cacao nibs and cinnamon as desired.

*add a splash of fresh lemon if not serving immediately to prevent from browning. CADA mix will store in the fridge for a few days.


For further guidance on making gluten free choices please see this post.

For tips and info on recipe measurement conversions, ingredients, substitutions and the methods behind how I do things.... check out my 'baking tips' tab at the top of the page.

Saturday, 15 December 2012

Christmas party time! (and the Christmas pudding recipe!)


Yesterday was a crazy day! 

Thankfully it finished on a high with my work Christmas party...my 8th and final Christmas party with the architects practice since as of next Wednesday I will be leaving the gang to find my own way into this big big world...more on all that another time. After the chaos of the day I was looking forward to eating good food and letting my hair down. 


All the team pitched in to cook a huge Christmas roast... I was chief event co-ordinator and so of prime importance to me was to make sure we had plenty of vegetable dishes! Of course there was lots of meat as well for the rest of the team so I let them get on with that part. I cooked up a chestnut and cranberry nut roast for me...but big enough to share (for anyone who cared for a slice), I also made a little batch of vegan bread sauce- no way was I going to miss out on that regardless of the fact I didn't have turkey to accompany it, it was a perfectly fine match for my nut roast! We also made a variation of this brussel sprout salad without and bacon but with extra shallots and sliced chestnuts too...it was so good!


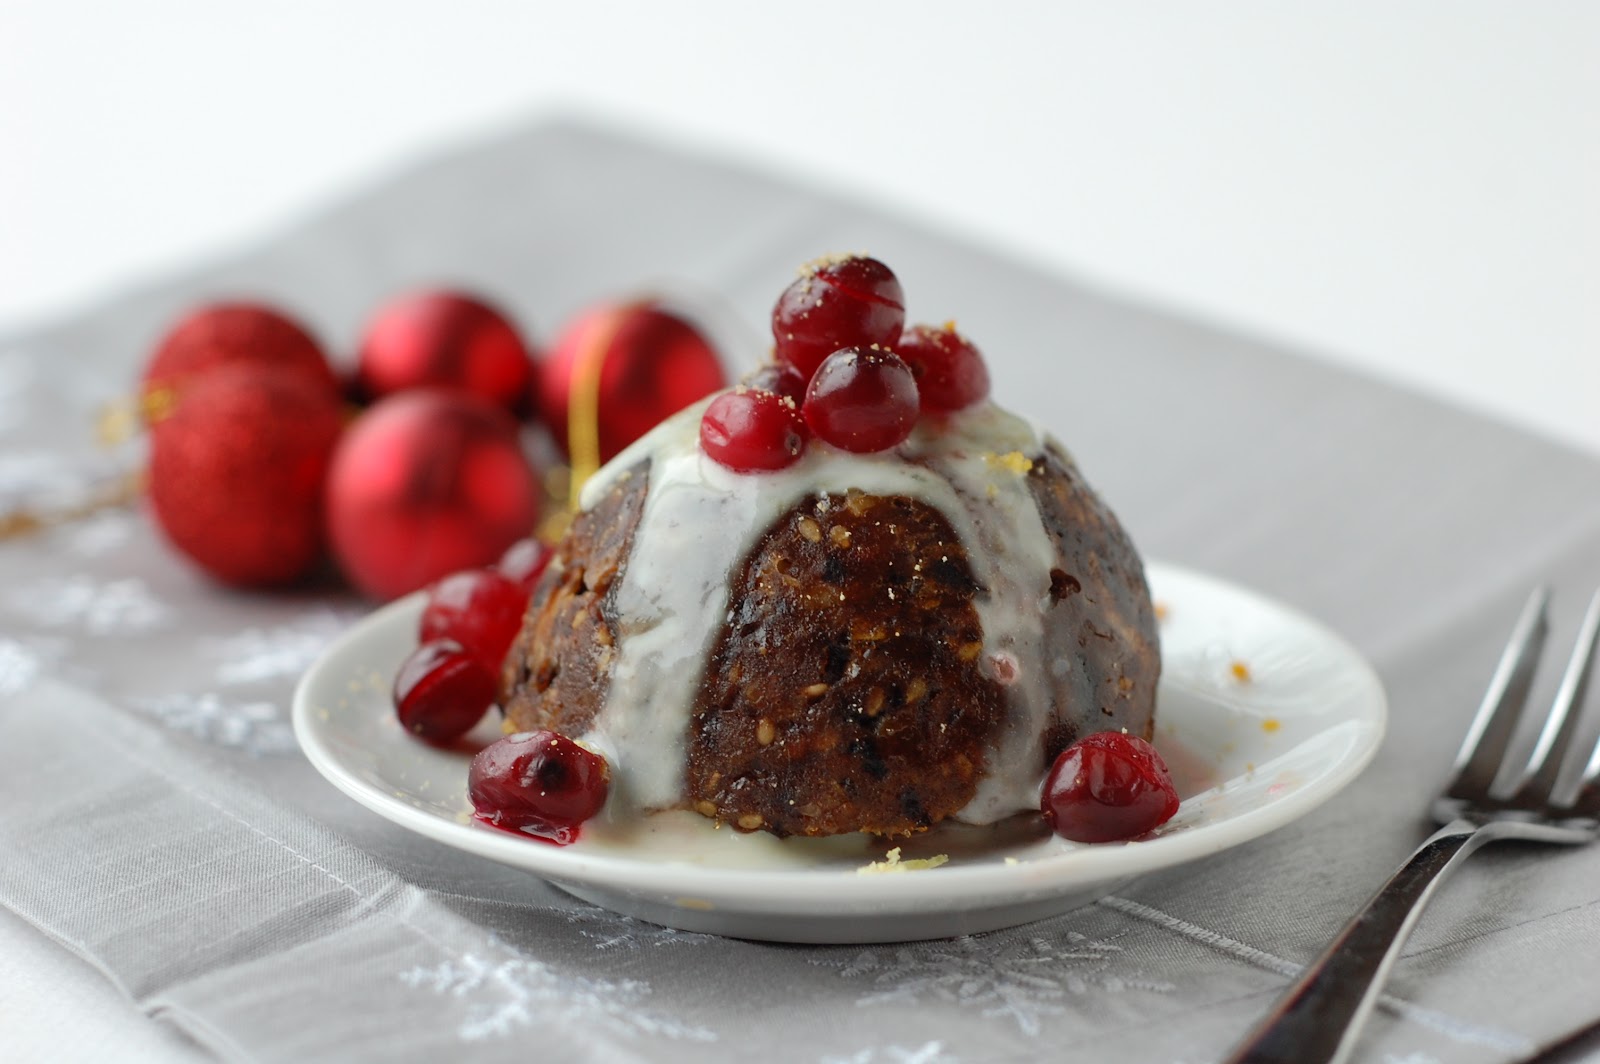
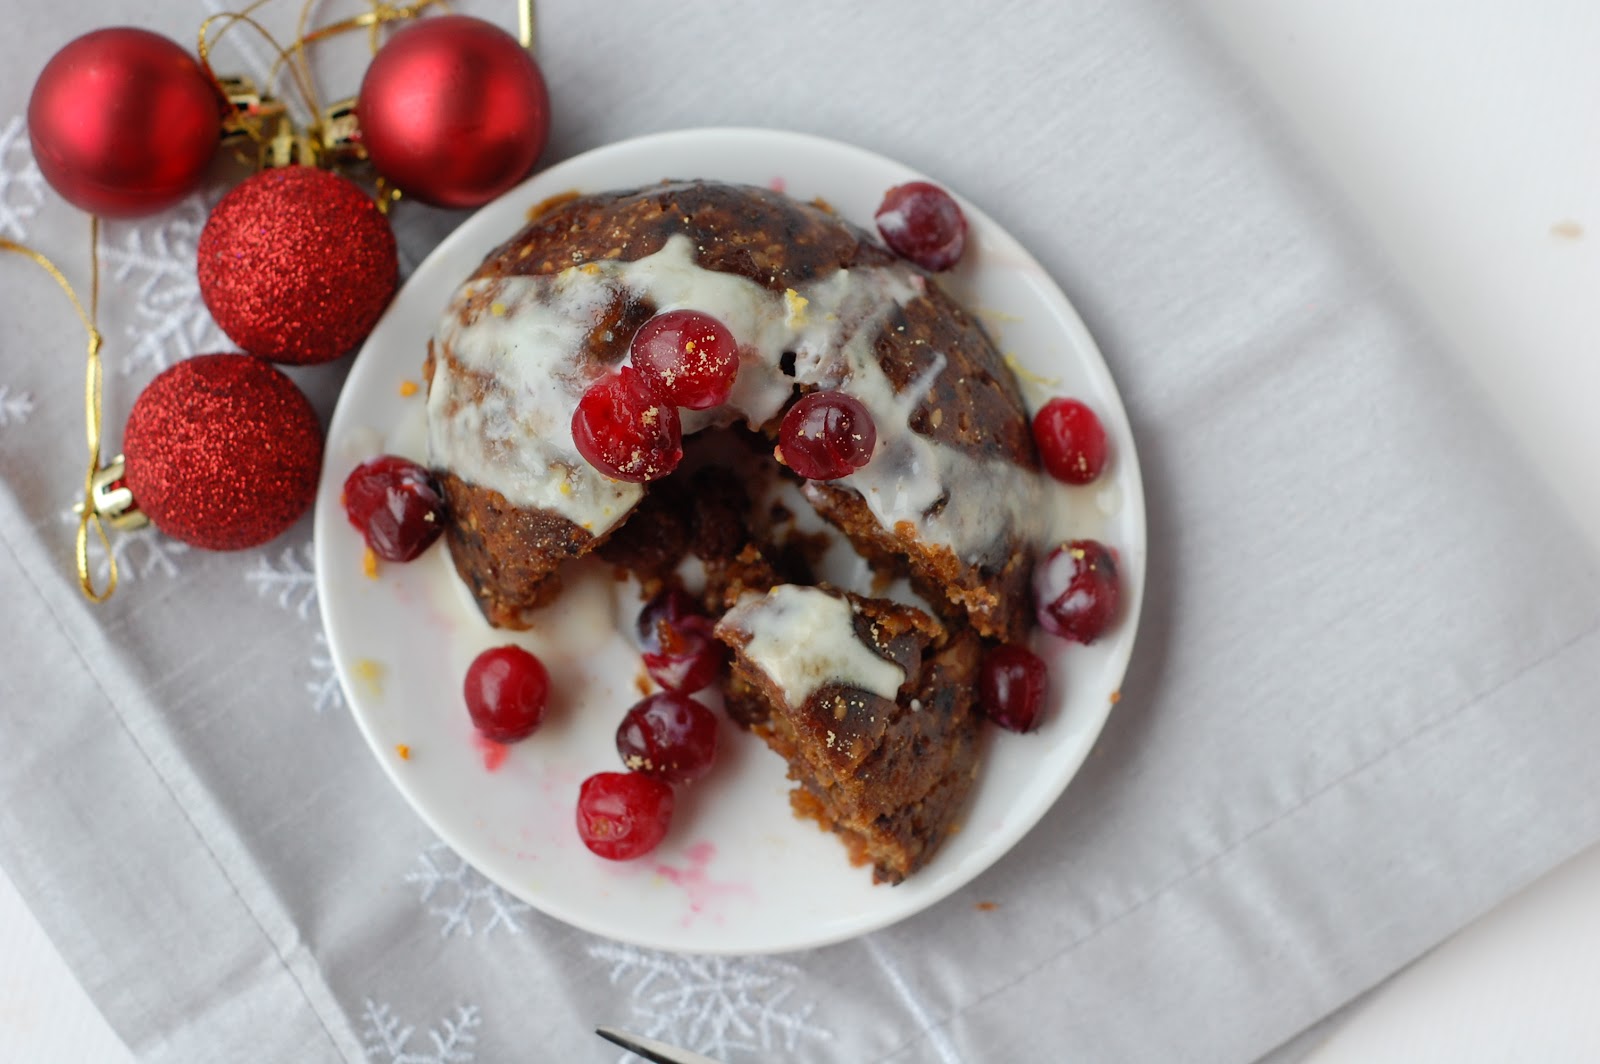
For dessert we had fruit salad, along with some more of these truffles that i'd whipped up earlier in the day. I also had my 'Christmas pud for one' whilst my colleagues served up their puddings and gateaux. I served my pudding with a drizzle of Alpro vegan vanilla pouring yoghurt. I'd not come across it before but found it in the supermarket yesterday and was very excited to try it, whilst I can't say its healthy since it does contain quite a lot of sugar, it was great for a little treat and for a change to regular vegan yoghurt or cream and the lovely vanilla flavour gave a real festive feel.

Instagram Christmas pud!
As promised here you have my Christmas pudding recipe, I found my notes! Most Christmas puddings require preparation way in advance and also need hours of steaming- not this one... here is a pudding in a day!

Recipe: Mini Christmas pudding (quick, easy and gluten free)


(Makes 2 mini puddings or one slightly larger. serve 2-4 altogether)

Ingredients:

50g each of raisins, sultanas and dried apricots
50g oatmeal or GF flour mix of choice (note: rice flour may give a slightly grainy texture though barely noticeable)
1/2 tsp baking powder
3tbs ground almonds
1 tsp each orange and lemon zest and a small squeeze of juice (or 1 tbs sugar-free marmalade)
1 small grated apple
1/2 tsp mixed spice (cinnamon/nutmeg/cloves)
1 tbs brandy (or omit for non alcoholic)
10g rapadura/fruit sugar or other unrefined granulated sugar

Method:

In a food processor pulse the dried apricots to chop very roughly and then add the sultanas and raisins and pulse a few times to achieve a very coarse paste (the raisins should still be mostly whole).

Transfer to a small bowl and mix through the grated apple. Add all remaining ingredients and mix well.

You can either prepare this mix the night before and let to sit overnight to 'mature' or you can use it straight away (I tried both ways and did not notice a significant difference to flavour).

Spoon the mixture into two silicone egg poachers (similar to this method) or one slightly larger domed bowl (silicone or glass). I really recommend silicone since its so much easier to remove once cooked. Make sure you cover the tops very well, I used baking parchment and then foil over folded tightly to the rim.  Steam the puddings with the bowl half submerged in simmering water with the covered top well out of the water. Steam for 90 minutes for 2 mini puddings or slightly longer for a larger pudding (I only tried making two smaller ones).

Allow to cool with the tops still fully covered, and uncover when ready to serve.  If you are serving these at a later time, they can be re-steamed or simply microwaved for 1 minute each to warm through.

P.s this recipe is actually much simpler than it sounds in these steps!!


For further guidance on making gluten free choices please see this post.

For tips and info on recipe measurement conversions, ingredients, substitutions and the methods behind how I do things.... check out my 'baking tips' tab at the top of the page.

Friday, 14 December 2012

Speedy Christmas pudding for one!


I did not think this post was going to happen. Seriously. But i'm a determined girl and I was not going to let 'a situation' stop me in my tracks!

It's been a crazy 24 hours and I do not wish to repeat it!

Yesterday evening I had my car broken into and my laptop and DSRL camera stolen. Along with my notebook which I jot down all my recipe ideas, experiments, website resources, inspirations and anything else that randomly crops up in my head...which it does on regular occasions!

It felt like a lead weight. I was gutted. Today has been a chaotic mix of phone calls, glass repair, laptop borrowing (thanks mum!) BUT there is a silver lining to this story. Two good things happened:

1- they found my bag, minus all the valuables of course, but with my notebooks! It had been raining but my holdall was waterproof. I have to just wait until the police have finished their investigations to get it back. Fingers crossed its ok.

2 - I was forced to use a different camera and a different lense to take these shots. These photos have been taken with my old Nikon camera body and a 50mm prime lense which i'd bought s few months back but had never actualy used. I love it! Even in low light the images rendered well, huge depth of field- maybe too much!  These photos have not been retouched in anyway as I simply have no software on the borrowed laptop to do it, they haven't even been cropped....this is literally straight from camera. I'm pretty happy with the results.

Ok, so I may have got your mouth watering, but you will have to wait for the recipe as it was written in my notebook...doh! ;-) will try and recall it and rewrite it tomorrow- I may have notes lying around the house (I am organised really!). But I will tell you this mini Christmas pud is a 'pud in a day'- super fast, gluten free, and sugar free.  Oh and it is super yummy!

I'm off to my work Christmas party now, in amongst the chaos I've been preparing food all day...more on that tomorrow and I will do my best to bring you this recipe.

Oh and just for a final laugh- all my make up and hair straighteners were in that bag too! The one evening in recent weeks that I actually want to make a effort to look half decent. So I guess this will be the second 'au naturel' look of the day!

Enjoy!

(Edit: you can now find the recipe here!)


For further guidance on making gluten free choices please see this post.

For tips and info on recipe measurement conversions, ingredients, substitutions and the methods behind how I do things.... check out my 'baking tips' tab at the top of the page.

Friday, 23 November 2012

Buckwheat blini breakfast kebabs

I had originally planned this post for yesterday...but I figured since many of you will be celebrating Thanksgiving, will anyone actually be reading blogs....really? Other than maybe people like me who don't celebrate Thanksgiving in their country. So I decided that I'd postpone it a day... I didn't want anyone missing out! This would make a fab lazy day post Thanksgiving brunch.

This idea came to me at 2am last Saturday morning....just when I should be sleeping NOT thinking about breakfast!

I've got into a bad habit of sitting in bed on my laptop before going to sleep and getting so engrossed in things that I don’t realise the time has crept across to the early hours… and then I can’t switch off when I do lay down to sleep.

However I didn't really mind this particular moment of creativity, and I simply tucked the idea away in my mind until morning.


Welcome to the most amazing brunch ever!

Simple, healthy, versatile, gluten free….the list goes on!

Ok, I’ll cut to the chase. These mini buckwheat blinis were inspired by this post in which the concept of the oat blinis worked really well, however not wanting to simply replicate with buckwheat I made miniature versions using a melon baller as a batter scoop (this worked perfectly- I really recommend this for getting evenly sized blinis) and then threading them onto skewers between chunks of fruit.

You could use any fruit you wish as long as it can be threaded onto skewers. It would be fabulous with banana and strawberries but alas it is not the season for strawberries. I was a little lacking on the fruit front and so used banana and some tinned apricots….had I planned ahead I would have used grapes, chopped mango along with banana…but I  was too impatient to try out my idea before I could get to the shops to replenish my frit supplies!

The blinis are only slightly sweet in themselves so I drizzled them with a (generous) helping of maple syrup and a dollop of vegan yoghurt. You could increase the sweetness of the batter itself if you desired, although I always prefer pancakes to be plain and then sweeten with toppings.

Go on…have a little fun today and play with your food!


Recipe: Buckwheat blini breakfast kebabs

Approx. 8 kebabs (serves 2-4)

100g buckwheat flour
Scant ½ tsp bicarbonate soda
150ml soy milk (or other dairy free milk)
1tsp ground chia or flax
3 tbs agave syrup
½ tsp cinnamon
1 tsp vanilla
extra water to thin batter as needed

Approx. 2 cups fruit chunks of choice.
Maple syrup to serve

Method

Blend together all ingredients (other than water) until very smooth. Add as much water as necessary to create a thick but easily pourable batter.

Prepare fruit for kebabs- you can use any fruit that can be skewered. I used banana and apricot halves. Set aside.

Using a melon baller (most practical method) spoon small dollops of the pancake mixture onto a hot lightly oiled frying pan and fry for approx. 30 seconds or so on each side until golden.

When all the blinis are cooked thread them onto skewers alternating with chunks of fruit. Drizzle with maple syrup to serve.


For further guidance on making gluten free choices please see this post.

For tips and info on recipe measurement conversions, ingredients, substitutions and the methods behind how I do things.... check out my 'baking tips' tab at the top of the page.

Tuesday, 11 September 2012

Power ice cream!

This is quite simply my new favourite snack…just a pity I discovered it during the last few weeks of summer since it is a snack of the ice cream and soft serve variety! Oh well, I will still eat it in winter too, maybe simply as a chilled desert as it really is that versatile. This is very similar in principle to the 'chia puddings' seen all over blog land, but for some reason I just couldn't make the texture of those chia puddings work for me...however change things up and add some yoghurt and I love it, crazy how such a small change can make such a big difference!

banana and raspberry soft serve bowls

I’ll stop going on in a moment and cut to the chase, but this really one of the best breakfast, dessert and post work-out power snack concoctions that I have chanced upon in a while.

The chia seeds are the key ingredient in this recipe with the added bonus of their amazing hydrating qualities (perfect for summer or post workout).  This recipes simply calls for chilling the mixture until it begins to freeze for a soft-serve or just freeze for longer for an ice cream. Note that without the addition of refined sugars and dairy fats the ice-cream will freeze harder than regular ice creams but I have found that a 30 minute thaw in the fridge prior to serving thaws the ice cream just enough for serving up, it can then simply go back in the freezer if need be.

The chilled chia soft serve is best made in quantities to eat on the same day (unless you want to fully freeze into an ice cream). You could alternatively make a larger batch and keep in the fridge for more of a chia pudding without the’just frozen’ texture.


This is another simple recipe base where you can easily play around with topping until your hearts content. I particularly like the banana soft serve with a sprinkle of cacoa nibs- as pictured in my ice cream balls, or how about topping with, granola or a crumbled smoosh bar or simply go chia crazy and add a dollop of chia jam!

banana soft serve with a dash of cinnamon (couldn't resist!)

Recipe: Chia soft serve dessert and ice cream

Serves 1

Ingredients

½ cup yoghurt of choice (I used soy)
2 tbs chia seeds (plus extra to sprinkle serving if desired)
¼ cup fruit puree (i.e apple, strawberry, raspberry or banana puree) note: banana is my favourite and makes the dessert super creamy.
Spices to complement the fruit.e.g a large pinch each of cinnamon and nutmeg
Extra fruit, chocolate, granola etc for optional topping

Note: I used white chia seeds for a light coloured mixture but dark would be fine too.

Method

Mash/blend all ingredients together to achieve a smooth consistency.

Chilled pudding: Store in fridge of min. 30 mins. before serving to thicken up.
Soft-serve: Store in the freezer for a 2-3 hours to create a soft-serve dessert.
Ice cream: Freeze for longer to make an ice cream.

chia banana ice cream with coconut flakes and cacoa nibs to serve


For tips and info on recipe measurement conversions, ingredients, substitutions and the methods behind how I do things.... check out my 'baking tips' tab at the top of the page.

Thursday, 6 September 2012

Strawberry cream granita

Summer is slowly drawing to a close…..nooooo!

The kids areback to school, the nights are getting shorter (making it increasingly difficult to get daylight shots of my evening meals) and the air is getting cooler…not that it really hotted up an awful lot round here. Maybe we’ll have an Indian summer. One can all but hope!  I really need to get my 'night mode' photography equipment sorted (lighting and tripod etc), these shorter evenings have turned my priorities to it since the window of daylight during the winter is so restrictive otherwise.

So, before the summer turns into a full on Autumn, I thought I’d best get this recipe out there. I still have a little stock pile of summery recipes to share, so we’ll see how many I can get through over the next few weeks.


This recipe is super simple, an extension of my ice cream making efforts. This freezes hard making it perfect for a ‘scrape your own’ granita. Make sure you blend everything up together really well and you should be fine. You could also try using coconut milk for an alternative creamy texture to the cashew butter- note: I have not tried it this way.

Perfect served over a simple fruit salad.

How do you like to serve you granita?


Recipe: Strawberry cream granita

Makes 1 tub (approx. 2 cups)

Ingredients:

2 cups berries (I used strawberries)
1 cup water
2 tbs agave plus a pinch stevia (more or less to taste)
Juice of 1 lemon
¼ cup cashew butter

Method

Puree everything together and pour into a tub suitable for the feezer. Whisk with a fork a coip;e of times as it freezes.

To serve, scrape with a form to form crystals. This mixture freezes hard and makes the perfect chilled dessert topping.


For tips and info on recipe measurement conversions, ingredients, substitutions and the methods behind how I do things.... check out my 'baking tips' tab at the top of the page.

Saturday, 5 May 2012

Breakfast crumble crisp

 So many ideas…!

That often happens, I have one idea of something to I want to bake, which then gives rise to another version which then inspires another recipe idea, and then I have a brainwave to make an old recipe even better by using the new ideas…etc etc, you get the picture. Not that I’m complaining though, I simply wish I had even more time (and even more money to buy all these ingredients).

Yesterday I had one majorly successful recipe…a burger trial (with one more variation left to try to make sure it’s the best it can be) until I will unveil all to the world. However that was followed by one major disaster recipe….it was my basic nutty granola to stock up my snack supplies but I burnt it big time and it was not salvageable. Sad times.

Anyway, now onto breakfast; this one is so good, so simple and more like dessert than breakfast but just as good for you as my usual bowl of fruity oats. Make a big dish full and have it as breakfast and then dessert in the evening! Perfect.

Meet the fruity breakfast crumble crisp.

A deep layer of juicy chunks of seasonal fruits topped with a thick layer of nutty, oaty crumble crisp. With most of the sweetness coming from the fruit itself and apple sauce in the topping, with just a smidgen of agave syrup, this is one virtuous crumble. I also added white chia seeds to the fruit mix to bulk up the sauce and also give an extra nutritional kick, but these are entirely optional.

Use whichever fruits you like- here I used apple, raspberry and blueberry, but you could use pear instead of the apple, plums instead of the berries or maybe even mango for a tropical trip...combine that with some coconut flakes in the topping!!

P.s it seems that my ‘mugcake’ poacher idea is finding a few fans! Thanks guys.


Recipe: Breakfast crumble crisp

Serves 3

Ingredients

Filling:
2 apples or pears cut into chunks (skin on)
½ cup blueberries or raspberries
Squeeze of half a lemon
1 tbs whole or ground chia seeds
½ tsp cinnamon
Pinch salt
1-2 tsp agave syrup (optional to taste)

Topping:
3 tbs apple puree
1 tbs coconut oil- melted
2 tbs agave syrup
1 cup oats
½ cup puffed brown rice (or other cereal)
1/3 cup nuts and seeds mix
½ - 1tsp cinnamon

Method

Mix all filling ingredients together in a medium bowl and spoon into the bottom of a smallish oven proof dish.

For the topping, in a separate bowl mix the wet ingredients together first and then add in the dry  topping ingredients. Mix until well coated then press down firmly and evenly over the fruit layer.

Bake at 180C for approx. 20 mins until topping is golden.

Serve with soy cream or yoghurt if desired.


For tips and info on recipe measurement conversions, ingredients, substitutions and the methods behind how I do things.... check out my 'baking tips' tab at the top of the page.

Friday, 6 April 2012

Goldilocks… and her oats!

The Story of Goldilocks and the Three Bears

Once upon a time, there was a little girl named Goldilocks.  She went for a walk in the forest.  Pretty soon, she came upon a house.  She knocked and, when no one answered, she walked right in.

At the table in the kitchen, there were three bowls of porridge. Goldilocks was hungry. 

She tasted the porridge from the first bowl. 
"This porridge is too hot!" she exclaimed.

So, she tasted the porridge from the second bowl.
"This porridge is too cold," she said

So, she tasted the last bowl of porridge.
"Ahhh, this porridge is just right," she said happily and she ate it all up……


Ok, well I can’t really blame her for eating the bears porridge...it would have been tempting after all (although if I was one of the bears I would have put my foot down and decided that we would not leave the house until we’d eaten all of the porridge- just in case!)

I figured today would be a fitting opportunity to re-live a little oatmeal magic. I eat a bowl of oats every day for breakfast, and often at other times of the day for a little snack to keep me going. It’s not just porridge that gives me a kick…we have the breakfast cookie, the bakewell oat tart, gorgeous granola, the simplest most versatile crumble topping, plus many of my pancake recipes such as have a hefty serving of oats!

So..i’ll get to the point. Today’s post is simply a little tribute to the humble oat to give you a little inspiration…and maybe a drool-worthy moment. Catering for all tastes and textures (as I know for many people it is the 'gloopy' texture of porridge that doesn't appeal) check out the teasers below..... I will take this opportunity to remind you that ALL these recipes are super healthy  (even when it doesn’t look that way!)

step by step: oats and soy milk- pre cooked... cooked oats with grated apple on top...apple mixed through plus toppings


This pictures above are my go-to everyday breakfast bowl. I usually eat when I get to work and keep oats, seeds, nuts and soy milk in the cupboard/fridge in the office. I then take an apple in with me each morning  and concoct this monster! If I’m feeling like a lighter breakfast I will reduce the amount of oats and keep everything else the same so once the apple is mixed through it’s simple ‘light’ oats and not so filling and heavy. I add quite a lot of soy milk so that the oats have a lovely creamy milky texture,  The best thing about this method is that grating the apple makes the bowl of oats look huge once its mixed through and it offers plenty of sweetness without any thing needing to be added. A few raisins/seeds/nuts are the perfect finali! I use this method in many of my variations with different toppings. Typically I go for ½ cup oats (usually porridge oats not steel cut), slightly under 1 cup soy milk- microwaved together for 90 seconds then with 1 grated apple mixed through before toppings added last.

Now, check out some more oat love below...............Mmmmmmmm!

 apple and mango oats- using thegrated apple method
 my favourite chocolate granola
 oh yeah... the breakfast cookie!
 a very milky PB&J styled combo
 (peanut butter oats with strawberry and nectarine)
 strawberries and almonds
 another breakfast cookie...coming to my blog very soon...
 plums and nuts
the banana choc classic...or go crazy with carob
super simple crumble topping


For tips and info on recipe measurement conversions, ingredients, substitutions and the methods behind how I do things.... check out my 'baking tips' tab at the top of the page.

you may also like

Related Posts Plugin for WordPress, Blogger...