Showing posts with label microwave. Show all posts

Saturday, 17 November 2012

5 minute choc orange puddle cake

This dessert came totally on a whim!

I had a sudden chocolate craving and usually when such an attack strikes I have some choc-orange smoosh bars or healthy chocolate fudge to hand. However at this particular moment in time I had neither!


Since a taste for a chocolate orange combo had been planted in my mind, I set about using my silicone egg poacher trick to create a super speedy (I wanted that fix pretty quick!) healthy chocolate puddle cake using the dome shape to encapsulate a melty chocolate centre.

Oh my… 5 minutes later and one awesomely indulgent but healthy chocolate cake was all mine! Ok, so I would suggest reigning in a little self-control and not eating the entire thing in one sitting- it is quite large. (but I won’t tell if you don’t). 

I used buckwheat as my GF flour of choice but other flours of wholemeal spelt if GF is not a requirements are likely to work fine also. I also added in grated courgette for moistness, it works really well and you really can’t tell it’s there. Finely grated carrot or pureed cauliflower would also work well.

This puddle cake could be made into all sorts of flavours…how about substituting almond extract for the orange and adding flaked almonds on top of the cake (or in the silicone mould or bowl before pouring in the batter). Mix through some berries and sugar free jam for a fruity kick.  Or why not go all out and leave out the orange and spread this crazy healthy banana frosting over the top.


Recipe: Choc orange puddle cake

Serves 2-4 (depending on how hungry you are!)

Ingredients

¼ cup buckwheat flour (or whole meal spelt)
¼ cup finely grated courgette (carrot could also work)
2 tbs tapioca flour or arrowroot
Slightly heaped ½ tsp baking powder
Pinch salt
2 tbs cocoa powder or raw cacao
1 tsp ground chia/flax
1 tbs agave and a tiny pinch stevia
1/2 tsp orange extra
3 tbs orange juice
Grated orange zest- optional (I didn’t have any)
1 tsp mild flavoured oil
Approx. 1 tbs worth dark choc chunks (I broke off a chunk from  a dark choc bar)

Chocolate drizzle: 1 tbs agave mixed with 1 tsp cocoa powder.

Method

Add everything (except choc chunks) to a mini blender and blend until well mix and there are no visible courgette strands. You could mix by hand if the courgette strands are very fine.
Using a silicone egg poach or other lightly greased domed microwavable bowl (approx. 12cm diameter) spoon in half the mixture, place the choc chunks in the centre and then top with the remaining mixture.

Cook in the microwave on full power for 90 seconds. Allow to cool for 1 minute before loosening and tipping out into a serving plate.

Serve hot whilst the chocolate centre is still oozing. Serve with a chocolate drizzle if desired.


For further guidance on making gluten free choices please see this post.

For tips and info on recipe measurement conversions, ingredients, substitutions and the methods behind how I do things.... check out my 'baking tips' tab at the top of the page.

Thursday, 15 November 2012

Persimmon scone

This little delicacy is really a scone-cake. It has the lovely light and crumbly texture of a scone in a cake form. My scone was a little hard to handle since the chunks of fruit were fairly large, I’d suggest cutting the fruit into chunks less than 1cm and also ‘scoring’ the scone into 6 pieces before cooking it to make slicing it easier (I forgot that part too!)


This recipe was two ‘firsts’ for me…the first time I’d ever eaten persimmon and the first time I have tried cooking the scone by this super speedy microwave/grill method. It wa sa a success on both counts. The persimmon has a very delicate flavour.

There are plenty of options with this recipe…you could double it up and cut scone shapes with a cookie cutter if you preferred, you can also bake the scoene on the oven in a more traditional manner or you can go down my route and use a combination of 2 mins in the microwave and then 2-3 mins under the grill to give a crips crust. This shaves off about 10 mins of oven cooking time.

I had a persimmon to try out and it worked nicely in this recipe but you could substitute it for apple, apricot  or plum…or any fairly firm fleshed fruit. Just take care if you use anything that has a very high water content or no firmness as it might alter the nature of the scone, use a little less soy milk if necessary.


Recipe: Persimmon scone cake

Serves 2-3

Ingredients

1 persimmon- chopped into small pieces
½ tsp vanilla extract
½ tsp cinnamon
1 cup ‘flour’ (I use an equal mix of quick oats and wholemeal spelt but you could also use GF flours)
1 tsp ground chia or flax
1 tsp baking powder
¼ tsp baking soda
2 tbs rapadura
Pinch salt
2 tbs coconut oil
Up to ¼ cup soy milk (or other)

Method

Cut the persimmon into small 1cm chunks ( a little smaller than I have for a scone that is easier to handle), mix with the vanilla and cinnamon and allow to sit whilst preparing the remaining ingredients.

Combine the flours, baking powder, baking soda, rapadura and salt in a small bowl, add the coconut oil (this should be solid not runny) and mix through with fingers to achieve a crumbly mixture. Add the soy milk a little add a time to achieve a soft dough that holds together without being sticky.

You can either mix the persimmon chunks through the dough and then flatten altogether, or you can divde the dough into two halves, flatten one half into a circle approx. 15cm diameter, press half the persimmon onto the surface , flatten the other half firmly over the top making a ‘sandwich’ and then press the remaining fruit into the top. Dust with a little cinnamon and sugar as desired.
.
You can either bake for approx. 15 minutes at 180C, or for a super speedy scone, microwave for 2 minutes and then grill the top for 3-5 minutes to get a lovely crisp crust. I used the microwave method as I was keen to experiment this way and it worked perfectly!

Note: if using the microwave method be sure to use a baking liner that can be used for both the microwave and grill to avoid having to fuss around with transferring the part cooked scone.


For further guidance on making gluten free choices please see this post.

For tips and info on recipe measurement conversions, ingredients, substitutions and the methods behind how I do things.... check out my 'baking tips' tab at the top of the page.

Tuesday, 22 May 2012

Apple oat bites

Oats never go away from my blog for long do they! It’s because they are always on my mind. Such a healthy, substantial, cost effective, simple, versatile ingredient…I truly believe oats are what make the world go round!

Oats are my breakfast every day, snacks in between on other days and occasionally dinner (when all I need is a quick post-gym snack). So when I need a quick and simple 2-minute breakfast, often the answer lies in my oats.

This recipe concept is based on my regular breakfast apple oats’ merged with the amazing breakfast cookieLast weekend, to shake things up a little instead of eating my regular oats as a very liquidy mix in a bowl, I reduced the liquid content right down, added some shredded coconut (for good measure) and then packed the mixture into a mini silicone muffin pan to cook them up. By the way, the mixture also tastes great pre-cooking…yes I was very hungry at that point and so very tempted to eat it all…but then I wouldn’t have any recipe for you!

Quick recap on the apple oats theory. I always grate a whole apple to mix through my morning bowl of oats for four reasons- it's a great way to get an extra portion of fruit in your day, it gives a subtle sweet taste without the need for additional sugar, it is fairly neutral so can easily accommodate other mix-ins to jazz things up, it bulks up the size of my breakfast without needing to add more oats so offers a great balance between being substantial and light.

The apple base mix is great…but what about the add ins. It’s always all about the add ins, that’s what brings sunshine and smiles to my day, amongst other silly things that make me smile….like a cat on it tiptoes drinking out of the bird bath (spotted this morning!)

So I spent a little extra time putting together a few simple flavour combos to get you started- the key thing for me is that they shouldn't take more than a minute to prepare since this is a speedy breakfast after all.  I also ran a test for microwave vs oven. I found the only real difference to be that the oven gave a dryer ‘baked’ exterior where as the microwave version stayed soft on the outside. The inside of both versions were very soft and moist. Take your pick!

You could also make a larger 'breakfast bombe' using my silicone egg poacher method. The photo below is a plain apple oats version with extra coconut flakes on top...still super yummy without anything more!

This is a cheeky little 'bombe' version of the origial apple oats without mixins.

Recipe: Apple oat bites

This makes approx. 6-8 mini oat bites (or a couple of breakfast bombes)

Ingredients

1 cup regular oats
1/3 cup unsweetened coconut flakes
2 tsp vanilla extract
1 large apple grated
2 tbs ground chia or flax
½ cup preferred milk alternative
Approx. ½ cup total mix-ins

Mix-in ideas: 
'carroke cake' (carrot and nutmeg), date and walnut, 'gingerbread' (fresh, ground and crystalised ginger plus mollasses) maple cacao....plus pretty much anything else you can think of!

Method

Mix everything together and pack firmly into silicone mini muffins trays (silicone for easy removal and microwave compatibility). Microwave on full power for approx. 90 seconds until the top feels firm.

my mix-ins of choice- I made two of each of the above listed flavour combos

basic mixture ingredients
wet basic mixture
oven version
microwave version
For tips and info on recipe measurement conversions, ingredients, substitutions and the methods behind how I do things.... check out my 'baking tips' tab at the top of the page.

Friday, 4 May 2012

Sticky orange and ginger cake

You know how much I love a super simple two-minute cake, right?

Well, can you imagine how excited I was a week or so ago whilst wandering through the bakeware section of the supermarket, when these caught my eye….


That’s right, they are silicone ‘pods’ for poaching eggs… ah, but I don’t eat eggs. Confused?

…can you see where my thoughts are going yet?

They are the perfect way to create a perfectly domed single serving ‘mug cake’ that can easily be removed for serving on a little dish.  So much prettier than eating straight out of a mug (though nothing wrong with that either!), and so much simpler than trying the line a mug with clingfilm (as I did with my carrot cake) so that the cake can be removed.

Go on treat yourself!

I’ve already tried a few flavour combo’s out…and I have another recipe for another time, but for now how about a bit of sticky orange and ginger cake?

The magic ingredient in this cake is sugar free orange and ginger jam (you could easily use sugar free marmalade and add your own ginger). I use these ‘jams’ for all sorts of things… and they come in loads of flavours (I’d just run out of my blueberry). Great as a glaze, or as a juicy surprise centre like in these coconut tarts. They are sweetened with fruit only.


So onto the recipe itself, I have used white spelt flour but you could easily sub a GF mix (my usual one is equal measures of ground almonds, buckwheat flour and tapioca starch). Some of the jam is mixed through the batter or used as a surprise melty centre and the rest is melted over the top of the freshly cooked cake as a glaze. You will need very  little extra sweetener (if any) so go sparingly!

This sweet and citrusy dessert was the perfect pick me up for my Friday afternoon…and I certainly needed it after I’d given blood in the morning and then without heeding the nurses order of ‘rest and no strenuous activity’ for the rest of the day…I spent it on my feet for 5 hours in the kitchen, and as you know that is often a very strenuous activity. Ooops!

Resting with some cake now. All is better in the world.


Recipe: Sticky orange and ginger cake

Serves 1 (or double up for a sharing portion!)

Ingredients

3 tbs white spelt flour (or GF mix)
½ tsp baking powder
Tiny pinch salt
¼ tsp ground ginger
1 tbs melted coconut oil
1 tsp orange jam (for centre or mixed through) plus extra for glaze
1 tsp agave syrup (if needed to taste)
Up to 2tbs  orange juice

Method

Mix dry ingredients together in a small bowl. Add wet ingredients and mix well.  You can either add the jam to the mixture or reserve it to add as a melty centre.

In another greased/lined small microwaveable dish (or use a silicone egg poach!) spoon half of the mixture, add a dollop of jam to the centre (if preferred) and then spoon the remaining batter on the top.

Microwave for 40 seconds on full power. Test with a finger and if the sponge springs back you’re done. Cook for another 20 seconds if necessary.

Serve cake on a plate and spread a little more jam to glaze whilst the sponge is still hot. Decorate with mango or orange pieces, soy yoghurt/cream and a dusting of ginger.


(look at the gooooey melty centre peeping out at you....!)


For tips and info on recipe measurement conversions, ingredients, substitutions and the methods behind how I do things.... check out my 'baking tips' tab at the top of the page.

Friday, 20 April 2012

Coconut cakes…with a twist!

I have so much coconut!!

I ordered a 25kg sack load of organic coconut flakes some months back as it was such a good deal at that size…however I am trying to get through it before it begins to dry out.

I use a lot of desiccated coconut flakes for making coconut butter…it’s so cost effective that way, however there is a limit to how much coconut one person can eat! So recently I’ve been using lots of extra coconut in my granola bars, in my smoosh bars, and of course in this chocolate slice and in this coconut ice too. You may see a few more coconut inspired treats coming along in the next few weeks!

So, today I thought a coconut cake was in order. This cake also uses coconut flour which I also have in my regular baking supplies (just not in such vast quantities), it’s something I actually don’t use that often, often forgetting it’s there or simply using the coconut flakes instead.

It’s a really great but strange flour. Great because it has a delicate flavour and texture, is gluten free and high in fibre. But strange in that it is very ‘drying’ and absorbs liquid so you’ll find that the proportions of liquid in a recipe and the consistency of the batter are different to the norm. Don’t let that put you off- it’s fun to try new things!

This cake has a really delicate crumb, and is light and moist probably helped by the extra coconut and banana. I kept the sweetness fairly low so that it did not overpower and took on more of a ‘teabread’ type sweetness with the raspberry preserve adding an extra sweet kick. Feel free to increase the agave or add some stevia if you like. The coconut-raspberry combo was inspired by these tarts…oh they were so good and so I just had to get the combo going again. The coconut ‘bombe’ also worked really well with the warm gooey raspberry centre.

 coconut 'bombe'

coconut cake with raspberry drizzle

Recipe: coconut cake with raspberry delight

1 x 21cm loaf tin (or smaller tin plus one small microwave cake see below)

Ingredients

1/3 cup each coconut flour, tapioca starch, buckwheat flour
¼ cup dessicated coconut flakes (plus more for topping)
1 tsp baking powder
Pinch salt
1 small banana- mashed
1 tsp ground chia mixed with 2 tbs water
1/3 cup orange juice (or pineapple juice/non-dairy milk)
3 tbs agave syrup (more to taste)
1 tsp rum extract
Sugar free raspberry jam- for glaze

Method (for loaf)

Mix all dry ingredients together in a medium bowl and then add wet ingredients. Mix together gently but well. Note the coconut flour is very ‘drying’ so the batter will not be as runny as normal cake batter. It will probably be very light and airy.

Spoon the batter into a loaf tin (or a smaller loaf tin plus small round microwavable bowl-see below). Smooth the top of the batter and cover with a fairly generous layer of desiccated coconut flakes, gently press them into the batter 180C for approx. 30 mins until the top is golden and toothpick inserted into the centre of the cake comes away clean. Note- I loosely covered the loaf with tin foil after being in the oven for 10 minutes to ensure to coconut flakes did not burn.

Allow to cool slightly in the loaf tin before lifting out. Drizzle with raspberry jam whilst still warm and allow to cool fully before serving.

Method (for mini ‘bombe’)

serves 2

Keep aside approx. ½ cup of cake batter. Lightly oil a small microwavable round bowl (approx. 10 cm diameter rim). Sprinkle 1tbs of desiccated coconut flakes in the bottom and then carefully top this will ¼ cup cake batter. Spread the batter evenly across the bottom of the bowl. Dollop 1 generous tsp of raspberry jam into the centre of the batter before covering with the remaining  ¼ cup of batter. Smooth evenly ensuring all the jam is fully covered.

Cook in the microwave for 90 seconds. Lightly touch centre to check if cooked and if still wet cook for another 30-60 seconds as necessary.


For tips and info on recipe measurement conversions, ingredients, substitutions and the methods behind how I do things.... check out my 'baking tips' tab at the top of the page.

Tuesday, 20 March 2012

Bakewell oat-tart

So on Sunday it was Mother’s Day here in the UK. You may have noticed I gave you a little sneak preview as to the subject of today’s post….

Mmmmm, raspberries and almonds! I figured this was a very underused combo on my blog but I love bakewell tart so I can’t believe I haven’t attempted a healthy version before now. Plenty of time for all that, but this little oatcake certainly did the trick, and yes this is another single serving cake of the microwave variety. Oh how I do love them!

Perfect for mother’s day breakfast.


The original idea for this cake came via this recipe, when I was doing some ‘oatmeal’ research, and it simply looked too good to not to try out. I made a few tweaks to the ingredients, and the quantities simply because I wanted to make more of a single serving (though I’ll definitely be making a larger batch from now on!) I then also took the leap of faith and use the microwave to turn it into a super quick breakfast/brunch/dessert, and also because I resent having to turn the oven on for a single cake! 

It worked really well in a muffin case in a silicon muffin pan, as you can then simply peel away the paper case once cooked (you may well not even need the paper cake case). To me these had the lovely dense texture of oatmeal without the creaminess of a bowl of cooked oats (I love that too but I know some people don’t). It's really a kind of porridge cake but that doesn't sound as good as it tastes! Having not tried the oven version I was not able to compare the methods, I imagine the oven version would maybe have more of a crust on the top and simply taste more ‘baked’ so if that’s your preference go for it!

I tried this recipe on the Saturday (in preparation for Mother’s Day) and ate the first ‘cake ‘plain and then the second with a dollop of super thick melted cashew cream, oh yeah…I’d recommend going for the topping!  By Sunday I’d run out of topping…so I served them with soy yoghurt for our mid-morning brunch which was still yummy!


Recipe: Bakewell oat-tart

Makes 2 cakes

Ingredients:

2/3 cup oats
1 tbs agave
¼ cup apple puree
¼ cup soy milk (or any milk alternative)
½ tsp almond extract
1 tsp ground chia or flax
Handful of fresh or frozen raspberries (I use frozen as they don’t ‘bleed’ so much)
Flaked almonds for decoration (add some extra to mixture if desired)

Method:

Mix all ingredients together in a small bowl, adding the raspberries last so the mixture doesn’t turn totally pink, unless that’s what you are aiming for!

Spoon into two silicone cupcake/muffin cases (or anything suitable for microwaving) and cook on full power for 2 minutes, though I would advise checking after 90 seconds to see if they are ready to your desired consistency since microwaves are all different.


For tips and info on recipe measurement conversions, ingredients, substitutions and the methods behind how I do things.... check out my 'baking tips' tab at the top of the page.

Saturday, 10 March 2012

Single serve carrot cake

I’ve enjoyed making my ‘2 minute breakfast cookies’ so much recently, more for dessert than breakfast! I’ve tried out lots more flavour combinations so I will be sharing those with you soon, but today I fancied a single serving more of the mug cake variety.

Using this gluten free raspberry cheesecake mug cake recipe as a basis I set about making a super nutritious ‘fill me up’ type dessert with some added oats for oomph. To make smaller portions you could divide the mixture into two small ramekins to serve two.

Instead of serving it straight from a bowl or mug I decided to line the ramekin with lightly oiled clingfilm so that once cooked I could easily lift it out and peel away the clingfilm to serve. It worked pretty well although if I’d waiting a couple of minutes for it to cool and firm up slightly it probably would have been even easier….me impatient…never!

Using orange juice instead of soy milk really helps to bring out the flavour of the carrot, and the ground almonds really help add to the moistness of the crumb, you could probably get away without the added oil since the texture was in no way dry. You could serve it with a dollop of nut butter or a creamy cheesy style frosting. Here I served mine with a thick cashew cream made with much less water than usual.

Single serving 'microwave' cakes are great as a time saver and also as an ingredient saver particularly when being a bit adventurous or experimental and you don’t want to make a whole batch of cake to find it tastes awful! Today this ‘5 minute cake’ really did the trick and meant that I could have a 10 minute time-out before rushing off the do the next thing on my list…so much to do today…busy busy busy, I will reveal all very soon!


Recipe: single serve carrot cake

Serves 1!

Ingredients

2 tbs GF flour mix
1tbs ground almonds
1 tbs oats
1 tbs rapadura
Tiny pinch salt
¼  tsp baking powder
¼ tsp baking soda
1 tsp mild flavoured oil (coconut or rapeseed)
1 small carrot grated- approx. 3tbs
½ tsp vanilla extract
¼ tsp cinnamon
2-3 tbs orange juice
Nuts to sprinkle on top- optional

Method

Add all the ingredients to a small bowl adding orange juice last just enough to achieve a medium thick batter. Mix well so there are no lumps or dry patches of unmixed flour.

Pour into a mug or large ramekin (line it with clingfilm if you want to be able to take it out to serve). Note the mixture should only fill no more than just over half the height of the mug/ramekin. Sprinkle nuts over the top if you like. 

Cook on full power (900W) in microwave for 1 min. check with a cocktail stick until stick comes out almost clean. Cook for 20 seconds more if necessary (up to two times) until cooked.


For tips and info on recipe measurement conversions, ingredients, substitutions and the methods behind how I do things.... check out my 'baking tips' tab at the top of the page.

Saturday, 18 February 2012

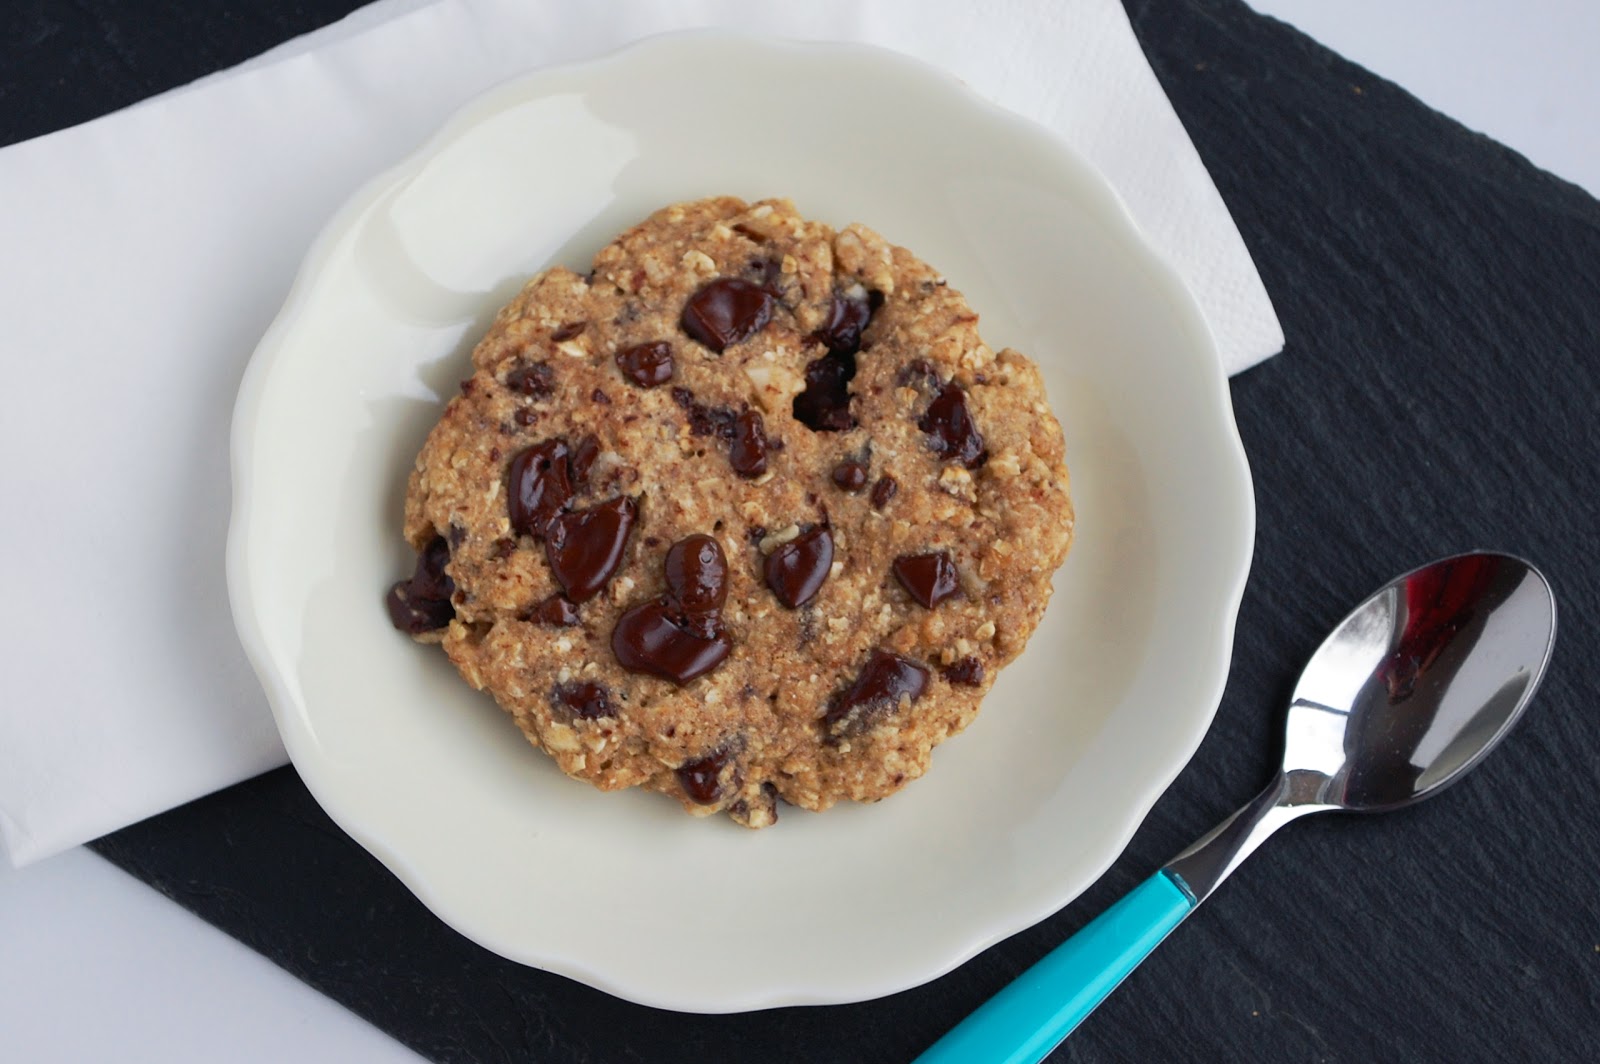
Choc chunk breakfast cookie

I love the weekend mornings…all the more because I can spend a little longer in my PJ’s, spend a little longer pondering how to fill the day, spend a little longer contemplating breakfast…..

Mmmm….Saurday morning breakfast! Today we have another new twist on my oats (you know I love oats, right?!) This breakfast snack (or any time of day snack) was inspired by this recipe by Ashley at the Edible Perspective, such a perfectly simple concept and with a few tweaks of my own I was ready to roll.

Please let me introduce  the ‘Choc Chunk Breakfast Cookie’

A super speedy, healthy but ever so slightly indulgent breakfast cookie….made in minutes. Ticks all the boxes, right? You could of course double or triple this recipe and form into two or three patties but for me the one was enough to fill me up and give me a morning boost (until my next snack in a couple of hours!)

This cookie is soft and ‘cake’ like with a lovely chewy moistness and contrasts of the chunky nuts and melted chocolate adding to the cakeyness. Without the chocolate it might be  a little dryer so feel free to add a tsp of oil to the mixture if this is more your thing.

You could make this recipe with other fruit and nut combos and omit the chocolate chunks if you were wanting to be really virtuous, (I am planning on testing this out soon) but for me the melty chocolate really hits the spot… and it is the weekend after all. The recipe below contains no additional fats (other than the choc chunks and good fats in the nuts,  and with its whole grains it’s still healthy and filling…so go ahead and enjoy your chocolate moment and start your weekend with a (chocolatey) smile!

If you're already done with breakfast and fancy a super speedy mid morning snack....treat yoursef to another little indulgence of the microwave variety....may be my chocolate mug cake or rasberry cheesecake will give you a bit of inspriation.

Right, better get on (and out of my PJ’s) I have lots of plans to investigate today, too soon to give anything away but I will hopefully be able to fill you in on all the happenings in a few weeks time!


Recipe: Choc chunk breakfast cookie

Makes one fat cookie

Ingredients

¼ cup oats
2 tbs buckwheat flour (other flours would probably be fine too)
¼ tsp baking powder
1 tbs ground flax
Ground cinnamon and vanilla extract to taste (approx. ½ tsp each)
1 tbs choc chunks
1 tbs chopped nuts or your choice
1 tbs agave or maple syrup
3 tbs soy yoghurt (or regular yoghurt for non vegan)

Method

Mix and mash all ingredients together well to form a thick sticky ball of dough. Roughly flatten the ball with your palms and place on a small microwaveable plate.

Cook on full powder in the microwave for approx. 1 minute. Press with your finger and if it springs back and there are no visibly sticky bits you’re done! Eat immediately whilst chocolate is melty!


For tips and info on recipe measurement conversions, ingredients, substitutions and the methods behind how I do things.... check out my 'baking tips' tab at the top of the page.

you may also like

Related Posts Plugin for WordPress, Blogger...