Showing posts with label snacks. Show all posts

Wednesday, 12 June 2013

Crunchy quinoa cookies...hemp infused!


My original chewy chocolate quinoa cookies have turned out to be one of the most popular posts on this blog, and also one of the most popular search terms.   This is a little twist on the original recipe with a superfood hemp boost... perfect training snacking... or for anyone looking for a source of wholefood protein boost. I have combined hemp protein with brown rice protein to achieve the best texture (in my opinion) but you could try using your preferred protein powders instead.


Ok, so if I was to state my preference between these cookies and the originals...maybe the originals would win over a teeny weeny bit in the chewy stakes and because they were more intensely chocolatey ...but these are pretty awesome and hit the spot in terms of nutrition whilst bringing a big smile to my face.  Plus...I love the crunchy little unshelled hemp seeds!

I made a double batch of these and kept a stash in the fridge that lasted me right through to race day!   


Recipe: crunchy quinoa cookies...hemp infused!

Makes approx 10  cookies

Ingredients:

1 cup cooked quinoa
¼ cup peanut butter
¼ cup date syrup (or 3 tabs alternative syrup)
Few drops stevia to taste
1 banana
¼ cup hemp protein*
¼ cup brown rice protein*
¼ hemp seeds (I use unshelled for extra crunch factor)
¼ cup cocoa powder
1 tsp vanilla bean powder or extract

*I used hemp protein and brown rice protein as my preferred protein options as they complement each other in texture and I typically like to use hemp wherever possible. Feel free to use your own preferred options.

Method:

Mix all the peanut butter, date syrup, banana and stevia together until smooth. Mix the dry ingredients together in a separate bowl and then add to the wet ingredients until well mixed and a thick paste is formed. Mix in the quinoa until well coated.

Form small balls with your hands and press down onto a lined baking sheet.

Bake at 180C for approx 15 mins. Allow to cool fully.


For further guidance on making gluten free choices please see this post.

For tips and info on recipe measurement conversions, ingredients, substitutions and the methods behind how I do things.... check out my 'baking tips' tab at the top of the page.

Saturday, 2 February 2013

Apricot and ginger flapjack...no bake

Ok, so I have a super healthy, super speedy, sweet treat recipe for you....what’s new?

We actually a lot is new!


A few milestones have been passed these last few days....I’ve been keeping things quietly under wraps to a large extent but I think now comes the time to share a little more with you. It’s all still an ongoing work in progress, but that’s life at it’s best don’t you think?

I shared a few changes and achievements so far this year in yesterday's monthly roundup; namely the fact I have just completed my Certificate in Plant Based Nutrition...exciting times! Also the fact that I have teamed up with The Real Food Source (who I have previously written recipe posts for) and we are looking to launch a range of products via their newly revamped website (work still in progress).

But in other news, two other important milestones (they are a big deal to me anyway). My facebook page reached 400 ‘likes’ last week. I know that may sound pitiful to some and pails in comparison with some of the big bloggers out their who’s work I admire and respect so much, but to me that means a lot and I am very thankful...I will keep on pushing forward, onwards and upwards! 

Secondly this post marks my 400th post on this blog! Wow, I can barely believe i’ve kept things going this far and actually had 400 things to write about...with more and more ideas constantly cropping up in my mind! I remember when I sat down to write my first post, I didn’t have much idea how things would pan out, but I do distinctly remember writing down a list of about 20 recipes before running out of ideas, but thinking to myself ‘well that will keep me going for a few months at least’. 

Anyway, that’s just a little taster of what I’ve been up to....I will update you on everything in greater depth very soon.

If you’re still reading at this point...I applaud you!  Any thoughts or questions let me know as I‘m open to all ideas as this point in my development. After all this blog is as much for you as much as it is for me!

So, on to the recipe itself! Sugar free, fat free, no bake, simple, sweet...what more could you ask for? Instead of using dates- my usual go to natural sweetener. I opted for apricots and a little ginger for a warming kick. Make sure you use organic apricots, these are browner in colour as they are not processed with sulphur dioxide which is used to help the regular dried fruits retain their colour.


Apricot and ginger flapjack
 
Makes approx 8-10 slices

Ingredients

½ cup dried apricots
2 tbs ground flax
¼ cup whole almonds
Pinch of pure stevia (approx 1/6th tsp)
1 tbs heaped fresh grated ginger (use more or less to taste)
½ cup oats

Method

Place the apricots in a food processor and blitz for a few seconds until you have a sticky paste. Add the flax, stevia, ginger and almonds and pulse to mixture until the almonds are broken up into coarse chunks. Add the oats last and pulse gently to mix through without breaking them up too much.

The mixture should be firm but sticky, add a few extra oats if necessary.

Press the mixture into the bottom of a small lined tin and chill for an hour or so before slicing into squares.


For further guidance on making gluten free choices please see this post.

For tips and info on recipe measurement conversions, ingredients, substitutions and the methods behind how I do things.... check out my 'baking tips' tab at the top of the page.

Tuesday, 25 September 2012

Ginger pumpkin no-bake bars


A follow up from this post…I felt the ginger version deserved its very own write up..

The warming ginger and carob kick is the perfect flavour for when summer is not quite out, yet autumn is sneaking up on you from behind!


These were a treat made for my sister as a special request to take with her to the music festival she was going to a couple of weeks ago. Easy, healthy, portable snacks were the deal of the day.

Knowing how much she liked the regular gingerbread smoosh bars, I thought I’d indulge my new found love of seedy things and make a nut fee version, whilst also going a little more crazy by adding a carob dusting to the top. The great thing about the added carob is that it should help the bars stick together a little less when packaged together for her trip (alternatively just lay each bar between a layer of parchment). The carob also gives an almost 'velvety' appearance to the top which I really loved.

I am happy to report these bars were given the seal of approval!


Recipe: Ginger pumpkin no-bake bars

Approx. 10 bars

Ingredients

100g dates
80g mix of seeds (I used mainly pumpkin seeds with a few sunflower seeds)
50g raisins
30g ground oats*
30g buckwheat flour
1tbs sliced fresh ginger (optional)
1tbs ground ginger
½ tsp mixed spice
½ tsp cinnamon
Approx. 1 tsp carob for dusting

Method

Mix all ingredients in a food processor until you have a firm and fairly fine sticky mixture.

I formed bars by pressing the mixture into the bottom of a small loaf tin lined with parchment for easy removal. Sprinkle carob flour evenly across the top and gently rub with fingers to settle the powder.

Allow to chill for an hour before slicing into bars.


Wednesday, 29 August 2012

Carry on camping!

Back home and rested after a busy bank holiday weekend in the hills!

It was so wet the car got stuck!
The day before my camping trip was mega busy with food preparations to carry me through the four day trip (supplemented by a bbq and a pub meal!)

I thought I’d share with you some of my preparations as many of these recipes are perfect ‘on the go’ snacks fit to fuel you up for the day whether you happen to be camping or not! I have posted many of these recipes or variations on them previously…but you know it’s always good to have it all in one place.

Oh, and in case you were wondering my pop up tent went up and down just fine thank you! I had been apprehensive that I would end up performing an embarrassing battle of wills in front of a field of bemused onlookers…thankfully that was not the case!

So, my food prep looked something like this:

These mexican beanburgers (pre-cooked and finished off on the bbq). I had planned to make these black bean beet burgers for a more authentic looking burger…but alas I had not black beans of beets!

Un-tuna sandwhichfilling- great in wraps, pittas or simply straight from the pot.

Lentil peanut dip…I know I go on about this but I love it!! Great with a pit of raw veggies.

Overnight oats….I premixed a tub of oats, chia seeds, cinnamon (lots!) and raisins, and then each night before going to bed I mashed a banana into a travel tub added 1/3 cup oat mix to a tub and then added approx. ½ cup soy milk. Mix it up…and voila the perfect breakfast come morning. I added some blueberries and a little extra soy milk in the morning too.  P.s this also serves a great lunch out on the hills….just remember to take a spoon.

Granola (cos I need oaty goodness with me at all times!) this batch had a touch of salt which really made the flavours pop!

mexican bean burgers
un-tuna salad
lentil and peanut dip
granola bites

Plus, last but not least…


Smoosh bars are another go to favourite that stand up well with the rough and tumble in the rucksack. Usually I opt for my gingerbread and choc-orange versions, but this time I put a little twist on things since I was running realty low on dates and so now you have a new recipe below.  I called these chocolate plum bars as prunes just didn’t sound quite so appetising to me (apolgoes if I have confused you with cherries in the photo!). The prunes provide a deep rich fruity sweetness which teams perfectly with the cocoa. My prunes were much softer than my regular dates so I slightly increased the nuts and oats to compensate.
Recipe: chocolate plum bars

Ingredients:

100g dried plums (prunes)
80g hazlenuts (or other nut(s) or seeds of choice)
50g raisins
25g coconut flour or ground oats* (I used oats)
20g cocoa powder

Method:

Put everything into a food processor and smoosh together until chopped up into tiny pieces and the bowl is filled with a fine sticky powder. For a less chunky nut then process the nuts a little on their own first before adding all the other ingredients in with them.

To form into bars I press the mixture into a small tin lined with baking parchment and us the flat end of a rolling pin to firmly pack the mixture down. Chill for a while before lifting out if the tin and cutting into bars. 

Oh and finally a few camping trip pics….


it was a bit wet!


* for further guidance on making gluten free choices please see this post.

For tips and info on recipe measurement conversions, ingredients, substitutions and the methods behind how I do things.... check out my 'baking tips' tab at the top of the page.

Saturday, 25 August 2012

Mexican bean burgers


As you read this post I will be battling my way across the Derbyshire countryside on a camping/hiking trip with friends this bank holiday weekend.

I’ve just bought myself my very first tent (having shared other peoples for many years) and it was of the pop up variety…. notorious for being difficult to pack down again once they’ve ‘sprung’ into shape. I popped it up on the garden lawn to give it a test run and thankfully it wasn’t too difficult…fingers crossed I manage to do it again at the end of the camping trip itself as a field full of bemused onlookers is not what I have in mind!

Back to food!

A BBQ was on my mind again as we’ll be hoping to have one or two during our trip (please don’t rain!) and so these burgers, that were the accompaniment to the BBQ sauce from earlier this week, came to mind. I may well whip up another batch to take with me.

The burgers with BBQ sauce were a match made in heaven! I do love a good veggie burger as they are always so versatile…served in buns, on salads, with cous-cous or quinoa, or even just served cold as finger food on their own. You can use any seasonings you wish, I simply went for a Mexican kick as the mood took me. The potato also holds them together nicely; see my notes below for choice of potato.

You can find more ideas for snacks and bbq sides here.


Recipe: Mexican bean burgers

Makes approx. 6 burgers

Ingredients

1 tin black beans (400g)
1 medium carrot- grated
1 small red onion- diced
2 cooked medium to large (fist sized) white or sweet potato (see note)
1 cup sweetcorn (I used frozen)
Seasonings to taste. I used 2tsp mix of cumin coriander and chilli. You could use fresh coriander
Salt and pepper to taste
¼ cup chia seeds
¼- 1/3 cup gram flour or oats* (as needed to achieve burger patty consistency)

Method

Chop the potatoes into small cubes and cook for approx. 10 minutes until just tender.

Meanwhile prepare remaining wet ingredients and roughly mash together in a large bowl. Add seasonings and chia seeds and mix through.

Add the cooked potato to the bowl and mash into the mixture until you have a lumpy mixture. Depending upon the potatoes used (see note) the mixture may still be too wet to form into into firm patties. If so, mix gram flour or oats/oatmeal through until a firmer mixture is formed.

Using your hands form fist sized patties and place on a line baking sheet. Bake for approx. 20 minutes until golden turning once after 15 minutes (or bake for 5 mins to increase firmness and then finish of on BBQ like I did!)  Alternatively these could be pan fried- note I have not tried this method.

Potato note:  I used sweet potatoes which are softer and retain more moisture than regular potatoes. Make sure you allow all water to drain once cooked and using kitchen towel lightly ‘dry’ the potatoes to further reduce excess water. White potatoes are firmer and regular draining should be sufficient.


* for further guidance on making gluten free choices please see this post.

For tips and info on recipe measurement conversions, ingredients, substitutions and the methods behind how I do things.... check out my 'baking tips' tab at the top of the page.

Friday, 27 July 2012

Cracking crackers…two ways


Continuing the savoury kick with this month’s Daring Bakers challenge….

“Our July 2012 Daring Bakers’ Host was Dana McFarland and she challenged us to make homemade crackers! Dana showed us some techniques for making crackers and encouraged us to use our creativity to make each cracker our own by using ingredients we love”.

As I type this post, I site with my laptop rested on my knee pausing every other sentence to watch the very beginning of the opening ceremony of the London Olympics 2012….this post could take some time!  This is Britain at is best, full of its quirks, its love of routines, it classics and it’s food.  If I’d thought ahead I may have gone for my take on a more ‘classic British cracker’ like a water biscuit or a cream cracker but these are very neutral plain crackers and I love to get the taste buds going with the cracker itself not reliant on toppings.

So back to the challenge… I do love snackety foods and dips of all kinds, so what better accompaniment but crackers! Particularly crackers that are full of tasty good-for-you things…..wholesome, gluten free, vegan…what more?!

The challenge required us to make two different types of crackers with two different presentation methods which was interesting in itself. Now since I don’t have any form of pasta/cracker roller machine, I went for a ‘roll thinly and score’ option and the ‘roll into a log and slice into rounds’ option.

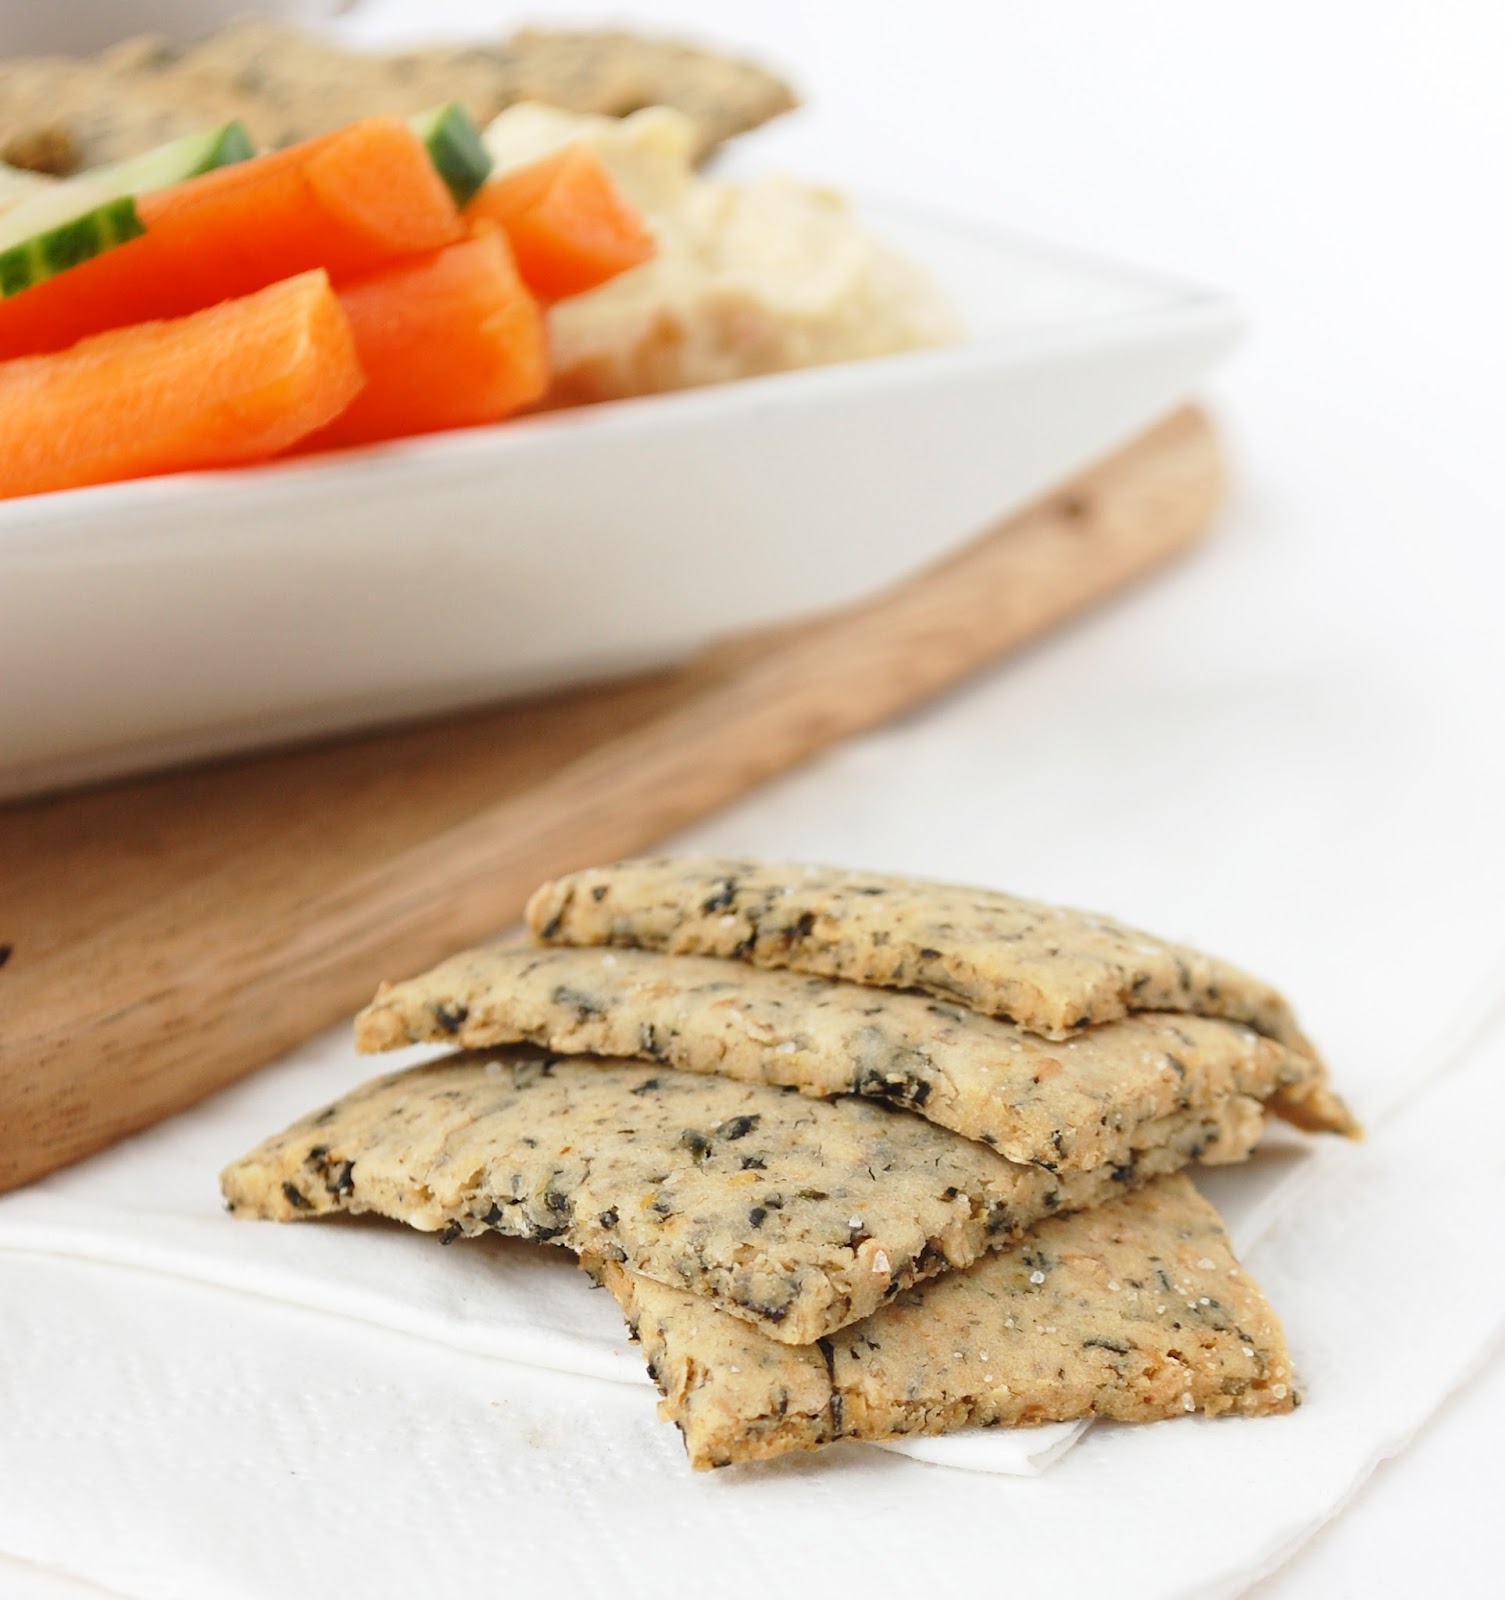
I had a lot of fun with flavourings to make sure these were big on taste without using butter and cheese as many of the cracker options seems to entail. You can vary the flavours as you like to achieve you own taste preference, these crackers have such a simple ingredients list you can really go to town with experimentation. The chickpea crackers in particular were a pure shot in the dark, instead of using chickpea flour I opted for chickpeas themselves and to my delicious surprise  they give a lovely chewiness to the cracker that itself has a crisp exterior. The nori crackers are loosely based on these crackers so I was more certain of their success from the outset, although the addition of brown rice was a new twist. The nori crackers were inspired in part by this recipe since I had some leftover sheets of seaweed that caught my eye as I opened the cupboard for inspiration.

These crackers retain their crispness for a couple of days but you may want to crisp them up in the oven beyond that.

Right, that’s me done…now to sit back and watch the amazing creativity and ‘organized chaos’ (words just uttered by the commentator) that all goes on behind the scenes to create a truly memorable opening sequence to the Olympic Games.


Recipe: Nori crackers

Makes approx. 12-16 crackers

Ingredients

½ cup brown rice flour
½ cup cooked brown rice
¼ cup roasted nori seaweed
½ tsp salt
2 tbs sesame seeds
Up to 3tbs water
1 tbs sesame oil

Method

Blend all ingredients together in a food processor, adding the water last a little at a time to reach a slightly sticky dough consistency. The dough should be sticky enough to bind but easy to roll out thinly.

Roll as thinly as possible (approx. 2mm thick), cut into squares and bake in a preheated oven at 180C for approx. 20 minutes until lightly golden.

Allow to cool fully before serving.


Recipe: chickpea sesame crackers

Makes approx. 8 crackers

Ingredients

¾ cup chickpeas
3tbs tapioca starch (or other starch)*
3 tbs gluten free flour (I used buckwheat)*
½ tsp baking powder
¼ tsp salt
¼ cup sesame seeds
1 tbs fresh coriander (or ½ tsp dried)
Pinch chilli flakes (or other spice as optional)
1 tsp sesame oil
1 tsp chia and 2 tbs water

Method

Blend all ingredients together in a food processor to get a fairly smooth and even crumb mixture. Form into a ‘log’ with your hands and cut into rounds with a sharp knife. If it is too soft to cut chill for up to 30 minutes.

Bake in a preheated oven at 180C for approx. 25 minutes until lightly golden.

Allow to cool fully before serving.


* for further guidance on making gluten free choices please see this post.

For tips and info on recipe measurement conversions, ingredients, substitutions and the methods behind how I do things.... check out my 'baking tips' tab at the top of the page.

Friday, 6 April 2012

Goldilocks… and her oats!

The Story of Goldilocks and the Three Bears

Once upon a time, there was a little girl named Goldilocks.  She went for a walk in the forest.  Pretty soon, she came upon a house.  She knocked and, when no one answered, she walked right in.

At the table in the kitchen, there were three bowls of porridge. Goldilocks was hungry. 

She tasted the porridge from the first bowl. 
"This porridge is too hot!" she exclaimed.

So, she tasted the porridge from the second bowl.
"This porridge is too cold," she said

So, she tasted the last bowl of porridge.
"Ahhh, this porridge is just right," she said happily and she ate it all up……


Ok, well I can’t really blame her for eating the bears porridge...it would have been tempting after all (although if I was one of the bears I would have put my foot down and decided that we would not leave the house until we’d eaten all of the porridge- just in case!)

I figured today would be a fitting opportunity to re-live a little oatmeal magic. I eat a bowl of oats every day for breakfast, and often at other times of the day for a little snack to keep me going. It’s not just porridge that gives me a kick…we have the breakfast cookie, the bakewell oat tart, gorgeous granola, the simplest most versatile crumble topping, plus many of my pancake recipes such as have a hefty serving of oats!

So..i’ll get to the point. Today’s post is simply a little tribute to the humble oat to give you a little inspiration…and maybe a drool-worthy moment. Catering for all tastes and textures (as I know for many people it is the 'gloopy' texture of porridge that doesn't appeal) check out the teasers below..... I will take this opportunity to remind you that ALL these recipes are super healthy  (even when it doesn’t look that way!)

step by step: oats and soy milk- pre cooked... cooked oats with grated apple on top...apple mixed through plus toppings


This pictures above are my go-to everyday breakfast bowl. I usually eat when I get to work and keep oats, seeds, nuts and soy milk in the cupboard/fridge in the office. I then take an apple in with me each morning  and concoct this monster! If I’m feeling like a lighter breakfast I will reduce the amount of oats and keep everything else the same so once the apple is mixed through it’s simple ‘light’ oats and not so filling and heavy. I add quite a lot of soy milk so that the oats have a lovely creamy milky texture,  The best thing about this method is that grating the apple makes the bowl of oats look huge once its mixed through and it offers plenty of sweetness without any thing needing to be added. A few raisins/seeds/nuts are the perfect finali! I use this method in many of my variations with different toppings. Typically I go for ½ cup oats (usually porridge oats not steel cut), slightly under 1 cup soy milk- microwaved together for 90 seconds then with 1 grated apple mixed through before toppings added last.

Now, check out some more oat love below...............Mmmmmmmm!

 apple and mango oats- using thegrated apple method
 my favourite chocolate granola
 oh yeah... the breakfast cookie!
 a very milky PB&J styled combo
 (peanut butter oats with strawberry and nectarine)
 strawberries and almonds
 another breakfast cookie...coming to my blog very soon...
 plums and nuts
the banana choc classic...or go crazy with carob
super simple crumble topping


For tips and info on recipe measurement conversions, ingredients, substitutions and the methods behind how I do things.... check out my 'baking tips' tab at the top of the page.

Friday, 16 March 2012

Irish potato farls

Ooo look I’m just in time…for St Patricks Day that is! 


I also had one other recipe I wanted to make, this time along the green theme but alas I didn’t quite get organised enough. Oh well I may as well just get that up tomorrow anyway on the actual day itself, I know it will be short notice but I am pretty certain it will a recipe for St. Paddy’s and far beyond!

So…. I wrote down and crossed off so many options for so many reasons:
…irish cream
….soda bread
…green smoothie
…. anything green!

Problem was I’d seen plenty of amazing looking recipes along these themes already. At some point I do want to attempt a soda bread though, but having never baked a GF loaf before I figured it might be best to wait for another time when I have time on my side to make a few mistakes and few attempts if necessary.

For today I wanted a fool proof recipe with a short ingredient list, but still decidedly Irish. I also wanted a savoury recipe (to compliment tomorrow’s sweet recipe!)

So, here we have Irish potato farls (with a little twist of my own that I couldn’t resist).  The traditional Irish recipe simply calls for regular potatoes and does not include any seasonings other than salt. The ‘cakes’ are meant to be plain as an accompaniment to a dish. However I wanted to add some sweet potato into the mix also adding a hint of seasoning whilst not being overpowering. I also substituted GF flours for the regular plain flour that would be more typically used. Feel free to mix things up as you wish.

One thing I would note is that the potatoes should ideally be ‘dry’ before they are mashed.  When I made them I didn’t let my potato dry very well after draining and had to add more flour to compensate, the flour is an approximation so add as much as it takes. It’s not a huge problem if you add a lot more, but better to let the potato take centre stage and not risk adding copious amounts of flour to the mix to alter the flavours.

I served my farls with a light salad as a brunch, I left the rest of the dough in the fridge to cook up at another time. The dry frying in flour is what really makes the farls, giving them a lovely crisp exterior and leaving a creamy soft interior.


Recipe: Irish potato farls

Makes 4-6 farls

Ingredients

2 medium potatoes, peeled and halved
2 medium (or one large) sweet potato
½ tsp salt
Approx.1/3 cup GF flour mix (I used tapioca and buckwheat)
1 tablespoon olive oil
1 tsp mix of garlic and onion powder- optional

Method

Boil the potatoes for approx. 20 minutes until cooked. Drain the potatoes and let sit for a few minutes to let dry out properly.

Add potatoes to a bowl and mash well, once mashed add  all the other ingredients and mix through until a soft dough begins to come together. The dough should be sticky but if it is too sticky to handle add a little more flour until it becomes workable (note- allowing the potato to dry should help combat this).

On a well floured surface bring the dough together into a ball and flatten into a circle approx. 1cm thick- cut into 4 or 6 wedges using a floured knife.

Heat a frying pan and sprinkle a little more flour over the base, cook the farls fry in the flour for approx. 3 minutes in each side until browned.

Sprinkle with salt to serve.


This post is also in memory of my Grandma Marion, who's birthday it would have been today...had she been born one day later she would have been named Patricia! 

For tips and info on recipe measurement conversions, ingredients, substitutions and the methods behind how I do things.... check out my 'baking tips' tab at the top of the page.

you may also like

Related Posts Plugin for WordPress, Blogger...